By Frederick M. Hueston
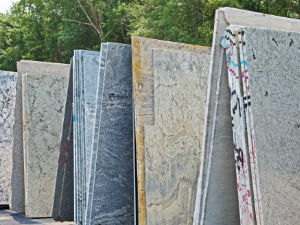
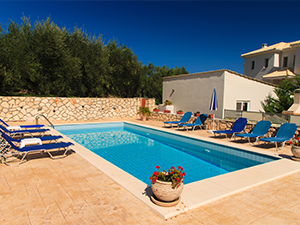
Do you have a stone pool deck and are wondering how to maintain it? Do you need to seal it? How do you deal with stains? The following will give you guidance from a pro on what you need to do to keep your stone pool deck looking great.
Basic Stone Pool Deck Maintenance
To maintain a stone pool deck, you should regularly:
- Sweep or blow leaves and debris off the deck to prevent staining and discoloration.
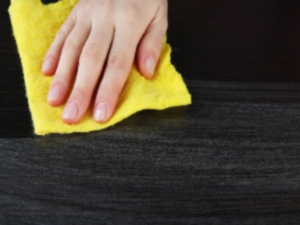
- Clean the deck with a neutral cleaner and water to remove any dirt or algae that may have accumulated.
- Seal the deck every 1-2 years to protect the stone from water damage and staining.
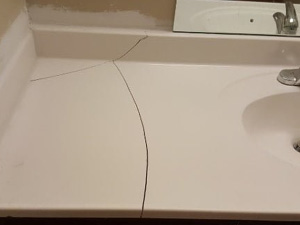
- Check for and repair any cracks or chips in the stone to prevent further damage.
- Keep the pH levels of your pool water balanced to prevent damage to the deck.
- Keep the trees and plants around the pool trimmed to prevent leaves and branches from falling on the deck.
- Use mats or rugs to prevent any scratches or stains from pool chairs and other furniture.
- Consider using a professional cleaning service to maintain your stone pool deck for best results.
Other Issues that May Arise
Sinking Pavers – If you notice your pavers becoming uneven or sinking, consider the location of the affected area. If it is around the pool shell, it may be due to a broken pipe or improper backfill compaction, which requires professional repair. If the sinking is happening in other areas, it’s probably due to a poor sub-base compaction. To fix this, remove the pavers in the affected area and add more fill.
Weed Growth – Weeds grow by seedlings landing in joint spaces where sand has washed out between pavers, not from the bottom up. Properly installed pavers with good materials can help prevent weed growth, but weeds can still find ways to grow. Spot weed killers can effectively treat isolated weed issues, but avoid oil-based products as they can stain natural stone pavers.
Ants – Ants can create unsightly sand dunes on your patio and pose a stinging hazard. To get rid of them, you can use a mild insect repellent and spray it on any nests or areas with a lot of ants. As a longer-term solution, consider having insect treatment sprayed around the area. Additionally, using a product like “sand lock” can prevent ants from accessing the sand between your pavers.
Other helpful hints for avoiding ants are as follows:
- Keep the area clean: Ants are attracted to food and sugary substances, so make sure to clean up any spills or crumbs on the pool deck.
- Use ant baits: Ant baits contain a slow-acting poison that the ants will take back to their colony, killing the queen and the rest of the colony.
- Use a natural repellent: Essential oils like peppermint, cinnamon, and citrus can help to repel ants. Mix a few drops of the oil with water and place in containers around the perimeter of the pool deck.
- Use a barrier: a barrier of diatomaceous earth or talcum powder can help to keep ants off the pool deck.
- Call a professional exterminator: If the ant problem persists, you may want to consider calling a professional exterminator to help control the infestation.
It’s important to remember that preventing ants from entering your home is the best way to control an ant problem indoors.
Sealing Your Stone Pool Deck
To seal your stone paver pool deck you will want to use an excellent quality stone impregnating sealer. Impregnators are designed to sink into the pores of the stone and protect it from within. You DO NOT want to use any sealers that place a topical layer over the surface of the stone.This will block the breathing of the stone and will not allow it to breathe.
Caution: Avoid impregnators that are designed for color enhancing. These sealers will darken the stone.
How do you know if your stone deck needs to be sealed?
Test the stone surface by placing some water on the stone. Wait five minutes to see if the water soaks into the stone. This will result in a dark area. If the stone soaks up the water then seal it with a superior quality stone impregnating sealer, per directions below.
DIY directions for applying the impregnator:
- Clean the surface of the stone thoroughly using a neutral cleaner and water, making sure to remove any dirt, dust, or stains.
- Allow the stone to dry completely. This may take several days. Ideally check with a moisture meter.
- Shake the impregnator well before use.
- Apply the impregnator to the stone surface using a brush, roller, or sprayer. Be sure to saturate the stone completely, but avoid leaving any excess impregnator on the surface.
- Allow the impregnator to penetrate the stone for the amount of time recommended by the manufacturer. I like to allow it to sit for 10 minutes.
- Wipe any excess impregnator off the surface of the stone with a clean, dry cloth.
- Allow the impregnator to cure completely before using the stone surface or applying any sealers.
Usually, 24 hours is sufficient for curing. Please note that different impregnators may have different instructions, please always refer to the product directions before use.
How to Remove Rust Stains from Stone Pool Pavers
Rust stains can occur from furniture placed on the stone surface as well as from irrigation water,etc. To remove them, it is important to use the following procedures as soon as possible.
To remove rust stains from marble using a poultice
You will need the following materials:
- A mixing bowl
- A spoon or spatula
- A white, powdery rust remover (such as Iron Out*)
- A white, absorbent material (such as flour or talcum powder)
- Plastic wrap
- Painters tape
Steps for making your poultice
- In the mixing bowl, combine equal parts of the rust remover and the absorbent material and water until it forms a paste.
- Spread the paste over the rust stain (about 1/8 inch thick) and cover it with plastic wrap.
- Secure the plastic wrap in place with tape.
- Allow the poultice to sit on the stain for at least 24 hours.
- Remove the plastic wrap and discard the poultice.
- Rinse the area thoroughly with water and dry it with a clean cloth.
- It is always recommended to test the solution on a small area before applying to the entire surface.
Important! Iron Out is available in a liquid and powder form. Do not use the liquid. Only use the powdered Iron Out.
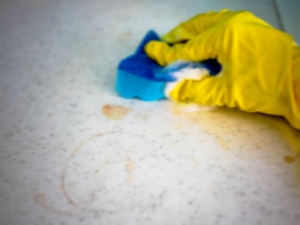
Removing Other Stains from Your Stone Pool Deck
Stains other than rust can be caused by wine or other food and drinks. The following is how to treat them.
- Mix a cleaning agent that is proper for the type of stain and the type of stone. Common cleaning agents used in poultices include hydrogen peroxide, baking soda, and ammonia. Most wine and other food and drink stains can be removed with the above procedure with a 20 volume hydrogen peroxide solution. This peroxide can be purchased at most beauty supply stores (sold as hair developer).
- Add an absorbent material to the cleaning agent to create a thick paste. Common absorbent materials used in poultices include flour, talcum powder, and diatomaceous earth.
- Apply the poultice mixture to the stain and cover it with plastic wrap or wax paper to keep it from drying out too fast.
- Allow the poultice to sit on the stain for at least 24 hours, or longer if the stain is particularly stubborn.
- Remove the poultice and wipe the area with a clean, damp cloth.
- Rinse the area thoroughly with water and dry it with a clean cloth.
Note: Before trying the poultice method, test the cleaning agent on a small, inconspicuous area of the stone to make sure it doesn’t damage or discolor the stone. Also always make sure to read the instructions for the cleaning agent and for the stone.
Follow the above maintenance instructions and you will enjoy your stone pool deck for years.
By Fred Hueston. This article is one of a series of articles written and published on behalf of Surface Care PROS Partners.