Why Do Carpets Wear Out Faster Around Certain Furniture?
Ever notice how the carpet near your sofa or bed starts looking worn long before the rest of the room? Flattened fibers, dark traffic patterns, or rough texture in these areas are extremely common—and there’s a reason for it.
We regularly see this issue in both homes and commercial environments. Whether it’s beside a living room couch, under office seating, or near hotel beds, these areas experience a unique kind of stress that causes carpets to age faster than surrounding spaces. The good news? Understanding why it happens and what to do to mitigate the damage before it happens can extend the life of your carpet.
Why Carpets Near Certain Furniture Wear Out Faster
Carpet wear isn’t always caused by heavy foot traffic alone. In many cases, it’s repeated pressure and movement in the exact same spot day after day.
Think about what happens near a sofa or bed:
- People sit down and stand up repeatedly
- Feet pivot in the same location
- Body oils transfer from bare feet or skin
- Dirt and grit get ground into fibers
- Vacuuming often misses tight furniture edges
Over time, this combination compresses carpet fibers and weakens their structure.
In both residential and commercial settings, these concentrated wear areas tend to show damage much earlier than open spaces.
The Difference Between Dirty Carpet and Worn Carpet
This is where many people get confused.
Sometimes carpet simply looks worn because dirt and oils have become deeply embedded in the fibers. Other times, the fibers themselves are physically damaged.
A few common signs include:
- Carpet looking darker near furniture
- Fibers appearing flat or matted
- Texture feeling rough or stiff
- Visible “traffic lanes”
- Areas that still look bad after vacuuming
When carpet fibers lose their resilience, they stop reflecting light evenly, which is why worn areas often look dull or permanently dirty.
Why Vacuuming Alone Isn’t Enough
Vacuuming is important, but it only addresses surface debris.
The problem is that areas near sofas and beds collect:
- Fine grit
- Skin oils
- Dust
- Moisture
- Embedded soil deep in the pile
That buildup acts almost like sandpaper inside the carpet. Every step grinds particles deeper into the fibers, accelerating wear.
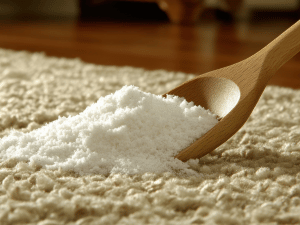
In many homes, we also see people unintentionally make things worse by aggressively scrubbing spots or overusing carpet powders and DIY cleaners.
Common Mistakes That Speed Up Carpet Wear
A few habits can shorten carpet life much faster than most people realize.
- Leaving Furniture in the Same Spot for Years
Constant pressure in the exact same location compresses fibers permanently. - Skipping Professional Cleaning
Deep soil buildup breaks down fibers long before the carpet actually looks dirty. - Over-Wetting Carpet
Too much moisture can attract more soil and create lingering odor or residue issues. - Using Harsh Spot Cleaners
Some products leave sticky residues that attract dirt faster.
What Professional Carpet Cleaning Actually Helps With
Professional carpet cleaning doesn’t just improve appearance—it helps remove the abrasive soil trapped deep in the fibers.
Depending on the carpet condition, professional care may help:
- Restore texture and softness
- Remove deeply embedded dirt
- Improve appearance in traffic areas
- Reduce odors and buildup
- Extend carpet lifespan
While heavily worn fibers can’t always be fully restored, proper cleaning often makes a much bigger difference than people expect.
Simple Ways to Reduce Wear
A few small changes can help protect carpet in high-use areas:
- Vacuum slowly and consistently around furniture
- Use furniture pads to reduce pressure
- Rearrange furniture occasionally when possible
- Place rugs or runners in heavy-use zones
- Remove shoes indoors
- Address spills quickly
- Schedule periodic professional cleanings
These habits help reduce fiber stress and keep soil from becoming deeply embedded.
When It’s Time to Call Your PRO
If certain areas still look dirty after cleaning, feel rough, or show visible wear patterns, it may be time for professional evaluation. Your PRO can
help identify whether the issue is:
- Soil buildup
- Fiber damage
- Residue from past cleaning attempts
- Moisture-related problems
- Normal aging versus preventable wear
Frequently Asked Questions
Q. Why does the carpet next to my bed look dirty so fast?
A. Areas beside beds collect body oils, dust, and repeated foot traffic every day, which causes faster wear and discoloration.
Q. Why is the carpet near my couch flat even after vacuuming?
A. Repeated pressure from sitting and standing compresses carpet fibers over time, and vacuuming alone usually can’t restore them fully.
Q. Can professional carpet cleaning fix worn carpet near furniture?
A. Professional cleaning can improve appearance and remove deep soil buildup, but severely damaged or crushed fibers may not fully recover.
Q. Why do the edges around furniture look darker than the rest of the carpet?
A. These areas trap dirt, oils, and fine debris that gradually build up and create darker traffic patterns.
Q. How do I keep carpet from wearing out near sofas and beds?
A. Regular vacuuming, moving furniture occasionally, using rugs, and scheduling professional cleanings can help reduce concentrated wear.
The Bottom Line
Carpets near sofas and beds wear out faster because they experience repeated pressure, friction, and concentrated soil buildup every single day.
The key is understanding that wear doesn’t happen overnight. It develops gradually through small daily habits and accumulated debris.
With regular maintenance, proper cleaning methods, and occasional professional care, carpets in both homes and businesses can stay cleaner, softer, and more attractive for much longer.
Do you have questions about your carpet care or want to schedule services with us? Send us a message online, we look forward to hearing from you.
By Wendy Fenske. This article is one of a series of Caring For It™ articles written and published on behalf of Surface Care PRO Partners.