Do Stone Impregnating Sealers Really Protect Your Surfaces? | {location}
We hear it all the time—“I had my stone sealed, so I don’t have to worry about stains or damage anymore… right?”
It’s a common assumption, but the reality is a bit more nuanced.
At {companyname}, we often talk with homeowners and business managers who have been given mixed or incomplete information about stone sealers, especially impregnators. Understanding what these products actually do—and what they don’t—can make a big difference in how well your stone performs over time.
What Is a Stone Impregnator?
An impregnator is a type of penetrating sealer. Instead of sitting on top of the surface, it soaks into the tiny pores within the stone.
Its primary purpose is simple: slow down how quickly liquids are absorbed.
This applies to everyday substances like coffee, wine, oils, makeup, and even dirty water—whether that’s on a kitchen countertop, a lobby floor, or a restroom vanity.
A helpful way to think about it: It acts more like a rain jacket, not a waterproof shell. It gives you time to react—but it doesn’t make the surface invincible.
What Impregnators Actually Do Well
They Help Resist Stains
By slowing absorption, impregnators reduce the likelihood of staining. If something spills, you have more time to clean it up before it penetrates the stone.
They Make Routine Cleaning Easier
Because liquids and contaminants stay closer to the surface, day-to-day cleaning becomes more effective—whether at home or in a commercial setting.
They Preserve the Natural Look
Most impregnators are designed to be invisible. They don’t typically add shine or change the appearance unless you’re using a color-enhancing product.
They Help More on Porous Stones
Materials like marble, limestone, and some granites benefit the most because they naturally absorb more.
What Impregnators Do NOT Do
This is where expectations often don’t match reality.
They Do Not Make Stone Stain-Proof
No sealer can completely prevent stains. If spills are left sitting long enough—especially oils, wine, or strong pigments—they can still penetrate.
They Do Not Prevent Etching
This is one of the biggest misconceptions.
Etching happens when acidic substances react with calcium-based stones like marble or limestone. Things like lemon juice, vinegar, or certain cleaners can dull the surface.
Sealers do not stop this chemical reaction.
They Do Not Prevent Scratches or Chips
Impregnators don’t create a protective layer on top. Dragging grit across the surface or dropping heavy objects can still cause damage.
They Do Not Last Forever
In both homes and businesses throughout the {location} area, we see sealers wear down over time due to use, cleaning, and foot traffic.
Depending on the surface and conditions, they may need reapplication every 1–3 years.
A Common Misunderstanding
One of the most frequent situations we see is someone relying entirely on a sealer to “protect” their stone—only to be surprised when damage occurs.
The truth is: Sealing is just one part of proper stone care, not a complete solution.
How to Tell If Your Stone Needs Sealing
A simple test can give you a good idea.
Place a few drops of water on the surface and let them sit for several minutes.
- If the stone darkens quickly, it may be absorbing moisture and could benefit from sealing
- If the water beads up, the surface may still be protected or naturally dense
This quick check works well in both residential and commercial environments.
Practical Tips for Better Stone Care
To get the most out of your stone surfaces, we recommend combining sealing with good daily habits:
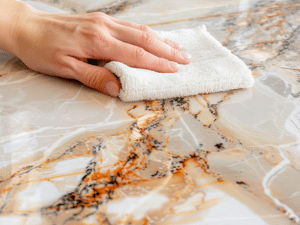
- Wipe spills promptly
- Use pH-neutral cleaners
- Avoid acidic products on marble and limestone
- Use coasters, trays, and cutting boards
- Reapply sealer when needed
- Avoid letting liquids sit for extended periods
These simple steps go a long way in preventing long-term issues.
When It Makes Sense to Call Your PRO
If you’re unsure whether your stone is properly protected—or if you’re seeing signs of staining, dullness, or uneven performance—it may be time for a professional evaluation.
We can help determine:
- Whether sealing is needed
- What type of sealer is appropriate
- If there are underlying issues like etching or buildup
If you’re not sure what you’re dealing with, we’re happy to help. You can reach us at {phonenumber}.
FAQs
Q. Do stone impregnators make surfaces stain-proof?
A. No. They slow down absorption but do not completely prevent staining if spills are left too long.
Q. Can a sealer prevent etching on marble or limestone?
A. No. Etching is caused by acid reactions, which sealers do not stop.
Q. How long does a stone sealer last?
A. Typically 1–3 years, depending on usage, cleaning, and environmental conditions.
Q. Do all types of stone need sealing?
A. No. Some dense stones may not require sealing, while more porous materials benefit from it.
Q. How can I tell if my stone needs sealing?
A. A simple water test can indicate whether the surface is absorbing moisture.
The Bottom Line
Impregnators are valuable tools. They help reduce staining and make maintenance easier, whether you’re caring for a kitchen countertop, a hotel lobby floor, or a commercial restroom surface.
But they are not a cure-all.
They won’t make stone stain-proof, scratch-proof, or acid-resistant. Understanding their role—and their limits—helps set the right expectations and keeps your surfaces looking their best for years to come.
By Fred Hueston. This article is one of a series of Caring For It™ articles written and published on behalf of Surface Care PRO Partners.