There was a time when cast iron was about the only choice for a kitchen sink. Those sinks were white, easy to chip and heavy. Then, stainless-steel sinks came along and became the go-to sinks. They came in a variety of styles like 50/50, 60/40, and one big bowl, but the color pallet didn’t exist. They were one color and if you did not get the sound buffer pads, they could be loud. Today, there are so many more choices.
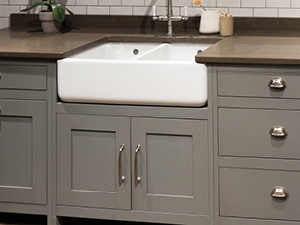
Fireclay
Fireclay sinks are clay and glaze fired together to make a durable, more scratch- resistant sink. They can be cleaned up with soap and water, but harsher chemicals can be used if needed.
Copper
Depending on the décor, copper sinks can be polished to a high shine, or they can be left with a dull finish. These sinks will develop a patina over time, and they clean up easily with
warm soap and water. Copper sinks will become the focal point of your kitchen.
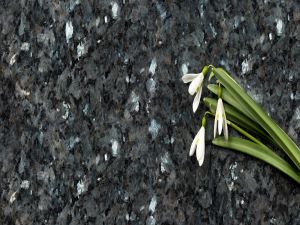
Granite Composite Sinks
Granite composite sinks are some of the most popular sinks sold today. They are made from stone powder and adhesives. Granite composite sinks are scratch and heat resistant plus, they come in a wide variety of styles and colors. Tip: Get the matching strainer if they offer it.
Glass
Tempered glass sinks come in a variety of sizes and colors. They are very stain resistant but do show water spots easily. A protective mat is recommended, and you should not pour boiling water into them.
Concrete
Concrete sinks are generally custom made and need additional support due to their weight. They can be perfect for a sleek, modern kitchen or a rustic looking décor. Concrete sinks are exceptionally durable.
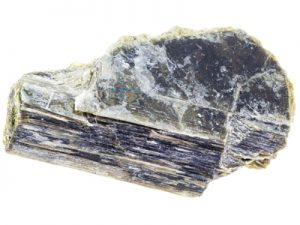
Bronze
Bronze sinks are usually crafted by hand and can be costly. Like copper, they will develop a patina over time, but their finish starts out darker than copper. They scratch fairly easily, but they will be a showpiece in your kitchen.
Bamboo
Bamboo sinks add warmth to the décor, and they are durable. Obviously, the color pallet is limited, but each sink does have variations that make each one unique. Bamboo sinks do require a bit more maintenance since they need to be sealed from time to time, and you cannot use harsh chemicals to clean them.
(New) Cast Iron
Obviously, the cast iron itself is still the same. These sinks are still heavy and require added support, but they are available in so many more varied sizes and colors now. It shouldn’t be a problem finding one to fit your décor. They are very durable and can last a lifetime.
(New) Stainless Steel
Up until recently the biggest drawback to stainless steel sinks was the color pallet. They had one color, but, just as with cast iron sinks, technology has changed this issue. Stainless steel sinks now also come in colors like gold, black, bronze, blue, and rose.
There are many new types of sinks on the market today, more than mentioned here. All have their pros and cons. But, no matter what your décor or your needs, there will be one out there exactly right for your kitchen.
By Sharon Koehler. This article is one of a series of articles written and published on behalf of Surface Care PROS Partners.