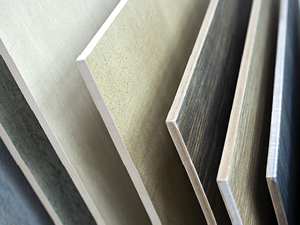
Pros and Cons of Prefab Countertops

If you are selecting a surface for your kitchen countertops, you may be considering going with prefabricated rather than custom cut slabs in order to save money. It’s important to understand that your investment decision involves more than just price. There are many factors to consider, from material selection and quality to design options and other considerations. Here are the pros and cons of prefabricated countertops.

Material Selection

Each type of countertop material has its own unique qualities. The most appropriate material selection will depend on your particular needs. Suppose you rarely cook or entertain, and you are more concerned about how the stone looks than how it holds up to use. You could get away with choosing a highly polished marble. If you are looking for a way to add value to your home for potential resale, granite is a widely popular choice.

PRO Prefabricated countertops are available in a variety of colors and textures.
CON Manufacturers of prefabricated countertops may not offer the countertop material you prefer, and your material selection may be more limited than if you were to select a slab.

Material Quality

Low quality materials may be cheaper, but as the adage goes, you get what you pay for. Take Chinese quartz, for example. It is more likely to have discolorations from resin pooling on the surface than quartz sourced elsewhere. Problems with other types of countertop materials occur, depending on region, methods of quarrying and transport, and other factors.
PRO Prefabricated countertops responsibly sourced from reputable suppliers and manufacturers can be of the same level of quality as countertops custom cut by a fabricator.
CON Prefabricated countertops may have dye lot variation from one countertop to another. If you are buying more than one countertop, you might see a slight difference in color.

Shape, Size, and Edge Options

Kitchens come in all shapes, sizes, and designs, and so do countertops. Choosing countertops that perfectly suit this very important space in your home is one of the most important home design decisions one can make.
PRO If you happen to find prefabricated countertops that meet your specifications and satisfy your design expectations, you may save a few bucks with this option.
CON Prefabricated countertops have zero flexibility when it comes to dimensions and edge options. What you see is what you get. In addition, seam placement may be problematic with prefabricated countertops.

Cost Considerations

The two major factors that determine the price of having new kitchen countertops installed are the cost of the materials and the amount of time the job will take from start to finish, which translates to labor cost.
PRO Because prefabricated countertops are standard sizes that are ready to install, prefabricated pieces generally are about half the cost of slabs, which require more preparation prior to placement.
CON If your prefabricated tops do not come with holes for the sink, faucets, cooktop, or other features or if the dimensions of your kitchen cabinets do not exactly match those of prefabricated countertops, you will need to hire a stone fabricator to customize your tops. This basically defeats the purpose of buying prefabricated tops. You would be better off with a custom cut slab.

If you decide to purchase prefabricated countertops, be sure to ask your contractor to include all labor expenses with your quote. With prefabricated countertops you may not save as much money or get the quality workmanship that you expect.

3 Tips for Comparing Stone Restoration Bids

Choosing a stone restoration contractor by comparing bids based only on price can be a costly mistake. There are other important factors to consider before you make a decision. Here are three tips for comparing stone restoration bids.

1. Does your contractor understand your particular type of stone?

Although there are similarities between marble, granite, travertine, and other types of stone, there are also differences that require specific restoration processes. Janitorial and cleaning companies may provide valuable services but their technicians are rarely properly trained, qualified, or experienced when it comes to natural stone restoration. Even some stone restoration companies may have little or no experience with your specific type of natural stone. Be sure to ask what your prospective contractor knows about your stone. They may offer the cheapest price, but in the wrong hands, your stone could end up with poor quality results or problems such as dimpled or wavy surfaces.

2. Are there hidden costs not included in the bid?

Basic stone restoration involves honing to remove surface damage and polishing to restore the finish of the stone. Your prospective contractor may not have included other procedures necessary to make your stone look brand new again in the bid. For example, does your stone have deep scratches, chips, or cracks? If the bid only includes honing and polishing, the contractor is not legally obligated to do special repair work. Does your stone need to be sealed? If so, check if sealer application is included in the bid.

3. Will the contractor be able to accommodate your schedule?

Scheduling is important for many people, but especially for business owners and property managers. In order to minimize disruption to the normal routines of employees, guests, and patrons, it’s important to know that your contractor can provide a plan of action that includes a start and finish date, and if necessary, work during the least busy hours or make special accommodations, such as keeping sections of flooring open for traffic while they work. Be sure to communicate your needs and confirm these details before accepting a bid.

Once you’ve taken the time to select contractors and gather bids for your stone restoration project, follow these tips to make an informed decision so that you will be happy with the entire experience, not just the price.


This article is one of a series of articles written and published on behalf of Surface Care PROS Partners.

DIY Carpet Cleaning Machines Aren’t Worth It

DIY Carpet Cleaning Machines Aren’t Worth It

Fresh, clean carpets create a welcoming atmosphere. Whether you are a renter who wants to retrieve a deposit, a landlord looking to spruce up a rental property in between tenants, or a home owner who wants to make their home fresh and clean, wall to wall carpeting should be professionally cleaned. Before you make the mistake of renting a carpet cleaning machine to save a few bucks, read on to learn why DIY machines may not be a good choice. DIY machines are heavy, awkward and messy. But more importantly they are not as effective as professional carpet cleaning and using them could result in problems.

DIY Carpet Cleaning Machines Are Heavy

Carpet cleaning machines are heavier than vacuum cleaners. No matter how lightweight a machine may be, carpet cleaning machines all require water, and water is heavy. If you choose to rent a carpet cleaning machine, be prepared for a pretty intense workout.

DIY Carpet Cleaning Machines Are Awkward

Carpet cleaning machines are more difficult to maneuver than vacuum cleaners. If you are cleaning stairs, hallways, closets, and other tight spaces, carpet cleaning machines may be especially awkward to use. If you have knee or back trouble, this could be problematic.

DIY Carpet Cleaning Machines Are Messy

Carpet cleaning machines can be messy. Canisters and attachments get coated with soiled water residue and detergents, and hair and debris collects in brushes. The machine must be thoroughly cleaned before it is returned.

DIY Carpet Cleaning Machines May Not Be Effective

Even if you find a machine powerful enough to achieve a deep cleaning comparable to professional carpet cleaning equipment, this is no guarantee that you will be able to achieve the desired results. Professional carpet cleaning technicians are trained in proper cleaning methods and the appropriate kinds and amounts of cleaning solutions for particular types of carpeting and soiling levels. All of these factors matter when it comes to achieving the best possible results.

In some cases, carpets may even look worse after improper cleaning with a rented machine than they did before cleaning. That’s why many landlords require tenants to sign an agreement to NOT use a rented carpet cleaning machine to clean carpets.

DIY Carpet Cleaning Machines May Leave Carpets Too Wet

Dry time is very important. Mold and mildew problems can happen when there is excessive moisture left behind after carpet cleaning. With machine rental carpet cleaning, if too much moisture remains, the carpet padding can stay wet long after the carpet itself has dried. Professional carpet cleaning removes most of the moisture and requires minimal drying time.

DIY Carpet Cleaning Machines Are Noisy

Vacuum cleaners are notoriously loud. Rented carpet cleaning machines can be twice as loud as vacuums.

DIY Carpet Cleaning Machines Are Time-Consuming

When you factor in the amount of time it takes to select a machine, wait in line, check out, loading and unloading in your vehicle, setup time, cleaning time, cleaning the machine, loading and unloading again, and returning the machine to the vendor, DIY carpet cleaning can take a whole weekend. Since time is money, you may not actually save money in the long run compared to hiring a professional carpet cleaner.

DIY Carpet Cleaning Machines Don’t Come With a Professional Technician

Sometimes spot removal, odor control, and other special considerations will require the knowledge and expertise of a professional carpet cleaning technician. If you choose to rent a carpet cleaning machine, it will be up to you to figure out how to resolve certain problems.

If you want fresh, clean carpets, renting a carpet cleaning machine to save a few bucks is not really worth the trouble. Professional carpet cleaning is affordable, easy, and effective.

Slab Selection and So-Called Imperfections

Natural stone countertop selection requires a bit of due diligence by consumers, from preliminary research and measurements to selection and the final slab inspection. When it comes to slab inspection, the most important thing to remember is that what you see is what you get. Here’s what you need to know before you make a final decision on a slab purchase.

Naturally Occurring Stone Features

Sometimes during slab inspection, clients find what appears to be small imperfections, such as fissures or spots. These naturally occurring stone features have no effect on the structural integrity of the slab.

Fissures, which are similar in appearance to a crack, are a result of geological or environmental forces, crystallization of minerals, and other conditions, whereas cracks are a result of man-made stresses, such as transport from the quarry to the fabricator or from fabricator to a residence or commercial facility.

Spots on a slab, like shade variation, veining, and other natural characteristics, are a common feature of natural stone. Naturally occurring spots are not stains, which are a result of something spilled on stone.

If the slab you intend to purchase has one of these stone features, you have a few options. You can embrace the fact that your countertop material is a completely unique product of nature and appreciate its perfectly imperfect appearance, you can select a different slab, or you can consult with your fabricator on other options.

Your Countertop Layout

Depending on the layout of the countertop design, fabricators may be able to cut slabs for inconspicuous placement of a portion of the slab. Because your countertop will need space cut out for the sink and faucets, it may be possible to avoid it altogether so that the spot or fissure ends up in the scrap material. If you have an area you want to avoid, ask for a layout to determine whether this is an option for you.

Once you find a slab you love, inspect it carefully to be sure it is the most appropriate choice for your countertops.

Why Pool Decks Turn Green and Black

Why Pool Decks Turn Green and Black

What is that green and black stuff growing on my pool deck? This is a question pool owners often ask. This article will help you identify and remove pool deck discoloration, as well as minimize the likelihood of future discoloration.

Biological Growth Types

The majority of unsightly green and black spots on pool decks are the result of biological growths in the form of algae, molds, lichens and mosses, and plants such as ivy and grasses. Let’s take a look at each:

  • Algae is commonly green in color but can also be black, orange, red or yellow. It is easy to identify since it grows in mats, films, and patches on the surface of stone, brick and concrete. Algae is a single-cell plant but lacks roots, leaves, stems and vascular tissue. Most algae, especially the green type, needs moisture and sunlight to grow. However, there are species that will grow in damp, low-light areas.
  • Moss is most commonly green but can also be red. Like algae, it requires sunlight and moisture to grow. It also needs a mineral source often found in soils. Unlike algae, moss has a root structure and a very small leaf structure. It will often grow in grout between stone and masonry.
  • Mold is a fungus, not a plant. It does not require sunlight but does require moisture and an organic food source. Mold is generally black in color but can also be red, orange, brown, or yellow. Limestone is especially susceptible to mold growth, since it contains organic matter that can feed mold.
  • Lichens are comprised of a fungus living in a symbiotic relationship with an algae or a relative of bacteria called cyanobacterium (or both in some instances). They can be red, yellow, red, green, or white. Lichens are identified by crusts or leaf-like structures with defined borders growing away from the surface of the stone or masonry.
  • Ivy, grasses, and higher plants are easily identified by their root systems and large leaf structures. They are often green in color.

Removal of Biological Growth

Regardless of the type of biological growth, removal requires the use of biocide cleaning chemicals, such as peroxide, bleach, or other biocides. Here is a basic cleaning procedure that is recommended to remove these growths. Be sure to carefully read the directions on chemicals and take all necessary precautions. Wear gloves and protective clothing. A mask is recommended, since some mold and algae can emit spores that can be harmful to your respiratory system.

Algae is best removed when it is dry since the spores are more likely to become airborne when wet. Allow the surface to fully dry, or expedite the drying process with a fan. Remove as much algae as possible by scraping or scrubbing with a stiff broom or brush.

A pressure washer can be used to remove the remaining biological growth, but there are a few additional precautions and recommendations:

  1. Do not use high pressure. Test the pressure in a non-conspicuous area to make sure you are not damaging the stone or masonry.
  2. Use hot water, if possible. Hot water will kill some of the biological growth and sanitize the surface.
  3. Use a wide nozzle tip to minimize damage. Keep the tip of the wand at least 12 inches away from the surface.
  4. Bleach or vinegar can be used to clean stubborn growth. Mix the bleach or vinegar. Use one cup of bleach or vinegar with one gallon of water. Test this mixture in a non-conspicuous area to see if it will cause discoloration. Some stone and masonry types can lighten, discolor, or etch with bleach or vinegar.
  5. Apply the bleach or vinegar mixture on the deck and allow it to sit for 15-20 minutes. Do not let it dry. (If it accidentally dries, apply more of this mixture.)
  6. Scrub the area with a nylon brush. Rinse with plenty of clean water. Be careful to avoid nearby plants, since this mixture can kill landscaping plants and grasses.

In lieu of bleach or vinegar, you can use many of the commercial cleaners appropriate for your pool deck surface type. You can find them at most home centers. If your pool deck is natural stone, be sure to use a pH-neutral, stone-safe cleaner. Read the directions carefully.

Spot Removal

If you have just a few spots, you can use 3% hydrogen peroxide. Simply spray the growth with the peroxide, allow it to sit for several minutes, and then rinse with water.

Prevention

Your best defense to keep biological growth at bay is to clean the deck on a regular basis. We can professionally clean your pool deck for the best results. We can also apply sealers and preventive biocides to inhibit new growth.

We can provide specific recommendations regarding cleaners for green and black growth on your pool deck.


This article is one of a series of articles written and published on behalf of Surface Care PROS Partners.
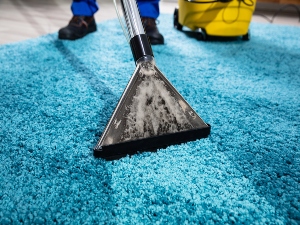
Carpet Spot Removal Can Create New Spots

If you own carpeting, you are probably familiar with the idea that spots should be removed right away before they turn into permanent stains. Sometimes spot removal, especially if you are removing several spots at once, gives carpeting an inconsistent appearance. Here are the details about what causes this problem and what you can do about it in the future.

Too Clean

With successful spot removal, the soiling substance is removed, leaving the treated area clean and fresh. The problem is that if the surrounding carpet looks dull and dingy, you’ve simply exchanged one kind of spot for another, a dirty spot for a clean spot. Obviously, a clean spot is not a stain. Nevertheless, due to the noticeable difference between the clean area and the rest of the carpet, it might as well be. The solution is to have your carpet professionally cleaned. Dust, dirt, and contaminants that stubbornly cling to carpet fibers can be extracted with professional carpet cleaning, leaving the entire carpet clean and fresh. Note that you will also need to increase the frequency of vacuuming, because it is not always easy to see how dirty carpet really is.

Spot Remover

When inappropriate DIY cleaning methods or improper cleaning solutions are used for spot removal, carpet fibers may become discolored or bleached, causing an inconsistent appearance. With discoloration, professional cleaning may resolve the problem. However, don’t delay in scheduling services, because the substances causing discoloration can set into the carpet fibers permanently. With bleaching, professional cleaning will not likely help. The reason for this is that bleaching removes color from the carpet, and there is no way that professional cleaning will put the color back.

Aggressive Methods

Scrubbing spots too aggressively or using abrasive cleaners, scouring pads, or stiff brushes for spot removal can result in damage to carpet fibers. When carpet fibers are bent, frayed, or missing in the treated area, but the carpet fibers in the surrounding area are still in tact, there can be noticeable variation in the appearance of the carpet. Professional carpet cleaning will not resolve this problem, but it may help disguise the problem by lifting and freshening the carpet fibers in the damaged area.

Protective Treatments

If spot removal is frequently necessary, and your carpet is more than two or three years old, you may also consider having us apply a protective treatment. New carpets are usually treated with stain and soil resistors, but these wear off with time and use. Consider having a us re-apply the treatment after professional cleaning, because it can help make spots easier to remove and less likely to turn into stains.

Feel free to contact us if you have any questions about spot removal or to schedule services after a spot removal mishap.


This article is one of a series of articles written and published on behalf of Surface Care PROS Partners.

Stone Fabrication. Stone Restoration. What’s the Difference?

If you are considering natural stone as a material for your kitchen or bath plans, whether new home construction or a renovation project, you will need to know the difference between a stone fabricator and a stone restoration contractor, and you will need to enlist the services of both. Here are the details.

Why the Confusion?

In the stone industry, from quarry to countertop, different types of companies practice different specialties. Some companies are concerned only with supply, others with design and installation, and others with repair and maintenance. Some companies may focus solely on commercial properties while others specialize in residential properties, and some may service both. Although stone fabricators usually do not do repair and restoration work and restoration contractors usually do not do new installation, there are occasionally some companies that do cross over work from one specialty to the other.

Stone Fabrication

Most people know that when it comes to natural stone countertops, fabricators offer a wide variety of options for countertop edges, backsplashes, decorative trim, and more. What many people don’t know is that fabricators rarely do anything with the face of the stone. Occasionally fabricators repair minor flaws in a slab face or provide a custom finish if they are properly equipped to do so, but for the most part, fabricators specialize in cutting and shaping natural stone.

Highly skilled technicians make a rectangle slab of stone conform to your creative vision, matching the specifications of each element in your kitchen design, from cabinets, sinks, and cooktops to faucets and other features. Fabricators finish edges so that they have a clean, elegant appearance that matches with the surface finish. Once stone is installed, a fabricator may wipe down countertops to remove dust or construction debris or apply a sealer, but any other work involving the face of already-installed stone, for example, changing the finish from honed to polished or vice versa, will require the services of a professional stone restoration contractor. Basically, homeowners can expect the appearance of the face of the slab to remain unchanged from the slab selection phase to when they see it as the newly installed top.

Stone Restoration

Natural stone restoration contractors help maintain the like-new appearance of already-installed natural stone, such as countertops and vanity tops, as well as walls, tub surrounds, fireplace surrounds, hardscape, and other stone surfaces. Their services may involve repair, restoration, or maintenance.

Over the course of time, countertops will eventually show signs of wear. Acidic substances in food and drinks may cause etching, heavy use may result in fine scratches and dullness, or a dropped heavy object may cause a chip or crack. Most of the time, an experienced stone restoration contractor can resolve stone problems, repairing damage and honing and polishing to restore the finish. Stone restoration contractors may also provide maintenance services, such as regularly scheduled visits to clean, buff, and seal stone.

With proper care, a stone restoration contractor can help your natural stone last a long time. When stone replacement services are required, whether it is because of a remodeling decision or out of necessity due to irreparable damage or failure, then it will be time to consult with a stone fabricator again.


This article is one of a series of articles written and published on behalf of Surface Care PROS Partners.


The Problem With Carpet That Hides Dirt

Carpet in living rooms, hallways, steps, and other high traffic areas can soil quickly. Some colors and styles of carpeting look clean longer than others. Chances are you have heard the well-intended but ill-advised suggestion to choose carpeting that hides dirt so there will be less vacuuming required and you will not feel the need to get it professionally cleaned as often. Why is this bad advice? Here are the details.

Carpets That Hide Dirt

Two factors to consider when it comes to how long a carpet looks clean are color and texture. Keep in mind that we are not talking about the actual cleanliness of the carpet but only how clean it appears to be. Carpeting with speckled patterns, crazy designs, or dark colored carpeting will hide dirt more than solid or light colored carpet. Certain textures with loosely distributed fibers, such as a low shag or Berber, will allow dirt to fall down below the surface, whereas other textures with densely distributed stiff fiber bundles, like cut pile carpet, will keep dirt on the surface longer.

The Cost of Less Vacuuming and Fewer Professional Cleanings

One might imagine that having carpets that stay looking clean longer would be a good thing, but hiding the dirt means you are also hiding the devastating long-term effects of dirt.

Think of dirt as tiny shards of glass. The sharp edges slice along the carpet fibers every time someone takes a step. Over time, the carpet fibers weaken and break. If you allow premature wear to be the norm, you can count on spending more money, because any money you save with fewer professional cleanings will seem insignificant once you are forced to replace your carpet a lot sooner than expected.

If you want to get the most mileage out of your investment, treat carpet that hides dirt like carpet that doesn’t hide dirt.

Carpet Care Tips

The best way to keep carpets looking clean is to actually keep carpets clean. If you keep your carpet looking clean by hiding the dirt, even professional cleaning won’t be enough to resolve the problem once premature wear becomes apparent. Whether your carpet hides or advertises dirt, it can look clean with proper care.

Vacuum regularly, especially high traffic areas. Vacuuming slowly and evenly to remove the most ground in soil. Place high quality, heavy-duty mats at entrances to reduce the amount of grit and grime tracked in from outside. Have your carpet periodically professionally cleaned, whether it looks dirty or not. Professional cleaning loosens, dislodges, and extracts dirt particles and contaminants that a vacuum can’t remove.

Our Carpet Selection Suggestion

Do not choose your carpet based on how well it hides dirt. It may seem counterproductive, but carpet that does not hide dirt may actually be a better choice. Like the adage, “The squeaky wheel gets the oil,” the dirty-looking carpet gets proper care. Go for the solid or light-colored carpet if that is what you really want. Regardless of your carpet selection, proper care is what really matters.


This article is one of a series of articles written and published on behalf of Surface Care PROS Partners.
Bookmatched Slabs as a Focal Point

Stone and Tile Slabs as a Focal Point

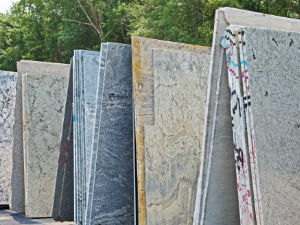
One fundamental element of interior design is the focal point. Bookmatched slabs take the focal point concept to a stunning new level of elegance. This article explains how to best incorporate bookmatched slabs as a dramatic focal point in your home’s design scheme.

Practical Benefits of Slab Applications

Slabs lack grout lines, which means they drastically reduce the cleaning and maintenance associated with grout lines. As such, they are especially appropriate for applications in wet areas, such as shower walls, bathroom vanities, walls surrounding baths or hot tubs, kitchen countertops and backsplashes, and more. In some cases, with proper substrate preparation, slabs can be installed directly over existing materials. Matching patterns and veins at seams can be challenging. The bookmatching technique is a convenient way to avoid mismatched seams.

Bookmatched Slabs

Bookmatched slabs command attention in the best way. The symmetry of this design feature conveys a sense of order, softened by the curves in the stone veins. Gorgeous bookmatched slab designs are achieved by the strategic pairing of neighboring natural stone slabs, nearly identical in appearance or engineered stone slabs, which are truly identical. The two pieces are placed next to each other, forming a symmetrical, mirror-like pattern. The appearance of the matched slab design resembles an open book, hence, the term bookmatching. When this process is repeated, four slabs are aligned resulting in a pattern that moves in four directions. This X or a diamond pattern is called quadmatching or diamond matching.

Best Places to Incorporate Bookmatched Slabs as a Focal Point

For many years, natural stone or quartz slabs have been a favorite material among designers for creating a focal point for commercial and high end residential properties, and over the past decade or so, large format tiles, such as gauged porcelain tile panels or slabs have also gained popularity. A focal point in interior design can be achieved through a variety of means, from artwork or furniture arrangement to a window with a great view or an architectural feature. Bookmatched slabs are becoming more common as a focal point because of the increased availability of large format tiles, panels, and engineered stone slabs with distinct veins and patterns.

Here are the best places to incorporate bookmatched slabs:

  • Facing the main entrance. Nothing says “welcome” more than a space designed to create a positive impression. A feature wall is a great place to showcase the colors and patterns of exquisite natural stone or beautifully engineered slabs.
  • Accent walls. Take advantage of the style and mood created at the entrance and continue it throughout the home or property with matching accent walls.
  • Exterior living spaces. Finish up the unified look with bookmatched slabs as an accent wall on a covered patio or outdoor kitchen.
  • Fireplace surrounds and fire features. Dramatic features in and of themselves, fireplace surrounds and fire features can be downright breathtaking when they are created using bookmatched slabs.
  • Fountains and water features. Like fireplaces, even the most unassuming fountains and water features tend to make an impression. Bookmatched slabs can accentuate this phenomenon.
  • Backsplashes. Select stone or tile that will hold up against cooking mess and cosmetic splatters for kitchen and bathroom backsplashes, such as granite or quartz. Bookmatched backsplashes create an unexpected work of art between your countertop or vanity top and other wall features, such as cabinets, mirrors, shelves, or windows. For an extra dramatic flair, continue the backsplash all the way up to the ceiling.
  • Shower walls and tub surrounds. Whether you have an open shower, a walk-in shower, a built-in tub, or a stand-alone tub, bookmatched slabs are an aesthetically pleasing, functional option for spa-like bathrooms. As mentioned earlier, fewer grout lines are a big plus.
  • Horizontal applications. Table tops, bench tops, bar tops, countertops, vanity tops, window sills, and other horizontal applications can all be bookmatched for an unexpected touch of style.
  • A statement piece. Like a window, a wall mounted shelf, or an architectural work of art, bookmatched or quadmatched slabs, large format tiles, or panels can be assembled to create a large, stand-alone feature that does not necessarily go from floor to ceiling.

If you are looking to incorporate the timeless elegance of geology into your interior design as a focal point, you cannot go wrong with bookmatched slabs.

This article is one of a series of articles written and published on behalf of Surface Care PROS Partners.
Resolve Dirty Grout Problems Once and For All

My grout is always dirty!

Tile is pretty easy to clean. Grout, on the other hand, can be notoriously difficult to clean. Once grout is clean, keeping it clean on a regular basis can also be quite a chore. If your grout looks dirty or seems to be a dirt magnet, there are real, lasting solutions available.

Why Grout is Hard to Clean

Grout is porous, which means it absorbs dirt, grime, spills, and other unwanted substances. Sometimes these contaminants can be removed using routine cleaning methods, such as sweeping, mopping, and occasional scrubbing. When contaminants become deeply embedded within the pores of the grout, regular cleaning methods will not produce the desired results. At this point you have two options: aggressive DIY methods or professional cleaning.

Aggressive DIY Methods

Before you start scrubbing grout lines with harsh chemicals, there are a few things to consider. To what lengths are you willing to go to get results? Plainly stated, it may be possible to remove discolorations using DIY methods, but that does not necessarily mean it is advisable. Harsh chemicals can be dangerous to the health of anyone who inhales the fumes, including children and pets, and can damage your floor or the surfaces surrounding your work area.

Begin with the gentlest methods. For example, you could sweep, apply a mild cleaning agent recommended for your type of flooring, allow enough dwell time to soften the buildup, scrub with a soft bristle brush, and then mop with a damp mop. You don’t want dirty mop water to be left to dry in the grout lines. Let the floor dry thoroughly before you decide whether your grout lines are dark, because wet grout is darker than dry grout. If your grout lines come clean, that’s great. You did it!

If your grout still looks dirty and you do decide to use harsher chemicals, be sure to select products specifically formulated, or stated as safe for, your type of flooring and follow all the safety recommendations. We have seen many cases where homeowners or professional cleaning or janitorial services did a little research, learned that sulfamic acid solutions and floor strippers can produce good cleaning results, and tried these solutions themselves only to find that they had inadvertently damaged the floor or surrounding surfaces.

Professional Cleaning

Professional cleaning can flush out contaminants that get trapped in the grout, sanitizing your floors and giving them a clean, fresh appearance. Most of the time, professional deep cleaning will produce the desired results. Qualified professional stone and tile restoration contractors know how to select and appropriately use chemicals to achieve the best possible outcome without causing damage.

Why Grout is Hard to KEEP Clean

Once your tile and grout floors are clean, whether you did this yourself or had a professional do it for you, within a few weeks, you may notice the grout lines starting to turn dark. If dirt and grime are simply coating the surface of your grout, simply sweep and damp mop to remove the discolorations. If the grout lines still look dark, it is because the pores in the grout are filling up with contaminants again, and those contaminants have seeped down below the surface.

Why Grout Sometimes Looks Dirty When It’s Clean

Sometimes, when grout is permanently stained or has an uneven appearance due to improper mixing of grout during installation, neither aggressive DIY methods nor professional cleaning will produce a completely uniform, clean appearance. The floor may be sanitized, yet still have a “dirty” appearance.

How to Keep Grout Lines Looking Fresh and Clean

Replacing your grout with epoxy grout is a possible solution to dirty grout problems, but not a very practical one, since grout replacement is a hefty, and more importantly, avoidable expense.

If the pores in your grout keep filling up with contaminants, clear grout sealer can provide a lasting solution. Note that clear grout sealer will not change the color of your grout, but it will help preserve the color of your grout. It fills up the pores so contaminants stay on the surface where they can be easily removed.

If your grout lines have permanent stains or blotchy spots, grout color sealer would be your best option, because it has all the benefits of clear sealer and more. A good, quality grout color sealer will cover stains and spots, creating a like-new look. The coverage is so good that, if you desire, you can actually change the color of your grout from dark to light or vice versa. Grout color sealer prevents stains and inhibits the growth of bacteria and mildew, and it lasts for years.

If you are not sure whether to have your grout clear sealed or color sealed, you want to learn more about what to expect with professional services, or you want to schedule services, contact us. Our PROS resolve dirty grout problems.


This article is one of a series of articles written and published on behalf of Surface Care PROS Partners.