When was the first known stone polishing done?
Stone polishing has been done since the beginning of civilization. Egyptian workers used sand and other rough materials to polish the surfaces of statues and monuments made of stone. This is the first time that polishing stone is known to have been done. Ancient Greeks and Romans also used this method. They used a variety of tools and materials to make smooth, shiny surfaces on marble statues and building parts.
When were improvements made to the techniques of stone polishing?
During the Middle Ages, ways to polish stones kept getting better. Buildings made of limestone and sandstone in Europe were polished by skilled workers who used tools they could hold in their hands. They also used grinding wheels powered by water to make stone floors and countertops smooth and even.
When were substantial changes made to the way we polish stone?
During the Industrial Revolution in the 1800s, there were substantial changes in how stone was polished. When the steam-powered grinding wheel was invented, it made polishing large surfaces faster and more effective. This made it possible to polish whole floors and building facades in a short amount of time.
How is stone polishing done today?
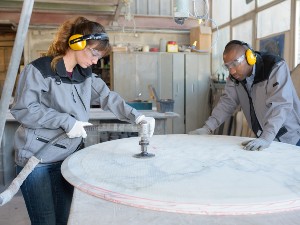
Today, polishing stone is a very specialized job that uses a wide range of modern tools and methods. Professional stone polishers use tools like electric and pneumatic grinders, polishing pads with diamond tips, and chemical polishing compounds. In short, polishing stone is an old skill that has changed over time into a highly specialized field that uses modern tools and methods. From the time when ancient Egyptians used rough materials to polish the surfaces of stone monuments to the 19th century, when a grinding wheel powered by steam was invented, technology has been a big part of how stone polishing has changed.
The mechanics of polishing stone have not changed much over hundreds of years. Yes, the tools and abrasives might have changed but the processes remain the same.
By Sharon Koehler. This article is one of a series of articles written and published on behalf of Surface Care PROS Partners.