What to Use and NOT Use to Clean Your Hardwood Floors

CLEANING TIPS FOR HARDWOOD FLOORS

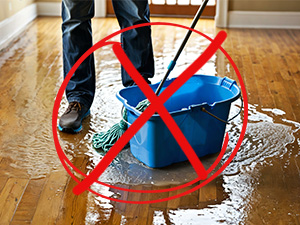
First, let’s talk about an important DON’T—Over Wetting.

Water and wet mopping should be limited, and an overabundance of water or cleaners is not necessary nor recommended. In general, wood surfaces are not “wet-loving” to begin with. Limit how much and how often you use water to clean your wood surfaces!

Most people get that concept when it comes to other wood surfaces like furniture and cabinetry, but they don’t when it comes to caring for wood floors. And depending on the type of finish on the hardwood floors water can be a real problem. To explain further, there are two types of finishes wood floors have. They are:

  • Top Finishes A top finish on hardwood is best explained as a coating that is engineered and designed to lay on top of the floor which creates a waterproof barrier on the surface of the wood. Commonly it is known as “polyurethane.” Polyurethane is like plastic and waterproofs the surface keeping things from absorbing into the wood.
  • Penetrating Finishes Conversely, a penetrating finish is a finish that absorbs into the wood cell structure instead of a finish that lays on top. Perhaps a more traditional finish, these products may be oils, paste waxes, and the like. Again, the finish absorbs into the finish.

Polyurethane Finishes Withstand, or “Mostly Tolerate,” Some Wet Cleaning

Because polyurethane finishes sit on top of the wood rather than seeping into it, they handle moisture better than penetrating finishes. However, too much water can still damage the floor by compromising the finish and the wood underneath. As a result, it’s best to avoid excessive wetting—even on polyurethane-coated floors—and to limit water use overall when cleaning.

Penetrating Finishes Are NOT as Tolerant of Wet Cleaning

An overabundance of water on a penetrating finished floor is NOT encouraged, it is not tolerant of excessive water at all! Instead, the water may absorb into the cell structure and damage it. Likewise, if too much water is used it will begin to react with the penetrating finish and cause it to act up too. In example, you may see the appearance of the floor turn milky or whiteish. To sum it up, wood floors in general should not be “over-wet-cleaned!” Therefore, eliminate using (or limit) a bucket with a rag or wet mop to do so!

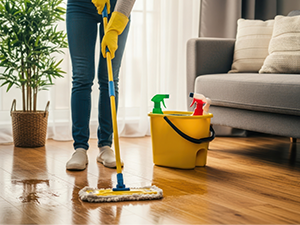
DO Ditch Wet Mopping and Begin to Think Dust Mopping

Wood floors are more simply treated with a good dry dust mop or vacuuming. If you are dust mopping you can use, but perhaps should not use, a pre-treated dust mop. Or, if you have a mop with a treatment canister you should consider using it sparingly. Although formulated and advertised as suited for cleaning floors, again additives are put into these solutions that will create residues that can contaminate the floors down the road.

Dusting a Floor

Keep your floor cleaning efforts simple yet effective. Dusting per se can be accomplished with a dry dust mop or a suitable vacuum attachment that is designed for dust collection and removal.

Dry dust mop A microfiber Velcro strip “mop” is ideal. Sold as such it comes with a stick handle and a rectangular frame where the rectangular mop strip attaches. Use it completely dry, untreated is perfectly fine. Once dirty switch it our for a clean one, and proceed again.

Dry dust vacuuming Let the convenience of mechanized dust collection and removal work on your behalf! In plain speak, a vacuum with attachments that don’t damage the wood surface are ideal. To be specific, ideally it is good to use a vacuum wand with a felt attached to the wand “shoe.” (TIP: Make sure the plastic or rubber wheels on the vacuum are kept free of grit and dirt to avoid scratching the floor.) Or you can use one with a soft bristle brush on it. And a third alternative is an upright or automatic vacuum that has a high setting for vacuuming the floor either with or without a brush or felt attachment.

All in all, hardwood floors are preferably cleaned with effective dry dusting!

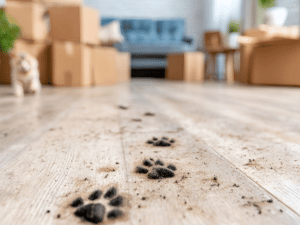
But Then, There’s Cleaning Up a Spill

By now it might be conveyed that you shouldn’t or don’t need to wet mop your floor regularly. Cleaning up spills and such are better handled with a wet rag preferably at the time the spill occurs. And to manage that, a hand rag may be most suitable. If a large spill or leak occurs, a mop and bucket, or even a wet vac, is the better choice. But again, don’t let puddles of liquids dwell on the floor for too long.

Other Wood Floor Care Do’s and Don’ts

DON’T Use a Steam Mop to Wet Clean or Steam Clean Your Wood Floors!

While it won’t be elaborated here, it is recommended that wood floors not be steam cleaned with a steam mop! Even though the steam mop manufacturer and advertising on TV says it’s ok, it is not! Steaming of either type of finished hardwood floor is not encouraged because damage to both kinds of finishes, and ultimately the wood itself will occur.

DON’T Over-use Shine Restoring Products!

Shine restoring products are a whole different conversation, which should be discussed and dealt with separately.  Overuse of shine restoring products will upset the balance of the finish or floor, and cause problems down the road. It is just better to steer clear of using them. Or, if you must, understand that shine restoring products merely are a band aid solution to bigger problem.

DO Use a Good Neutral Cleaner.

When cleaning hardwood floors, a good neutral floor cleaner is best! Neutral cleaner is a category of cleaner whose pH composition is a pH of 7. Because wood and flooring are both best cleaned with a pH of 7, that is all that is recommended. (In box stores and hardware stores look for “neutral floor cleaner.”)

DON’T Use Cleaners That Have Heavy Ingredient Additives. They Are Unnecessary and Will Contaminate the Floor if Used.

This might include heavy oils, fragrances and disinfectants.

Avoid:

  • Cleaners with labels that denote “oil” as part of their name or on their ingredient list.
  • Low-end cleaners, maid-service favorites that are not so “lo so” recommended.
  • Anything that indicates a fragrance (which is used for your olfactory stimulation only). Fragrance does nothing for the wood surface whatsoever.
  • Heavy disinfectants. They are unnecessary.
  • Pre-treated dust strips (micro-fiber or regular ones). They tend to leave a slippery residue on the wood floor that can become a slip and fall hazard. Avoid them altogether, or sparsely use them with caution only.

Instead, a light duty neutral floor cleaner will be sufficient and not complicate nor contaminate the floor with residues.

“Daily Neutral Cleaning” Products and Kits are Recommended and Better Suited for Daily or Regular On-going and Periodic Cleaning!

First off, don’t get caught up in the literal translation of “daily cleaning.” This does not refer to, nor mean, you need to do this type of cleaning daily. It does, however, refer to a safer group of products suitable for basic cleaning tasks, whatever your frequency preference is (daily, weekly, bi-weekly, etc.).

Daily Cleaners Can Be Purchased in a Couple of Convenient Ways, and, Hint, Look for the Word “Daily”

  • A spray bottle of daily cleaner available on the shelves or online.
  • A gallon of the same cleaner similarly available suitable for refilling the spray bottle.
  • A” kit” as a one-time purchase (comes in a box) that includes a “stick mop” (2 pc stick handle, a frame, and one or more Velcro strip mops), and a spray bottle of daily cleaner.

How Best to Use Your Daily Cleaner

Many times, the practice is to spray the floor with the cleaner used. Doing this uses way too much cleaner. Besides using up your bottle of cleaning solution way too fast, you also more quickly contaminate the floor by depositing more chemistry and solution than is needed to clean it.

Instead, withhold that temptation! Spray the strip mop or rag with the spray cleaner. That is all that is necessary! This is a way easier method that keeps it simple to clean your floors. But caution, even some “daily cleaners” will leave residues!

Although more technical diagnosis, even some daily cleaning products will promote a residue build up over time. For this reason, it might be encouraged to periodically use a dry mop (untreated) to buff off any subtle build up of haziness and residue that becomes noticeable on the floor. Akin to using the rinse cycle in your washing of your clothes, whereby the rinse cycle flushes out the detergents, dirt, soils and oils from your clothes. A dry dust mop that soft buffs (nothing abrasive AT ALL!) the floor will remove the film buildup on the floor. After that, good to go as in “spray buff” the mop strip, rinse and repeat!”

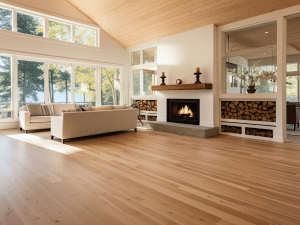
In Summation About Cleaning Your Hardwood Floors

Perhaps now the hint is communicated that “less is better!” Less water (if any), and certainly less cleaning product with heavy ingredients should be avoided. Get the “some is good- more is better” thought out of your head (otherwise also known as the “glug-glug” method). Replace the temptation with a reserved practice of limited amount of water and a limited amount of “product”. Remember, water is not a friend to wood! And dry treatments, despite your reluctance, will ensure longer lasting, cleaner and less contaminated or damaged floors.


By Wendy Fenske. This article is one of a series of Caring For It articles written and published on behalf of Surface Care PRO Partners.

Why Should I Have My Hardwood Professionally Cleaned?

Hardwood Floors Professional Cleaning

Having hardwood floors is a beautiful investment in your home. Having them professionally cleaned periodically helps maximize their beauty and life.

While regular sweeping and mopping can help keep them looking good, there are many good reasons why you should consider having your hardwood floors professionally cleaned. Here are four key reasons why professional cleaning is worth the investment:

1. Deep Cleaning for Long-Term Care

Over time, dirt, dust, and debris accumulate in the cracks and grooves of your hardwood floors. Regular cleaning often only removes surface dirt, but a professional cleaning service can provide a deep, thorough cleaning that reaches areas you might miss. Professionals use specialized equipment and cleaning agents designed for hardwood, which helps break down tough stains and grime without damaging the wood. This deep cleaning helps preserve the wood’s finish and extends its life, ensuring your floors remain in excellent condition for years to come.

2. Protects the Finish

The finish on hardwood floors is essential for protecting the wood from moisture, dirt, and wear. Routine cleaning can cause wear on the finish, especially if harsh chemicals or incorrect cleaning tools are used. Professionals use the right products and techniques to gently remove dirt while preserving the protective layer of your floor. A proper cleaning can even improve the shine and luster of the finish, keeping your floors looking their best.

3. Prevents Allergens and Health Issues

Dust, dirt, pet dander, and other allergens can accumulate in the gaps between your floorboards and are often difficult to remove with standard cleaning. Professional cleaning removes these allergens effectively, improving indoor air quality. For households with pets or allergy sufferers, a deep cleaning can help reduce symptoms related to dust mites, mold, or pollen, creating a healthier living environment. This can be especially important in homes with young children or individuals with respiratory conditions.

4. Saves Time and Effort

Cleaning hardwood floors is more than just a quick sweep and mop. Proper maintenance requires knowing the right techniques, tools, and products to use. By hiring professionals, you can save yourself time and effort while ensuring the job is done correctly. Professionals also have the knowledge to spot any potential issues with your flooring, such as water damage or wear spots, and can address them before they become serious problems.

Regular cleaning is important for the upkeep of hardwood floors. Professional cleaning offers a deeper, more thorough level of care that can protect your investment, improve the health of your home, and save you time in the long run.


By Sharon Koehler. This article is one of a series of articles written and published on behalf of Surface Care PRO Partners.

DIY Carpet Cleaning Machines Aren’t Worth It

DIY Carpet Cleaning Machines Aren’t Worth It

Fresh, clean carpets create a welcoming atmosphere. Whether you are a renter who wants to retrieve a deposit, a landlord looking to spruce up a rental property in between tenants, or a home owner who wants to make their home fresh and clean, wall to wall carpeting should be professionally cleaned. Before you make the mistake of renting a carpet cleaning machine to save a few bucks, read on to learn why DIY machines may not be a good choice. DIY machines are heavy, awkward and messy. But more importantly they are not as effective as professional carpet cleaning and using them could result in problems.

DIY Carpet Cleaning Machines Are Heavy

Carpet cleaning machines are heavier than vacuum cleaners. No matter how lightweight a machine may be, carpet cleaning machines all require water, and water is heavy. If you choose to rent a carpet cleaning machine, be prepared for a pretty intense workout.

DIY Carpet Cleaning Machines Are Awkward

Carpet cleaning machines are more difficult to maneuver than vacuum cleaners. If you are cleaning stairs, hallways, closets, and other tight spaces, carpet cleaning machines may be especially awkward to use. If you have knee or back trouble, this could be problematic.

DIY Carpet Cleaning Machines Are Messy

Carpet cleaning machines can be messy. Canisters and attachments get coated with soiled water residue and detergents, and hair and debris collects in brushes. The machine must be thoroughly cleaned before it is returned.

DIY Carpet Cleaning Machines May Not Be Effective

Even if you find a machine powerful enough to achieve a deep cleaning comparable to professional carpet cleaning equipment, this is no guarantee that you will be able to achieve the desired results. Professional carpet cleaning technicians are trained in proper cleaning methods and the appropriate kinds and amounts of cleaning solutions for particular types of carpeting and soiling levels. All of these factors matter when it comes to achieving the best possible results.

In some cases, carpets may even look worse after improper cleaning with a rented machine than they did before cleaning. That’s why many landlords require tenants to sign an agreement to NOT use a rented carpet cleaning machine to clean carpets.

DIY Carpet Cleaning Machines May Leave Carpets Too Wet

Dry time is very important. Mold and mildew problems can happen when there is excessive moisture left behind after carpet cleaning. With machine rental carpet cleaning, if too much moisture remains, the carpet padding can stay wet long after the carpet itself has dried. Professional carpet cleaning removes most of the moisture and requires minimal drying time.

DIY Carpet Cleaning Machines Are Noisy

Vacuum cleaners are notoriously loud. Rented carpet cleaning machines can be twice as loud as vacuums.

DIY Carpet Cleaning Machines Are Time-Consuming

When you factor in the amount of time it takes to select a machine, wait in line, check out, loading and unloading in your vehicle, setup time, cleaning time, cleaning the machine, loading and unloading again, and returning the machine to the vendor, DIY carpet cleaning can take a whole weekend. Since time is money, you may not actually save money in the long run compared to hiring a professional carpet cleaner.

DIY Carpet Cleaning Machines Don’t Come With a Professional Technician

Sometimes spot removal, odor control, and other special considerations will require the knowledge and expertise of a professional carpet cleaning technician. If you choose to rent a carpet cleaning machine, it will be up to you to figure out how to resolve certain problems.

If you want fresh, clean carpets, renting a carpet cleaning machine to save a few bucks is not really worth the trouble. Professional carpet cleaning is affordable, easy, and effective.

Countertops: Your Essential Guide

Countertops: Your Essential Guide

Thinking about purchasing new countertops? You’re going to love the Surface Care BUZZ magazine Kitchen Countertop edition!

When you begin to consider which countertop material for your new kitchen, you will want to educate yourself on all your options before you make your selection. After all, you’re going to be living with them for a long time and there are so many wonderful choices to consider. Look to the special edition of Surface Care BUZZ magazine that is dedicated to kitchen countertops. In addition to the regular articles–Did You Know? Ask Our PROS, and the ever popular Kid’s Page (which in this edition includes a fun how-to video)–our PROS present incredibly useful information and tips in:  Countertops 101: The Complete Guide to Kitchen Countertops.

In it, topics covered to help you in your decision process include…

How Do You Intend to Use Your Kitchen?

Although color, budget, and texture/finish are important considerations, your material selection ought to be based on how you intend to use your kitchen. An elegant, high-maintenance material might be a perfectly reasonable choice for a kitchen that gets very little use. Durable, low-maintenance materials are appropriate for kitchens where there is constant cooking, cleaning, entertaining, and eating. You might consider selecting more than one type of countertop material for designated purposes like baking or heavy meal prep.

Countertop Materials

There are so many so many choices for countertop surfaces today, from concrete and laminate to metal or natural stone. Some materials are easier to maintain than others. With proper care, most materials can last many years. The appearance of some materials can be renewed once use or damage have taken a toll, while other materials will have to be replaced.

  • Concrete countertops can look as elegant as natural stone. Look for a specialist with a reputation for excellence for concrete countertop installation.
  • Laminate countertops are an attractive, stain-resistant option for a limited budget design. With proper care, laminate can last a long time, but damaged laminate cannot be restored.
  • Porcelain countertops are a great choice as they give the look of marble without being porous or acid sensitive. However, damaged porcelain can be difficult or impossible to restore.
  • Recycled glass countertops are resistant to UV damage, chips, cracks, and stains. They are difficult, but not impossible to restore.
  • Solid surface countertops are made with acrylic or polyester plastic. They are a good option for interior areas where there is no direct UV exposure but not suitable for outdoor kitchens.
  • Metal countertops are a fantastic alternative to more traditional countertop materials. Fabricators can make seamless, custom integral sinks with metal countertops. Metal tops are non-porous, which is perfect for food prep, with the exception of metal tops containing lead. Options include zinc, pewter, copper, bronze, and brass.
  • Stainless steel countertops are, hands-down, the absolute best option for outdoor kitchens and are also appropriate for indoor kitchens with modern, retro, or industrial designs.
  • Wood or butcher block countertops can be sanded for brand new look. Wood tops are porous and should be sealed, but even sealed countertops can warp with excess water exposure. Wood is not suitable for exterior applications.
  • High end countertop options include gemstone, exotic stone, precious metal, petrified wood, and other types of exotic stone.

And a Special Section Dedicated to Natural Stone…

Natural stone countertop choices include granite, marble, limestone, soapstone, slate, quartz surface (engineered stone), and quartzite. Some types of natural stone are more suitable than others for kitchen countertops, depending on a variety of factors.

Natural Stone Selection

If you are looking for tops that can hold up to serious use, there are a few simple tests you can do with stone samples:

  1. The Scratch Test reveals the softness of the stone.
  2. The Dye Test can help you identify “Doctored Stone.”
  3. The Lemon Juice and Oil Test demonstrates whether the stone is prone to staining and etch damage.

Learn more about these tests and various types of natural stone in the full article, as well as how to work closely with your fabricator to select the most appropriate stone or other material for your kitchen countertops. Learn about slab selection, resined slabs, why fees go beyond square footage, what you should do before the slab is cut, and edge options that are available to you.

Caring for Your Stone

Some of the topics covered include…

  • Educating yourself on some essential do’s and don’ts
  • Troubleshooting – Common problems and what to about them

Don’t miss out on any issue of Surface Care BUZZ magazine. Be sure to subscribe to be notified when a new issue is published.