Natural Carpet Fibers

Natural Carpet Fibers

Carpet and area rug materials generally fall into two different categories: natural fiber and synthetic fiber. For people who want to steer clear of synthetic fibers, there are many options. Here, we will explore natural fiber floor covering, including both animal-based materials and the most popular plant-based natural fiber materials. Learn more about possible uses in your home, so you can make an informed decision on your carpet or rug purchase.

What are natural carpet fibers?

Natural carpet fibers are carpet/rug materials that can be obtained from natural sources, such as plants or animals. Natural fiber carpets are considered more eco-friendly, because they come from natural, sustainable materials that can be regrown or harvested multiple times. Natural carpet fibers include, but are not limited to: jute, silk, cotton, wool, sisal, seagrass, and coir.

What natural fibers come from animals?

Most animal-based carpets and rugs are made from wool, but silk is also a luxurious option.

  • Wool is sheared from sheep and is considered the best natural carpet fiber. Any natural fiber wall-to-wall carpet is made almost exclusively out of wool. While wool is on the more expensive end, it does have several properties that make it a good fit for most homes. It is naturally insulating, keeping your winter heat out of your crawl space and in the room where it belongs. This will help reduce your heating costs. Wool has a natural elastic quality, which means it doesn’t “crush” like some other carpets. This makes wool great for high traffic areas. Wool also holds color dyes well, so they don’t fade easily.
  • Silk comes from the cocoon of the silkworm, and rugs created with silk are very highly prized and expensive. Those beautiful, vibrant, colorful Oriental or Persian rugs you see hanging on walls or laying under expensive furniture are silk. They are delicate and require maintenance and professional cleaning.

What natural carpet fibers come from plants?

If you are looking for plant-based carpeting or rugs, here are the most popular options.

  • Jute comes from the stem of the jute plant and is a very soft material. It is not good for wall-to-wall projects, but its softness does make good area rugs. It cleans up well with just a vacuum. Jute should not be cleaned with water. It can mildew. So, while it may be good for a playroom, it is not suited for bathrooms. Jute also does not generate static electricity, so you may experience fewer winter shocks. Jute rugs are generally tan/brown in color, but they can be dyed successfully.
  • Cotton grows in protective cases on cotton shrubs and, like jute, is considered to be a very soft material. Cotton rugs are great for people on a budget or for those who like to change out their look often. For the most part, they are relatively inexpensive, plus they come in a wide variety of colors and patterns. They are reversable and washable. The downside to cotton rugs is that they do stain rather easily (so it’s a good thing they are reversable and washable). The other thing is that they are light in weight, so they tend to slide or not lay flat creating a trip or fall hazard. These two drawbacks can be minimized by using a good rug pad underneath.
  • Sisal comes from the agave plant and is VERY durable, so it holds up well in high traffic areas. Sisal is a low pile rug, so it doesn’t hold on to dust particles, pet dander, or other allergens, making it a good choice for allergy sufferers. Like jute, it does not hold static electricity. Sisal is very absorbent, but the absorbency does make it prone to staining. Sisal should not be steam cleaned or put in the washing machine. Vacuuming should be all that is needed for cleaning. If you are looking for a soft, rub-your-feet-on-the-fibers rug, sisal is not for you. Sisal is rather rough to the touch.
  • Seagrass is the only flowering plant that grows completely underwater. Like sisal, it is also good for homes with allergy sufferers. It is a low pile rug, so it doesn’t hold onto dust particles, or pet dander. Seagrass cleans up with a vacuum and should never be steam cleaned. It is not a good outdoor or bathroom floor covering as it can get mildewy in humid conditions. It can be installed wall to wall BUT needs to acclimate first for at least twenty-four hours, as it does shrink once it gets unrolled. Seagrass has a natural, nonporous, waxy coating making it stain resistant. Seagrass rugs should only be dry cleaned. Excessive or prolonged moisture can lead to mold.
  • Coir carpets are made from coconut husks. These carpets are rough to the touch and shouldn’t be placed in barefoot areas like the bedroom or bathroom. They are very durable and good for high traffic areas. Coir rugs are mold and mildew resistant, but they can shed. If your coir rug has a PVC backing, then you shouldn’t get it wet.

Carpets and area rugs can be a big investment. If you are interested in a particular material, make sure you research the do’s and don’ts so that you find the floor covering that is perfect for you, your budget, and your home.


By Sharon Koehler. This article is one of a series of articles written and published on behalf of Surface Care PROS Partners.

What gives granite its shine?

Granite is a composite of magma and different kinds of minerals such as quartz, feldspar, amphiboles, and mica. The mineral mica is found in a lot of granite, and it is one of the things that gives granite a shimmery shine in certain places. Whether you already have granite countertops or other granite surfaces or if you’re thinking about having granite installed, here are a few things you should know about mica.

Granite
Mica forms in sheets like a book.

What is mica?

Mica is a highly reflective natural substance that forms in sheets, like the pages of a book. It ranges in color from clear to black. If you have granite, then you more than likely have mica to some degree. Delicatus White, Volga Blue and Cosmos are examples of granites that have a bit more mica than most. A lot of mica can make a slab incredibly beautiful, but it can potentially cause some issues.

Potential Problems With Mica

The BIG issue is that mica is brittle. When we think about the granite, we think of durable, hard, rock. Due to mica’s brittleness, there may be some fabrication issues with granite that has a high mica content. When mica gets cut, it breaks, causing crumbling, pitting, and flaking. Fabricators may charge you extra to fabricate slabs with a lot of mica, because they know they will have to repair the slabs during the fabrication process.

If your granite countertop has a lot of mica, think about going with a simple edge like a pencil round or eased edge. A triple pencil or waterfall edge takes more fabrication and opens up more edge surface for mica to chip out, both before and after install.

What happens after the install?

Maybe nothing. Maybe some chipping. One day when you are doing your routine clean up, you may notice the sponge catches on a rough, flaky area that you never felt before. If this happens, don’t worry. Your granite countertop is not falling apart. More than likely, what has happened is that a piece of mica has chipped out.

If routine cleaning or normal wear and tear cause pieces of mica to flake out of your countertop, you can call your stone restoration technician to fix the spot. In most cases, there won’t be any problem with the repair, however, repair can be difficult or impossible for very large or awkwardly placed chips. Also, be aware that there is nothing any stone restoration contractor can do to prevent future chips.

What should you do about mica?

There is a myth that applying a sealer to granite will help prevent mica from chipping. This is simply not true, however, you can discuss other protection options with your stone restoration technician or fabricator. They can take into consideration your particular stone, the environment where it is or will be installed, your budget, and intended use and then make a recommendation for a protective treatment or film to help prevent chipping. This can be applied to a brand new installation or an existing one.

For new countertops, your fabricator will know if any shine on the granite is an abundance of mica or something else. If the shimmering beauty it creates is worth the possible occasional chip, then everything is okay. If not, you can always look at colors that contain a little less mica.


This article is one of a series of articles written and published on behalf of Surface Care PROS Partners.

Carpets vs Area Rugs

Carpets vs Area Rugs

We tend to use the words carpet and rug interchangeably. Even though they may be made of the same material, they are not necessarily the same thing. Carpet is a thick, fabric floor covering that is installed in a room or rooms in a wall-to-wall manner. Once installed, it is generally not moveable or interchangeable. An area rug is a fabric floor covering that is not installed but laid loose in a room. It is moveable and interchangeable. Let’s take a look at some of the pros and cons of both types of floor coverings.

Carpet Pros

Carpeting offers a variety of favorable characteristics, but these ones stand out above the others when it comes to comparing carpets and rugs.

  • Hides flaws of the underfloor. If your hardwood or tile is old and in need of serious work, carpet may be the answer. Since it goes wall to wall it will cover every inch of the old, distressed existing floor.
  • Warmth. In the winter carpet acts as a heat loss barrier. It helps retain the heat in your home that might otherwise seep into your crawl space or basement, keeping your home warmer and your heating bills a little bit lower.
  • Safety. Trip and fall accidents are greatly reduced on carpet compared to hard flooring. Wall-to-wall carpet adds traction to floors and there are no unevenly laid tiles to trip over.

3 Carpet Cons

Every type of flooring material comes with disadvantages, and carpeting is no exception. Here are three factors to consider when comparing carpets and rugs.

  • Cleaning. Since you can’t roll wall-to-wall carpet up and take it somewhere to clean, you will need call your carpet cleaning technician to schedule periodic deep cleaning.
  • Uneven wear. Some areas in your home are high traffic and some are not. Unlike some types of hard flooring, when carpet gets worn in one area, that section cannot be restored or replaced. The whole carpet will need to be replaced.
  • You can’t take it with you. If you install wall-to-wall carpet and then need to move, the carpet stays with your house. On the plus side, with proper care and professional cleaning, carpeting can be an attractive selling point.

3 Area Rug Pros

We love area rugs for lots of reasons, but here are the top three reasons you might choose area rugs over wall-to-wall carpeting.

  • Easy, inexpensive redecorating. Like throw pillows and other accessories, area rugs are laid loose in a room. When redecorating, it is easy to swap out or move area rugs.
  • Cleaning. Since area rugs aren’t attached to the floor, they can be easily thrown in the washer or taken to the laundromat and put in a heavy-duty washing machine. If they aren’t washable, they can be easily transported by you or your carpet cleaning technician.
  • Cost. Compared to installed wall-to-wall carpeting, area rugs usually are less costly, so they are easier on your budget. You can also reposition area rugs to avoid uneven wear and the cost of replacement.

3 Area Rug Cons

Here are three disadvantages to area rugs compared to wall-to-wall carpeting.

  • Safety. Trip or slip and fall accidents tend to increase with area rugs, because people catch their feet on the edges. Since area rugs are not installed, they can slide, causing accidental falls. A rug pad underneath or anchoring the rug with furniture can help reduce the likelihood of a rug sliding.
  • They don’t generally cover the whole floor. Usually, area rugs are smaller than the room they are in, so if there are issues with the original floor such as stains, scratches or cracked tile, area rugs may not cover all the imperfections.
  • Limited availability of sizes. Unless you are willing to pay top dollar for a custom rug, you will need to choose from preset sizes, such as 4 x 6, 8 x 10, and 10 x 12. If you are unable to find the ones you want in the sizes you need, you’ll have to wait, shop around, or pick something else.

The words “carpet” and “rug” may be used interchangeably, but they each have their own advantages and disadvantages. Once you make a decision about your flooring materials, you can count on us to help you keep your fine surfaces clean, fresh, and inviting.


This article is one of a series of articles written and published on behalf of Surface Care PROS Partners.

Are Natural Stone Floors Slippery?

Are Natural Stone Floors Slippery?

We’ve all seen “SLIPPERY WHEN WET” signs posted at entry ways of industrial, commercial, and retail properties. Falls are completely avoidable, yet incredibly common. Sadly, they are the second leading cause of unintentional injury-related death, according to the National Safety Council. If you have natural stone floors or are considering having natural stone floors installed, you may be wondering whether this surface material is slippery. This article clears away misconceptions about the slipperiness of natural stone and provides suggestions regarding both new and existing installations.

The Physics of Slips

Slips are based on two surfaces, the flooring material and the shoes one is wearing (or bare feet). Just a bit of wetness between the bottom of a shoe and certain types of flooring can pose a very real hazard. You may have seen cartoons where a character slips on a banana peel. In real life, wetness on floors has a banana peel affect, whether the wetness comes from a spill, a pet accident, foot traffic on a rainy day, or even moisture from condensation. There are things you can do to minimize the risks, such as placing heavy duty mats near entry ways, being hyper-aware and vigilant about wiping up damp spots, and placing warning signs in conditions where wetness is likely to occur.

Natural Stone, Terrazzo, and Concrete

When it comes to natural stone, terrazzo, and concrete, the more polished and glossy the surface is, the less coefficient of friction (CoF) there is, that is, the more slippery the surface is. Likewise, if the stone has a honed or textured finish, it will have a higher CoF, which can minimize the likelihood of a slip and fall accident. If your floors get slippery when wet, talk to your natural stone technician. There are solutions available.

Professional Solutions

If you are having new stone installed, and you have your heart set on a reflective finish, you may want to select a lightly polished or highly honed finish instead of a high polish. For existing stone, your stone restoration technician can apply a treatment or refinish the floor to reduce the slipperiness. The tricky part is minimizing slipperiness while also preserving the reflective appearance of the stone. The more reflective you want the finish to be, the more ongoing maintenance will be required. Your stone restoration technician can make recommendations on the frequency of maintenance, depending on the type of stone you have, how much traffic it gets, and how determined you are to keep a finish that is inherently slippery. The bottom line is the rougher the finish, the less slippery the floor tends to be.

No Guarantees

As previously mentioned, why someone might slip involves two surfaces, but many factors can contribute to why someone might slip. For example, is there something on the floor or the bottom of a shoe, such as grease or residue from a cleaning solution? How much grip does the bottom of the shoe have? Is the pedestrian paying attention and being mindful or haphazardly moving along? Are there distractions in the environment, such as noise or poor lighting? Has the floor been properly installed and maintained? Stone restoration technicians can improve the slip resistance of your floor, but there is no guarantee someone will not slip and fall.


This article is one of a series of articles written and published on behalf of Surface Care PROS Partners.

Stone and Quartz Backsplash Options

Stone and Quartz Backsplash Options

If you are having natural stone or manmade quartz countertops and backsplashes installed, you will need to make a decision about the height of your backsplash or whether you want a backsplash at all. This article provides valuable information about the purpose of a backsplash, what could happen if there is no backsplash, and the pros and cons of various backsplash heights.

The Purpose and Function of a Backsplash

Backsplashes have two main jobs. The first is to protect your walls and cabinets from liquid spills. The second is to hide the gaps between your countertop and walls.

Spill Protection

If a spill occurs on your countertop and, for whatever reason, does not get wiped up right away, a backsplash will prevent the spill from seeping down into your cabinets or from pooling at the wall and being absorbed into the drywall. Over time, this issue can damage your cabinets and walls resulting in costly repairs.

Hiding Gaps

Even in new construction, walls are very seldom completely straight. Settling, uneven drywall mud, and other factors can make walls a bit uneven. It’s nothing to worry about. It’s just a fact. Fabricators will try as hard as possible to minimize gaps but sometimes gaps will happen. Since stone doesn’t bend and cannot be “molded” to follow the wall line. Backsplashes go a long way toward hiding those gaps.

If You Forego the Backsplash…

While no backsplash can put a modern spin on a kitchen, it may not be worth the risk of expensive damage down the road. The decision to forego a backsplash that matches your countertop material is not recommended unless tile or some other backsplash material is going to be installed all the way down the wall to your countertop. If there are gaps, make sure the backsplash material you choose will be wide enough to cover those gaps. For example, if you have a quarter inch gap, thin metal for a backsplash won’t hide the gap.

If you do decide on no backsplash, purchase and store some extra material. That way, if you realize later down the road that no backsplash was a mistake, you will have the exact color you need. Don’t expect to find an exact color match for your existing stone or quartz countertop if you purchase it later. Colors can change from lot to lot on stone and even manmade quartz countertops.
backsplash

4-inch Backsplash

The most common backsplash height is 4 inches. When your stone or quartz backsplash is cut and installed at the same time as your countertop, the top and backsplash will match. Fabricators do what they can to line up veining but depending on the project, this may not be possible. A 4-inch backsplash will be the same thickness as your countertop project and will cost the same per square foot as your countertop material. There are times when a 4-inch backsplash may need to be cut a little taller to cover the caulk/paint line of the previous countertop splash.

The backsplash is installed after the countertop installation. Your installer will make sure the backsplash is securely adhered to both the top of the countertop and the wall and fill the seams for spill protection and aesthetic purposes.

A 4-inch backsplash can be left on its own with just a painted wall, or it can be used in addition to other backsplash material such as tile or metal.
full-height-backsplash

Full Height Backsplash

Full height natural stone and quartz backsplashes are the most impressive and helps give a kitchen the “WOW” factor. Plus, they are easy to clean.

Full height backsplashes are also the most expensive, for several reasons. They go from the bottom of the cabinets to the top of the countertop, leaving no open wall space. The backsplash material is sold at the same price as your countertop material, but it does add a lot of extra square footage to the project. It also requires a second trip to be installed, as the space usually does not get measured until after the countertop is installed. This ensures a better fit. Also, there will have to be electrical outlets cut out, which can add to the cost. A full height backsplash will be the same thickness as your countertop material.

Here’s an interesting design note. It is not unheard of for people to mix and match their countertop and full height backsplash materials. For example, an Absolute Black granite countertop can be installed with a Red Dragon granite full height backsplash.

If you are having natural stone or manmade quartz countertops and backsplashes installed, make a decision about the height of your backsplash based on both what fits your budget and what makes you smile. The end result should be something you love.


This article is one of a series of articles written and published on behalf of Surface Care PROS Partners.

Is my countertop quartzite or marble ?

In recent years, there have been complaints from consumers who thought they had purchased quartzite for their countertops because of their its unique durability. Quartzite will not etch (a dullness of the surface) or become easily scratched. Later, when their tops are etched and scratched, they learn the hard way that their tops are actually marble. Marble is a beautiful stone and in the right environment an ideal choice. But for kitchens and other places where the countertops are exposed to high use and acidic liquids, without being specially protected, marble will become damaged and will need to be professionally honed and polished to restore that brand new look. This article explains the difference between quartzite and marble and how to tell what countertop material you truly have.

About Marble

Marble is a metamorphic material that contains an abundance of the mineral calcium carbonate, which is soft and chemically reacts to acidic substances. This means marble is very susceptible to acid etch damage. Heat, pressure, and other geological forces destroy or modify the texture and structure of limestone or dolomite rock, resulting in a new form of rock known as marble. When the limestone or dolomite are very pure, the resulting marble is white. When the limestone or dolomite is mixed with clay, iron oxides, or other minerals, the resulting marble may have swirls, veins, or varieties in color.

About Quartzite

Quartzite is also a metamorphic rock but differs from marble in that it does not contain calcium carbonate. This means it is not susceptible to acid etch damage. Quartzite is formed when heat, pressure, and other geological forces destroy or modify the texture and structure of quartz sandstone. When the quartz sandstone is very pure, the resulting quartzite is white or gray. When the quartz is mixed with iron oxide or other minerals, the resulting quartzite may have streaks, lenses (transparent pieces), and varieties color.

Tests to Determine Stone Type: Marble or Quartzite

Marble and quartzite can be very similar in appearance. Fortunately, there are a couple of simple tests one can perform to tell the difference between them: the scratch test and the acid test. If you attempt to perform either of these potentially destructive tests, you should obtain a sample or use a piece of scrap countertop material to perform the tests. If neither are available to you, test in an inconspicuous spot knowing that the test may cause damage.

The Scratch Test

In order to understand how the scratch test works, we need to provide a little more science. The hardness of minerals can be determined by what is called the Mohs scale of mineral hardness. This scale rates minerals from the softest mineral, being a 1, to the hardest mineral, being a 10. Calcium has a Mohs hardness of 3. Quartz has a hardness of 7. A standard kitchen knife has a hardness of about 6.

Use a knife to scratch the surface of a countertop. The outcome indicates the hardness of the mineral. If the knife leaves a scratch, the stone is likely marble. If there are no scratches, the stone is likely a much harder stone like quartzite or granite.

The Acid Test

Calcium reacts to acids, causing etch damage. The etch may or may not have texture, depending on the severity of etch damage. Common acids will not affect quartz. Vinegar or a lemon wedge can be used for the test. Place the lemon wedge or a drop or two of vinegar on the stone and allow several minutes dwell time. Wipe up the excess. If it leaves a dull spot, that a positive indication for the presences of calcium, which indicates the countertop is marble and not quartzite.

What You Need to Know If You Have Marble

If you discovered you have marble, not quartzite, by way of these tests or because you already have countertops installed that have etch marks or scratches, rest assured that you are not doomed to live with unsightly damage or replace your countertops. Professional stone restoration contractors can hone and polish your countertops, virtually erasing damage and leaving your tops with a beautiful, pristine finish. Your contractor can also offer solutions for protection appropriate for your countertop material.


This article is one of a series of articles written and published on behalf of Surface Care PROS Partners.

Will the Sun Fade My Stone Countertops?

As the seasons change, so does the amount of sun beaming through your windows and bringing its UV rays into your home and onto your countertops. Unfortunately, prolonged direct sunlight can cause damage, manifesting as fading or darkening on some granite countertops.

“Natural stone treated with resins are vulnerable to damage from direct sunlight,” says Fred Hueston, Chief Technical Director of Stone and Tile PROS. Applying resin to natural stone is now becoming commonplace because it strengthens the slab, allowing companies to eliminate waste from breakage during manufacturing and shipping.

Keep in mind that engineered stone, or quartz surfaces, as they are often called, are bonded with resins, making them susceptible to this same sort of sun damage as well.

PREVENTING FADING

Your natural stone countertops are an investment and you want to keep them looking beautiful for years to come. You can always check with your fabricator to see if your stone has been treated with resins, but it’s always a good idea to play it safe. Taking some simple precautions to minimize the time your countertops will be exposed to direct sunlight will go a long way. Simply closing the blinds during peak sunlight hours can be enough to prevent the damage.

For outdoor kitchens, consider a cover for your countertops when they are not in use. There are also some new innovative products on the market that can be applied to stone that act as a sunscreen to block UV rays.

ALREADY HAVE DAMAGE?

The good news is that natural stone that has faded by sunlight can be repaired. Stone that is not resined can be honed and repolished by a professional restoration company to bring it back to life. If it is resined, there are chemical dyes that can be applied to return the stone’s color.

If you have questions or concerns about your natural stone fading or darkening, contact us today.


This article is one of a series of articles written and published on behalf of Surface Care PROS Partners.

Is There Mold in My Carpet?

Mold in Carpet

Carpet can add so much cozy comfort to a home. Unfortunately, like almost any surface, it is susceptible to mold. In dark, damp environments, such as underneath sinks, in appliance drip pans, inside walls near plumbing, under or around house plants, and under carpet, mold problems can develop. To keep your carpet fresh, clean, and mold-free, it is important to keep it properly maintained, occasionally inspect it for mold, and take preventative measures to fend off mold problems.

How Does Mold Happen?

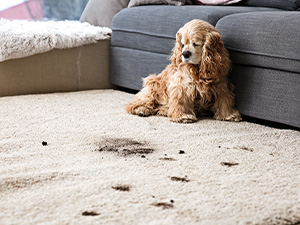
Mold can develop in a lot of different ways. Maybe your child spilled something and didn’t tell you. Maybe one day when you were out, your dog or cat had an accident, and you didn’t know. Perhaps you are not aware there is a small plumbing leak somewhere. Mold is everywhere and once moisture is introduced, the process of mold can begin on many different types of surfaces. It only takes 24 hours for the mold to start growing once an area gets wet. Carpets are not exempt from this process.

Is There Mold in My Carpet?

You may be wondering how you can tell whether mold is in your carpet. First, carefully inspect your entire carpet. For expansive areas, it might be helpful to imagine a grid going from the front of the room to the back and from the left side of the room to the right side, and then inspect each point along the grid. If you notice any off-color areas (black, green or maybe red) on your carpet, this may be an indication of mold.

WARNING: The only truly “safe” way to identify mold in carpet is to hire a mold removal company. If you decide to investigate yourself, try not to disturb the area too much, because doing so can send mold spores into the air. Don’t touch the stain without gloves. Mold spores can cause health issues, especially for people with asthma and allergies.

If the discoloration has a sour, musty, or moldy smell, then it may be mold. If possible, pull the rug and pad up where you suspect mold. Check the layers to see if there is mold underneath, and if so, how far down the mold has gone.

What You Should Know About DIY Mold Testing Kits

There are two types of mold testing kits: air and surface. For testing mold in carpet, we recommend a surface test, which requires you collect a sample using a swab or tape. Be sure to closely follow the manufacturer’s instructions.

What Should I Do if I Have Mold in My Carpet?

The simple answer is call your carpet cleaning professional. You may be tempted to go online and try to resolve the problem using DIY methods, but why risk it? Mold can be hazardous to your health and damaging to your home, and there are many DIY methods that can cause permanent damage to your carpeting. Your carpet cleaning technician can examine the area, and as long as the problem is not widespread or excessive, they can use special equipment and solutions to thoroughly clean and sanitize the area. For more severe mold damage, they may recommend a mold remediation company.

There is no guarantee that any company, even one that specializes in mold remediation, can completely remove 100% of mold spores from carpeting. However, there are preventative measures you can take.

How Can I Prevent Carpet Mold in My Home?

    • Keep your carpet dry. When humidity is high, run a dehumidifier or your HVAC system (which dehumidifies the air).
    • Soak up spills right away.
    • If possible, open windows or use a fan to dry the spills as soon as possible.
    • Vacuum carpets regularly.
    • Use a vacuum equipped with a HEPA filter bags. Ask your technician to make specific recommendations for how often you should vacuum your carpets, based on how much traffic your carpet gets.
    • Change your vacuum bags regularly, according to manufacturer instructions.
    • Inspect your carpet regularly for spills and stains.
    • Place high quality, heavy-duty mats at entrances to reduce the amount of water or moisture tracked in from outside.
    • Get your carpets professionally cleaned on a regular basis. Like vacuuming, ask your technician to make specific recommendations for how often you should have your carpets cleaned, based on how much traffic your carpet gets.
    • If you are purchasing new carpet, consider synthetic material instead of natural material like wool. Synthetic material is resistant to mold.

Your health, and that of your family and guests, as well as your home itself, are your biggest assets. Protect them both by contacting your carpet cleaning professional in this situation. Follow their lead. They know best.


This article is one of a series of articles written and published on behalf of Surface Care PROS Partners.

Refinishing Stone

The Appearance of Stone Can (and Can’t) Be Altered

Natural stone, a restorable surface material, is complex in comparison to restorable man-made materials, such as engineered stone, solid surfaces, and concrete. Unique as a snowflake or a fingerprint, natural stone requires customized restoration methods. It all depends on the composition of the stone, where it is installed, and how it is used. When homeowners want their stone restoration technician to change the appearance of their stone in some way, the task may or may not be possible to accomplish, and in some circumstances, it may be inadvisable. Let’s look at the various ways the appearance of stone can be altered.

But First… About DIY vs Professional Services

The appearance of stone can be altered subtly or in sweeping, dramatic ways. Subtle alterations can sometimes be successfully accomplished with DIY methods. For example, one might use a marble polishing compound to easily remove a minor etch mark on marble with a polished finish. More extensive changes should always be entrusted to your professional stone restoration technician.

Changing the Level of Shine or Finish

Professional stone refinishing entails using various methods to alter the reflectivity and texture of the surface of stone. If your stone is polished, but you would prefer that it have a soft, honed finish, or if your stone has a satin finish, but you would prefer a glossy, reflective surface, in most cases your professional stone restoration technician can make it happen.

There are a variety of natural stone finishes possible, including:
    • Honed / Satin / Matte – soft, velvety shine
    • Polished – glossy, mirror-like shine
  • Brushed / Antiqued – looks textured, but is smooth to the touch
  • Texture / Hammered / Tooled / Leathered – varying degrees of roughness, depending on the finishing technique
  • Custom – a personalized combination of other finishes
  • Coatings / Enhancers / Etch Protection Treatments or Films – alter the shine or finish
You Can’t Always Get What You Want

Your stone restoration technician may recommend against certain types of finishes in certain circumstances. For example, natural stone needs to “breathe” and for some applications, coatings could cause spalling, pitting, flaking, or other damage to the stone. Here’s another example. For sanitary reasons, textured finishes are not suitable for food preparation areas, because the unevenness of the surface can make cleaning difficult. The bottom line is that most of the time, you can get the finish you want, but sometimes the finish you want may not be appropriate.

Changing the Color or Darkness / Lightness

Are you unhappy with the color of your stone? Perhaps exposure to UV rays have made the stone fade or caused the resins in the stone to become discolored. If your stone is stained or dyed, and some of the color is inadvertently removed, then the untreated stone will show through, giving the stone a splotchy appearance. Your stone restoration technician may be able to reapply stains or dyes. Another option might be to hone the stone to remove the stains or dyes, revealing the brand new stone underneath and then refinish the stone to the finish of your choice.

Enhancers do not actually change the color of the stone, but they do intensify the color of stone.

Sometimes there are properties inherent in the stone that affect its apparent color in different lighting scenarios. For example, if granite contains a mineral called hackmanite, then certain spots will change color from pink to gray or another light color, depending on how much light exposure it gets. With some types of stone, a slab viewed from one end of a room will appear to be a different color than when it is viewed from the other end of the room. In cases like these, stone restoration contractors can’t really do anything to resolve the problem. You may, however, try experimenting with light fixtures and controlling the level of natural light exposure.

Removing Stains, Spots, or Discolorations

When it comes to stains, spots, and discolorations, things can get really confusing. A stain is a discoloration, but a discoloration may not be a stain. The easiest way to sort things out is to remember that a stain on natural stone will always be darker than the stone itself. Most stains can be removed. If the discoloration is lighter than the stone, then this is an indication that the it is a mark is corrosion (etching) caused by an acidic substance, or a caustic mark (bleaching) caused by a strong base (alkali). Stain removal methods will be ineffective on such stone damage.

The good news is that whether your stone is stained or damaged, in most cases the problem can be resolved. Your stone restoration contractor can instruct you on cost-effective DIY methods for stain removal or attempt to remove the stain for you. If your stone is damaged, it can likely be repaired and restored.

As mentioned previously, some spots or discolorations are inherent in the stone itself. One must either learn to appreciate the beautiful imperfection of natural stone or have it replaced.

Repairing Chips, Cracks, Holes, and Other Damage

Natural stone damage can happen in many ways, from scratches caused by dragging furniture or cracks caused by dropping a heavy object to signs of wear created by normal foot traffic or use. Your fully trained and qualified stone restoration technician can restore the finish and repair the damage, in most cases. They may grind, hone, polish, use color matched polyester or epoxy to fill in missing areas, replace tiles, and other methods, depending on what problem needs to be resolved.

Sometimes small imperfections or naturally occurring features in stone are mistaken for damage, even though they have no effect on the structural integrity of the stone. These include fissures or veins that look like cracks, angular fragments of stone, inconsistent veining, holes, pits, irregular shapes or inconsistencies in thickness, mineral deposits, and other features.

Moving Seams, Altering Edges, and Other Major Changes

After natural stone countertops have been installed, major changes are either difficult or impossible for a stone restoration technician to accomplish. Fabricators, that is, the ones who size and install countertops, use very specific equipment to do their work. Restoration contractors are not equipped to rearrange or re-profile countertops, and although fabricators are equipped, their work would entail removing the countertops completely, moving them back to the shop, and then reinstalling them. This labor-intensive effort would cost more than simply having the countertops replaced and could result in irreparable damage to the stone.

Contact us to discuss the appearance of your stone. We can take into consideration the look you have in mind, the composition of the stone, where it is installed, and how it is used, and then make the best recommendations.


This article is one of a series of articles written and published on behalf of Surface Care PROS Partners.

Why Stone Thicknesses Matter

Stone Thicknesses

If you are in the market for a new countertop installation, you may have noticed that countertops come in a variety of thicknesses. Perhaps you have questions. Why do countertop thicknesses vary? How thick is a typical countertop? Does countertop thickness even matter? The most common stone thicknesses for projects, in centimeters (cm) are 1 cm (3/8”), 2 cm (3/4”) and 3 cm (1 1/4”). Even though they may all be the same material, they are not all used in the same way. This article provides important details about countertop thickness that can help you make a more informed decision about your installation.

1 CM Stone

1cm (3/8”) stone really only has 2 practical uses. The first one is vertical projects. The second use for 1 cm stone is pre-made countertops with a laminated edge. Let’s take a look at each of these.

Vertical Stone Installations

Vertical project examples include fireplace surrounds, shower walls, backsplashes, and other vertical projects. 1 cm is much more fragile than 2 or 3 cm, but once the stone is properly attached to the right backing, such as drywall, plywood or other backing material, it becomes less fragile. The advantage to 1 cm stone is that it weighs much less than 2 or 3 cm, so it is easier to work with in some projects.

Pre-made Countertops With a Laminated Edge

A laminated edge is an edge that has had extra material glued onto it to make it appear thicker. Most of the time, this type of selection is used for vanity countertops precut with polished edges. 1 cm remnants are great for small shelves, furniture tops and other small projects.

There are a couple of drawbacks to using pre-made countertops with a laminated edge. If one of the edges needs to be cut for any reason, then the cut edge somehow has to be polished to the same shine as the surface of the stone, and the edge has to be made to match, as well. Another drawback has to do with sinks. Since the edges are laminated to show a thicker profile, if a hole is cut out for an under-mount sink, the actual, smaller, original thickness of the stone will show. It’s better to use the less popular drop-in sink on this case.

Pre-made countertops with a laminated edge are usually great for cookie cutter homes in a new subdivision where measurements tend to be the same and they can be ordered in bulk. If you want 1 cm stone for a special project, more than likely you will have to special order it. Most suppliers don’t carry it in stock, if they can get it at all.

2 CM Stone

2 cm (3/4”) stone is more flexible in its possible uses. Even though it weighs more than 1 cm, it can still be used for wall cladding, fireplace surrounds, and other vertical projects. Again, it should be attached properly to the correct backing. Since it is heavier than 1 cm, it is not quite as easy to work with in some situations. 2 cm remnants are also good for smaller projects like furniture tops, small shelves and other small projects. Let’s take a look at another possible use for 2cm stone, that is, countertops.

Kitchen Countertops and Bathroom Vanity Tops

With the proper support, 2 cm stone can be used for countertops in kitchens, bathrooms, break rooms, bar tops, table tops, and similar applications. Depending on the project, this thickness of stone may need the extra support of a plywood backer. If that becomes necessary, then be aware that the exposed edges will need to be laminated to hide the plywood. Also, like 1 cm, if the edges are laminated but a cutout is needed for an under-mount sink, the difference in the edge thicknesses will show. 2 cm overhangs should not exceed 6” without support. Your installer can recommend the proper overhang support for your project.

Supply is another consideration of 2 cm material. It is more common than 1 cm but is stocked in limited capacity by distributors.

3 CM Stone

These days 3 cm stone is the “mac daddy” of installation projects. You can do almost anything with it. With proper support it can be used for wall cladding, shower walls, fireplace surrounds, or other vertical applications. With the exception of a few geographical areas, 3 cm is also used for kitchen and bathroom countertops, bar tops, tabletops, windowsills, and a variety of other projects. It is the most commonly stocked thickness in distributors’ warehouses across the United States, again, with the exception of a few geographical areas.

The perks of using 3 cm stone include:
  • No need for extra support from plywood on 3 cm countertops
  • No need to laminate the edges for extra thickness
  • An under-mount sink cutout edge will match the front edge
  • The thickness will accept a wider variety of edge profiles
  • It is available in more colors and styles than we can count
  • Remnants are great for smaller projects

Other than the fact that 3 cm stone is heavy, there isn’t much you can’t do with 3 cm material.

Stone is very versatile and can be used for an endless variety of projects. We can help make sure you pick the right thickness of stone for your project.


This article is one of a series of articles written and published on behalf of Surface Care PROS Partners.