Sealers Can Help Protect Your Stone

[This article was originally published in October of 2018]

Kitchen countertops, bathroom vanity tops, bar tops, and the like can be prone to staining because they are exposed to oily or dye-containing substances on a daily, or sometimes, even an hourly basis. Consequently, a sealer should be applied to help prevent staining. Choosing the correct type of sealer can be very important for how the sealer performs. An experienced, professional stone restoration contractor will know which sealer is best, taking into consideration the characteristics of the particular type of stone to which it will be applied and the location where the stone is installed.

Impregnating Sealers

Impregnating sealers, also known as penetrating sealers, are the most commonly used sealers. They are applied to natural stone to inhibit staining. Impregnating sealers penetrate below the surface and protect the stone from within. They are formulated with water-repellent and oil-repellent substances. Topical sealers are available, but can be problematic, and are very seldom recommended.

Misconceptions About Sealers

There are many misconceptions about what a sealer does and doesn’t do. It is important to note that sealers do not prevent traffic patterns or etching. The surface of the stone is still vulnerable to acidic substances, scratches, dullness, and other damage. In addition, natural stone, even when it is properly sealed, is not stain proof, it is merely stain resistant. In other words, it buys some time so that spills can be cleaned before they penetrate into the stone and become stains. After natural stone is sealed, it still needs to be regularly cleaned with pH neutral stone care products and periodically refinished or resealed.

New High Performance Protective Treatments

There are new protective treatments that, unlike impregnating sealers, offer both etch and stain protection.

Ask us about how we can help protect your natural stone.


This article is one of a series of articles written and published on behalf of Surface Care PROS Partners.

Why You Should Rearrange Your Furniture

There is a Lot to Be Said for Rearranging Your Furniture

[This article was originally published in October 2018]

Furniture arrangement sets a tone for how a space is used. Once you’ve settled on a layout that works for you, why change it? Well, it turns out that there are actually quite a few benefits associated with changing your furniture layout. Here are the details.

Psychological Benefits

Did you know there may actually be psychological benefits to rearranging furniture? For creative people, rearranging furniture is an opportunity for creative expression. For people who want to hit an emotional reset button, rearranging furniture provides physical and visual evidence of change. If the urge for a fresh decorating scheme hits you, rearranging furniture can create a sense of newness without the expense of replacing your current furniture. And last but not least, it certainly can’t hurt to take the focus off of the TV and establish a space that is more conducive to social interaction.

It’s Good for Carpets and Rugs

Carpets and rugs are subject to damage from foot traffic, heavy furniture, and sun fading. Rearranging your furniture is a great way to combat all three problems. The more you are able to alter traffic patterns and create new walkways in a space, the less likely your carpets and rugs are to develop uneven wear, tracking, and footpaths. Moving heavy furniture also helps prevent excessive compression of the fibers, because it gives the fibers a chance to recuperate and bounce back. When you rotate the position of furniture, solar damage is spread more evenly and is less noticeable.

Better Health and Fatter Pocketbook

Dust and dander tend to collect under and behind furniture. Every time you rearrange your furniture, it creates a convenient opportunity for some quick spring cleaning. If you have carpeting or rugs, they act as giant air filters, reducing the allergens in the air you breathe, and consequently, they should be professionally cleaned on a regular basis. Many of our clients time their furniture rearranging with our services twice per year. Their most used furniture is placed according to the season, maximizing warmth coming in from a sunny window or near a fireplace in the fall or winter and taking advantage of coolness near an air conditioner vent or open window in the spring or summer.

Overcoming Limitations

If the room size limits your ability to rearrange furniture, consider reducing how much furniture you have or replacing large pieces with smaller ones. An overcrowded room feels oppressive. The more walking space there is, as well as the more space there is between walls and furniture, the less confining a room will feel. Having less furniture or smaller size furniture can really help.

If, for whatever reason, you can’t rearrange your room entirely, consider adjusting the furniture by a few inches every few months to avoid excessive compression of the carpet and rug fibers.


By Sharon Koehler. This article is one of a series of articles written and published on behalf of Surface Care PROS Partners.

Central Vacuum Systems

Should You Invest in a Central Vacuum System?

As we know, vacuuming our home’s floor surfaces is the first line of defense against dirt and grime building up. This buildup can make floors look dirty and dingy or it can cause the floors and carpet fibers to be damaged. Vacuuming is essential to floor surface care.

Today’s homes often have mixed floor surfaces such as: hardwood, area rugs, tile, and wall-to-wall carpet. Not all vacuum cleaners are meant to clean all surfaces. You may end up having to buy more than one type of vacuum cleaner to take care of your surfaces. Plus, if you have a multi-level home with stairs, you either have to buy multiple vacuums for each level or you have to lug vacuums up and down the stairs to get all your surfaces clean. What a drag. If this does not appeal to you, think about installing a central vacuum system in your home. Let’s take a look at some the pros and cons of central vacuum systems.

Pros:

  • Warranties: Most systems come with multiyear warranties, some up to 10 years. Whereas, most portable vacuums, even the high-end ones come with a one-year warranty.
    Suction: Since the motors on central vacuum systems are so much larger, they have much more powerful suction, enabling you to pick up more dirt and debris.
  • Convenience: Instead of lugging a heavy, portable vacuum around, with a central vacuum system, you only need to carry the hose AND if you get a retractable hose option at your ports, you won’t even need to carry that.
  • Options: There are tool options for all your flooring needs and there are options for the systems such as wet/dry to help with spills, HEPA filters, retractable hoses, and baseboard dust slots to eliminate the need for dustpans. You can sweep directly into the slot.
  • Noise: Regular, mobile vacuums have a noise rating of 70-85 decibels, approximately the sound level of a lawn mower. It annoys kids and pets alike. A central vac system goes to roughly 60 decibels or about the same as a window air conditioner. Quieter and much less annoying.
  • Air Quality: Since the suction is superior to that of a standard vacuum cleaner, it eliminates more allergens and dust. Plus, it sucks these things out of your immediate living area, and you only have to empty the dust container a few times a year reducing your exposure to these irritants.

Cons:

  • Expense: The initial outlay for a system, depending on options, location, and brand can be upwards of several thousand dollars.
  • Energy: Central vacuum systems have larger motors and more suction power, so they require more energy than smaller, portable vacuum cleaners.
  • Storage: If you don’t get retractable hose ports, hoses can be up to thirty feet long, taking up much more space in a closet than a regular vacuum cleaner.
  • Suction: While a central vacuum system has more powerful suction than a standard vacuum, that can be a problem. If you are not careful, the extra power can accidentally suck things up you wanted to keep. Or it can suck up items too big for the system causing clogs or other malfunctions.
  • Potential Damages: Hoses can reach up to thirty feet enabling multi- room cleaning. However, unless you are careful, hoses can rub on walls and furniture causing wear, scuffs, and other damage.
  • Repairs: If something does go wrong, repairs can be costly, especially if the issue is behind the walls of your home. Some brands require that only certified, licensed technicians work on your system, or the warranty may be voided.

Whether you decide to invest in a central vacuum system or not, vacuuming alone should only be considered the first line of defense against carpet wear. While vacuuming does help prevent premature wear and damage, it does not replace the routine, deep cleaning performed by professionals. The three-pronged approach of: taking care of spills and stains immediately, proper vacuuming and routine deep cleaning is the best way to keep your carpets and rugs looking their best for years to come.


By Sharon Koehler. This article is one of a series of articles written and published on behalf of Surface Care PROS Partners.

Cultured Marble vs Real Marble

Are cultured marble and real marble the same thing?

Cultured marble and real marble sound the same, but they are two completely different things. Each one is created differently. They are fabricated differently, and they are installed, cared for, and repaired differently. The only real similarity is that they both have marble in their name.

What is cultured marble?

Cultured marble is a man-made product that contains dyes, marble dust and resin. After it’s made, it gets coated with a high-shine, clear gel to protect it. Because of the way it’s made, cultured marble is more closely related to Corian or Hi-Macs solid surfaces. It is often called faux marble.

What is real marble?

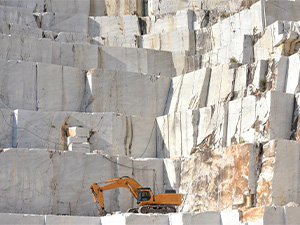
Real marble is created by mother nature. Man has nothing to do with it. What man does is quarry it out of the earth, cut it, polish it, and install it in different projects.

How can I tell the difference between cultured and real marble?

  • Cultured marble projects have integrated sinks and backsplashes. (All one-piece design). Real marble projects have separate backsplash pieces and separate sinks.
  • Cultured marble can be manipulated to mimic real marble but will have a flat appearance that lacks depth. The protective gloss can even make it appear like plastic. Real marble will have depth to its look.
  • Cultured marble, made in a factory with a formula, has a consistent look, piece after piece. No two pieces of real marble are identical.
  • Cultured marble is considered more of a budget friendly product while real marble is considered more of a luxury item.
  • Cultured marble never needs sealing. Real marble does.
  • The protective coating on cultured marble gives it a high shine. Marble may have a high shine, but it can also have a dull, matte finish, giving it a softer look.

While cultured marble and real marble have vast differences, they can both be cleaned and maintained in basically the same way, with non-abrasive, pH-neutral cleaners. Look for cleaners that specifically state they are for cleaning cultured marble or real marble, depending on what you have. Both materials can be etched by harsh, abrasive chemicals and cleaning products. Both can also sustain chips, scratches, and cracks. Even though they can both be damaged in similar ways, the tools and processes used to fix them are different.

Can cultured marble be repaired?

Most damage on cultured marble can be repaired if the gel coat has not been penetrated or removed.

  • Light scratches can be addressed with automotive buffing compound.
  • Cracks and chips can be repaired with a retail repair kit specifically designed for cultured marble. It may be best, however, to let a professional stone restoration contractor handle such damage for the best possible results.
  • Since the gel coat on cultured marble is non-porous, deep stains don’t normally happen. Usually, stains can be dealt with by using a cultured marble cleaner or denatured alcohol and a non-abrasive pad.
  • Deep scratches or large chips and cracks may require a professional restoration technician or may require replacement altogether.
  • If the gel coat has been worn off, damaged or removed, it is also best to call a professional restoration contractor.

Can real marble be repaired?

Under most circumstances, real marble can be repaired to new or almost new condition.

  • Light scratches can be minimized by using a dry, soft buffing cloth in a circular motion after cleaning the area with warm, soapy water.
  • Cracks and chips can be repaired with a retail repair kit specifically designed for real marble or natural stone. It may be best, however, to let a professional stone restoration contractor handle such damage for the best possible results.
  • Stains can usually be drawn out with a poultice. Once you identify the stain, look at the Stain Care App on our website under the Resources tab to see what sort of poultice you need.
  • Deep scratches, set-in stains, etch marks or large chips and cracks may require a professional restoration technician.
  • If your marble needs to be resealed, it is best to call a professional.

While cultured marble and real marble are vastly different surfaces, they each have the potential to enhance the look of different projects in your home. The key is to realize which one you have so you can properly clean and maintain it, keeping it beautiful for years to come.


By Sharon Koehler. This article is one of a series of articles written and published on behalf of Surface Care PROS Partners.

Cleaning Synthetic Carpets and Rugs

How to Keep Your Synthetic Carpets and Rugs Clean, Fresh, and Inviting

No matter what type of synthetic fiber your carpets and rugs are, proper cleaning and care not only enhances the look of your carpet but can help prevent premature wear. All synthetic fiber is not created the same, and each material requires its own unique cleaning methods, even when it comes to vacuuming. Let’s look at how to keep your synthetic carpets and rugs clean and looking good.

Nylon Carpets and Rugs

Nylon is the most popular fiber for synthetic carpets and rugs. It is estimated that two thirds of synthetic carpets sold are nylon. It is stain resistant, static free, and retains its pile height extremely well. However, you need to use proper care to help it maintain these qualities.

General Care:
  • Vacuum at a minimum, weekly, and more often in high traffic areas.
  • Use a soft bristle beater bar in the vacuum. Hard bristles can cause fuzzing.
  • For area rugs, flip them over and vacuum the underside as well.

It is recommended that you get your nylon carpet professionally cleaned at least every year.

Spill and Stain Care:
  • Immediately blot up or remove as much of the stain or spill as possible, using a clean white cloth. You can also use a wet dry vac.
  • Wet but do not saturate the area with warm, not hot water.
  • Blot up excess moisture until the stain is removed.
  • If the stain persists or reappears, use a mixture of ¼ teaspoon dish detergent and 1 cup warm water. Rinse with warm water and blot. Repeat until all the detergent is gone.
  • Area rugs can be machine washed on the gentle cycle at home or in a large commercial machine at your local laundry mat.

Polyester Carpets and Rugs

Polyester rugs are affordable, stain resistant and great in high-spill areas. However, dirt and debris can damage the carpet fibers, so routine carpet maintenance is a must.

General Care:
  • If the rug is small enough, shake it outside before you vacuum.
  • Vacuum at a minimum, weekly, and 3-4 times a week in high-traffic areas.
  • If possible, vacuum both sides of the rug.
  • For shag rugs, disable or remove the beater bar and vacuum with suction only.
  • It is recommended that you get your polyester carpet deep cleaned by professionals yearly.
Spill and Stain Care:
  • Immediately blot up or remove as much of the spot or spill as possible with a white towel or paper towels.
  • Put a few drops of dish detergent in a cup of cool water and blot on the spot with a clean sponge. Don’t rub.
  • Clean the sponge and repeat until the stain is gone.
  • Rinse the area with cool water until the soap is all gone.
  • Let dry completely before you use it again.
  • Area rugs can be machine washed on the cold water cycle at home or in a large commercial machine at your local laundry mat.

Olefin Carpets and Rugs

Olefin carpets are fade and moisture resistant. They also dry very quickly after cleaning due to their moisture and stain resistance. One thing to keep in mind is olefin fiber has a low melting point starting at 225 degrees, so be careful with heat treatments.

General Care:
  • Vacuum at a minimum, weekly, but more frequently is preferred.
  • If possible, vacuum both sides of the rug.
  • Steam cleaning is not recommended for Olefin rugs. It can discolor or damage the fibers.
  • Dry cleaning is fine for these types of rugs. There are DIY kits on the market, or you can contact us.
Spill and Stain Care:
  • Immediately blot up or remove as much of the spot or spill as possible, using a clean white cloth.
  • Spray the area with a commercial carpet cleaner and let it dry. Then vacuum the area.
  • Always blot with a clean, white cloth and allow the rug to dry completely before walking on it or brushing up the pile.
  • Olefin area rugs can be machine washed on the cool water cycle at home or in a large commercial machine at your local laundry mat.
  • If the spot or spill is oil based, you may need the help of a professional, as oil-based material is very difficult to remove from Olefin fiber.

Triexta Carpets and Rugs

Triexta is still a rather new material for carpets and rugs. When seeking a carpet cleaning professional, be sure to ask if they are knowledgeable about Triexta.

General Care:
  • Vacuum weekly, but in high traffic areas, more frequently.
  • Set the beater bar at high height to help prevent fuzzing of the fiber.
  • Get the carpet professionally cleaned every 12-18 months.
Spill and Stain care:
  • Blot immediately with white paper towels.
  • Do not scrub, as this may cause fuzzing.
  • Spray with cold water and blot from the outside to the middle of the stain or spill.
  • Repeat until the stain is gone.
  • Press dry by layering white paper towels over the area and pressing in place with a flat weight until dry.
  • If the spill area is large, you can use a wet/dry vac.

Wall-to-wall carpets and area rugs can add so much to the décor and warmth of your home.


By Sharon Koehler. This article is one of a series of articles written and published on behalf of Surface Care PROS Partners.

Natural Stone – Fissures vs Cracks

Fissures vs Cracks

Natural stone, granite, marble, quartzite, etc., is made by, well, nature. Man has nothing to do with it. We just quarry it, sell it, and put it where clients want it. Then we ooh and ahh and remark how pretty it looks. Yes, it is pretty and it does deserve our admiration, but it can have natural, unique occurrences in it called fissures. Fissures can give your stone project that one-of-a-kind look that people love. Natural stone can also have cracks. Cracks can be natural or unnatural occurrences. Fissures and cracks look remarkably similar, but they are not the same thing. Here we will explore the differences between them and help you know what to do about them.

What are fissures?

Fissures are defined as: A long, narrow crack or opening in the face of a rock. Fissures are often filled with minerals of a different type from those in the surrounding rock.

Basically, what this means, is that fissures are natural occurrences in the stone and normally they don’t affect the integrity of the stone itself. They are not considered to be flaws or defects. Fissures are not normally localized in stone slabs. They are usually spread out through the entire piece.

What are cracks?

Cracks are defined as: A line on the surface of granite, marble or another natural stone that has split without breaking into separate parts.

Cracks usually happen when the stone has stress or trauma applied to it, and they can run almost all the way through the depth of the stone. However, by the time the stone gets to the point of installation, cracks have generally been addressed, usually by the fabricator. As a general rule, cracks are mostly confined to one area of a slab.

How can you tell the difference between fissures and cracks?

One way is to rub your finger or fingernail over the area in question. If it is smooth, then it is a fissure. If your finger feels a bump or your fingernail gets caught or drags over the area because it’s not level, then it is a crack.

Another way to tell is to shine a light on the stone and look across the plane of the surface. A crack will have two points of reflection, one for each plane, but a fissure will only have one point of reflection as it is an even surface.

What can be done about fissures?

Nothing. They are a natural part of the stone and are not considered flaws or defects. You can just admire them for making your stone project unique.

What can be done about cracks?

If you see a crack while the stone is still at the distributor or wholesaler, think about staying away from it, no matter how much you love it. There is no guarantee that the stone will survive transport to the fabricator, and there is no guarantee that the fabricator will be able to cut around it.

If you discover a crack in the stone at the fabricator’s shop, find out if they can cut around it. If not, ask them if it is severe enough to compromise the integrity of the stone. If they say yes, then pick something else. If the fabricator says it’s minor, ask them how they intend to fix it. Then it is up to you whether you accept it or pick something else.

What if a crack forms after install?

If you notice a crack after install, you will want to have someone look at it right away. Left unattended, it could get worse. If your project was recently put in, you may want to give the business that installed it a call. They won’t warranty the stone itself, because Mother Nature made it, but a good company will warranty their own workmanship. If it has been a while or you know you did something to cause the crack, even accidently, you should contact your stone and tile restoration and repair technician. Your restoration or repair technician will know exactly what the issue is and how to repair it. They deal with these types of occurrences on a regular basis.

Natural stone is beautiful, and the projects created with it can take your breath away. In spite of its natural beauty and versatility, it is not a perfect product. We need to learn how to appreciate and work with its occasional imperfections and flaws. After all, those unique imperfections can help give your stone projects the “WOW” factor everyone loves.


By Sharon Koehler. This article is one of a series of articles written and published on behalf of Surface Care PROS Partners.

Synthetic Fibers for Carpets and Area Rugs

Synthetic Carpet Fibers

Carpet and area rugs can enhance the décor of any space, but not all floor covering is made the same. Carpet and area rug materials generally fall into 2 different categories: natural fiber and synthetic fiber. They each have their pros and cons. Make sure you get the one that is right for your needs. Here we will explore synthetic floor covering.

What is synthetic carpet fiber?

Synthetic carpet fiber is created in a man-made manufacturing process. It is not as eco-friendly as natural fiber in either its creation or the manufacturing process. Synthetic carpet makes up the biggest percentage of wall-to-wall carpeting. It is much more stain and mold resistant than natural fiber carpet, making it great for both offices and homes.

What types of synthetic fiber are used in carpet?

There are 4 main types of synthetic fiber for carpets and rugs: Nylon, Polyester, Olefin and Triexta.

Nylon

Nylon is the most well known of the synthetic fiber carpets. It’s strong and resists “crushing,” making it great for high traffic areas. Nylon does have staining issues, but that can be minimized by making sure it is protected with a stain treatment. Most nylon carpeting is pretreated with stain protection, but it never hurts to double check. Nylon is great for wall-to-wall projects.

Polyester

Polyester has gotten a bad reputation in the past for not being as durable or strong as nylon, but with the advent of new technology, polyester is making great strides in that area. Polyester also has better stain resistance than nylon. Some polyester carpeting is now made with recycled material, making it a bit more eco-friendly to make, but the actual carpet itself is not recyclable. Polyester tends to have a lower price point than nylon. It does resist fading and is softer than its nylon counterpart. It is great for wall-to-wall applications.

Olefin

Olefin has a look that is similar to wool, in a manmade sort of way. As synthetics go, Olefin is considered to be inferior, as far as strength and durability are concerned. Consequently, it is considered by many to be a contractor- grade item. Before you decide against it, it should be mentioned that Olefin is good in low-traffic areas, and it is very fade and stain resistant. Olefin does not absorb liquid, making spill cleanup much easier. Possible uses would be a guest room, outdoor carpet, or basements. It is generally not recommended for wall-to-wall projects in high traffic rooms.

Triexta

Triexta has been around for just a little over a decade. It is a relative newcomer to an industry that has been around for eons. Although similar to polyester, it is softer and resists crushing better than polyester. Triexta is resistant to staining, and most water-based spills can be taken care of with cold water. Even though it is a synthetic fiber, part of the manufacturing process uses corn glucose (sugar), making it just a bit more on the eco-friendly side. The biggest drawback to Triexta is that it is relatively new on the market, and its longevity, while looking promising, is unknown at this time.

Off-gassing

All synthetic carpet off-gasses when first installed, which means that your new carpet may smell when you first get it. The smell will go away in a few days to a week. (Triexta gives off less smell due to being partially made with corn glucose.) Off-gassing shouldn’t be a reason to not get synthetic carpet. Lots of other things off-gas such as: cabinets, new furniture, cleaners, cosmetics, and a host of other items.

Carpets and area rugs can be a big investment. If you are interested in a particular material, make sure you are clear on the pros and cons of each type so that you find the floor covering that is perfect for you, your budget, and your home.


By Sharon Koehler. This article is one of a series of articles written and published on behalf of Surface Care PROS Partners.

Why is Caulk So Important in Your Kitchen?

Countertop Caulking

One of the biggest investments in a home is the kitchen. The right flooring, along with the paint, cabinets, appliances, and countertops can result in a hefty price tag. And yet, one of the smallest and easiest things to fix can be the cause of costly damage to your investment. You need to fix those cracks and gaps in your kitchen caulk.

When your stone countertop was installed, several areas were caulked. The bottom of the backsplash where it meets the countertop. The top of the backsplash where it meets the wall or tile. The gap between the sink and countertop, and the seams where two pieces of countertop come together. If you don’t have a backsplash, then caulk was used to fill in the gap between the countertop and wall.

Why does my countertop need caulking?

  • It looks better than leaving a raw edge.
  • It looks better than having a noticeable gap.
  • It’s an extra step to help hold the parts and pieces still.
  • Filling the gaps helps to prevent water and other spills from running behind or through your countertops to your walls and cabinets.

What causes caulk to crack and gap?

  • If your home is new construction, settling may be the reason you are seeing cracks or gaps in your caulk lines.
  • Change of the seasons is another culprit, especially if your countertop rests on an outside wall. Cabinets and walls shrink and swell with seasonal changes, and heat and humidity.
  • Maybe your cabinets were not level, square, and plum when the countertops were installed so there is undue tension on the countertop causing it to minutely shift.
  • Overscrubbing can also be an issue, especially since latex caulk can get moldy.
  • Normal wear and tear can be a key factor in causing gaps and cracks, as well.

What kind of damage can happen?

No matter how it happened, once you see those cracks and gaps, you should have them taken care of promptly to prevent any type of cabinet or wall damage. Gaps in the seam between two pieces of stone countertop can allow water or other liquids to run into the cabinets below. The same is true of gaps in the caulking material that helps adhere your sink to your countertop. Leaking water can damage your cabinets. Gaps and cracks at the backsplash can allow water and other liquids to seep through and run down your walls, damaging the drywall over time.

If you decide to take care of this yourself, be aware that different joints require different material.

  • The gap between the sink and countertop requires 100% silicone.
  • The joint at the bottom of the backsplash also needs 100% silicone.
  • If the stone meets a tile backsplash, you should use either 100% silicone or sanded color caulk to match the grout as closely as possible.
  • The gap at the top of the backsplash where it meets the drywall should have either 100% silicone or paintable caulk.
  • If the issue is between two pieces of countertop, a two-part epoxy, custom tinted to match the countertop color is needed.

Caulk is a little thing that most people tend to ignore. However, caulk can play a key role in protecting one of your biggest home investments: your kitchen. Make sure your caulking is in good condition. If your caulking needs to be redone, don’t put off taking care of it. If you aren’t exactly sure what you need to do, then give us a call. It’s best to take care of the small things now so they don’t become big problems later.


By Sharon Koehler. This article is one of a series of articles written and published on behalf of Surface Care PROS Partners.

Choices for Modern Kitchen Sinks

There was a time when cast iron was about the only choice for a kitchen sink. Those sinks were white, easy to chip and heavy. Then, stainless-steel sinks came along and became the go-to sinks. They came in a variety of styles like 50/50, 60/40, and one big bowl, but the color pallet didn’t exist. They were one color and if you did not get the sound buffer pads, they could be loud. Today, there are so many more choices.

Fireclay

Fireclay sinks are clay and glaze fired together to make a durable, more scratch- resistant sink. They can be cleaned up with soap and water, but harsher chemicals can be used if needed.

Copper

Depending on the décor, copper sinks can be polished to a high shine, or they can be left with a dull finish. These sinks will develop a patina over time, and they clean up easily with
warm soap and water. Copper sinks will become the focal point of your kitchen.

Granite Composite Sinks

Granite composite sinks are some of the most popular sinks sold today. They are made from stone powder and adhesives. Granite composite sinks are scratch and heat resistant plus, they come in a wide variety of styles and colors. Tip: Get the matching strainer if they offer it.

Glass

Tempered glass sinks come in a variety of sizes and colors. They are very stain resistant but do show water spots easily. A protective mat is recommended, and you should not pour boiling water into them.

Concrete

Concrete sinks are generally custom made and need additional support due to their weight. They can be perfect for a sleek, modern kitchen or a rustic looking décor. Concrete sinks are exceptionally durable.

Bronze

Bronze sinks are usually crafted by hand and can be costly. Like copper, they will develop a patina over time, but their finish starts out darker than copper. They scratch fairly easily, but they will be a showpiece in your kitchen.

Bamboo

Bamboo sinks add warmth to the décor, and they are durable. Obviously, the color pallet is limited, but each sink does have variations that make each one unique. Bamboo sinks do require a bit more maintenance since they need to be sealed from time to time, and you cannot use harsh chemicals to clean them.

(New) Cast Iron

Obviously, the cast iron itself is still the same. These sinks are still heavy and require added support, but they are available in so many more varied sizes and colors now. It shouldn’t be a problem finding one to fit your décor. They are very durable and can last a lifetime.

(New) Stainless Steel

Up until recently the biggest drawback to stainless steel sinks was the color pallet. They had one color, but, just as with cast iron sinks, technology has changed this issue. Stainless steel sinks now also come in colors like gold, black, bronze, blue, and rose.

There are many new types of sinks on the market today, more than mentioned here. All have their pros and cons. But, no matter what your décor or your needs, there will be one out there exactly right for your kitchen.


By Sharon Koehler. This article is one of a series of articles written and published on behalf of Surface Care PROS Partners.

How To Take Care of Natural Fiber Floor Coverings

Cleaning Natural Fiber Rugs and Carpets

Even though natural fiber rugs and carpets are “natural,” they are made from different materials. While they do have some similarities, they need to be cleaned differently. In this article, you will learn some tips on how to take care of your natural fiber floor coverings.

There are several things you can do to all natural fiber rugs to help keep them clean:
  • Vacuum regularly. This keeps dirt from getting ground into the carpet.
  • Treat spills and stains at once. This helps to keep the stain from setting. Never rub or scrub spills. Blot only.
  • Try not to use store-bought stain removers. They may leave a film on your rug that can make it appear dull.
Before treating any spills or stains…

Always test any substance in an inconspicuous area first. If you see any problem, contact us and do not proceed.

Determine if the rug is colorfast, meaning that the dye will not run or fade when wet. If the carpet is wall to wall, find an inconspicuous spot like a closet and put a few drops of the cleaning solution on the carpet. Wait 5-10 seconds and then blot with a clean, white cloth, using a bit of pressure. If the cloth is clean, then the carpet is colorfast. If the cloth turns the color of the carpet, then the carpet is not colorfast, and you will need to call a professional. If you have an area rug, test a small spot on the edge the same way.

NOTE: Baking soda is a mildly abrasive alkaline substance. Baking soda’s abrasive properties can result in fiber damage and breakage with foot traffic if it is not completely removed from carpet, so, if you choose to use baking soda, be sure to thoroughly vacuum once the area is dry.

Wool Carpeting

Wool tends to be stain resistant, so it is fairly easy to keep clean. Vacuum weekly, and get it professionally cleaned yearly.

Treating stains and spills:
  • Identify the stain.
  • Spray the stain with warm water, but do not saturate.
  • Blot with a clean, white rag.
  • Start from the outside and work your way in.
  • If needed, use a soft bristle brush in a circular motion.
  • For a pet stain, use a 50/50 mix of white vinegar and water.
  • For a makeup stain, use a 50/50 mix of rubbing alcohol and water.
  • For wine spills, make a paste the consistency of peanut butter with baking soda and water, spread it on the stain, and vacuum thoroughly when dry.
  • For a crayon stain, you will need to call a professional.

Silk Rugs

To keep silk rugs looking good, vacuum weekly, and have them professionally cleaned every 6 months.

Treating stains and spills:
  • If possible, use a silk rug shampoo to treat stains or…
  • Make a white vinegar and baking soda paste the consistency of peanut butter, and let it sit on the stain for 30 minutes, then remove with a clean white cloth.
  • Let the rug air dry and then vacuum.

Cotton Rugs

Cotton rugs need to be vacuumed weekly, but occasionally, the rug needs to be turned over and vacuumed on the underside. Plus, the floor needs to be swept underneath.

Treating stains and spills:

If the rug is not colorfast, you can take it to be dry cleaned.

If the rug is colorfast:

  • Blot the stain with a clean, white cloth.
  • Dip another clean, white cloth in a mixture of mild soap and cool water, wringing out the excess.
  • Place the cloth on the stain for 10 minutes.
  • Blot with a clean, dry white cloth, and let the rug air dry.
  • If the stain is still visible, try again, but use a 50/50 mix of white vinegar and water.
  • If the stain is large, you can put the rug in the washing machine. If the rug is too big, you can take it to the laundromat and use a commercial washer.
  • Do not put a cotton rug in the dryer. Always let the rug air dry.

Jute, Sisal, Seagrass and Coir Rugs

These rugs need to be vacuumed weekly. An extra step, if possible, is to shake the rug outside first to loosen dirt, so the rug can be more easily vacuumed up.

Treating stains and spills:
  • Blot the stain with a clean, white rag.
  • Use a clean white microfiber cloth to sparingly apply a cleaner specifically made for natural carpet fibers or use a 50/50 mixture of white vinegar and water.
  • Blow dry with a hair dryer to prevent mold or mildew.
To clean the whole rug:
  • Shake the rug outside, and then vacuum.
  • Sprinkle dry carpet shampoo or baking soda on the whole rug.
  • Let sit for 2 – 3 hours, then vacuum.
  • Turn the rug over and repeat the process.
  • DO NOT steam clean or wet shampoo. This can cause mold and mildew, plus it can damage the fibers.

Carpets and area rugs can add style and warmth to any home. But, just like anything else, they need proper care to look their best and to keep your home warm and inviting. Download our free Carpet and Interior Textiles Care Guide under the Resources tab of this site for more information. Contact us if you have any specific questions about these tips on how to take care of your natural fiber floor coverings.


By Sharon Koehler. This article is one of a series of articles written and published on behalf of Surface Care PROS Partners.