Tips on Carpet Care for Pet Owners

CARPET CARE TIPS FOR PET OWNERS

Pets bring us joy and companionship, but they can also leave behind fur, odor, and unexpected accidents on your carpets. Keeping your carpet clean and fresh requires a proactive approach. Here are some essential tips to help pet owners keep spotless carpets.

Dealing with Pet Fur

Pet hair can quickly accumulate in carpets, making them look dirty and triggering allergies. To minimize fur buildup:

  • Vacuum regularly: Use a vacuum with a HEPA filter and a pet hair attachment to remove embedded fur. Aim to vacuum at least twice a week.
  • Use a rubber squeegee: Running a rubber squeegee over the carpet helps lift stubborn pet hair.
  • Groom your pet often: Regular brushing reduces shedding and keeps excess fur off your carpet.
  • For dogs – Invest in a comfortable pet bed so they don’t lay directly on the carpet.
  • For cats: Use a cat tree or platform. Cats like to be high, and they will spend less time on your carpet.

Eliminating Pet Odors

Pet odors can seep into carpet fibers and linger. To keep your home smelling fresh:

  • Sprinkle baking soda: Let it sit for 15-30 minutes before vacuuming to neutralize odors.
  • Use an enzyme-based cleaner: These break down pet odors at the molecular level rather than just masking them.
  • Ensure proper ventilation: Open windows and use air purifiers to improve indoor air quality.

Handling Pet Accidents

Accidents happen, but quick action prevents stains and lingering smells:

  • Blot don’t rub: Use a clean, white cloth to absorb as much liquid as possible.
  • Apply a pet-friendly stain remover: Look for enzymatic cleaners designed to break down urine, feces, or vomit stains.
  • Steam clean periodically: Deep cleaning with a pet-safe steam cleaner helps remove stubborn stains and bacteria.

When to Call a Professional Carpet Cleaner

While regular maintenance helps, professional carpet cleaning is necessary for deep-set stains, odors, and allergens. Consider hiring a professional if:

  • Stains persist despite home treatments.
  • Your carpet has a strong pet odor that won’t go away.
  • It’s been over six months since your last deep clean.

Professional cleaners use advanced equipment and pet-safe solutions to remove dirt, bacteria, and allergens more effectively than DIY methods. Many offer pet-specific treatments that help eliminate odors and restore carpets to their best condition.

By staying consistent with cleaning habits and scheduling professional cleanings when needed, pet owners can keep their carpets fresh and free from fur, odors, and stains—ensuring a clean and comfortable home for both pets and humans.


By Sharon Koehler. This article is one of a series of Caring For It™ articles written and published on behalf of Surface Care PRO Partners.

Ripping Out Your Carpet and Restoring Your Terrazzo Floors

Thinking About Ripping Out Your Carpet and Restoring Your Terrazzo Floors? Here’s What You Need to Know

If you’ve discovered terrazzo under your carpet, you’ve stumbled upon a treasure. Terrazzo floors, with their distinctive blend of colorful chips and smooth, glossy finish, can bring timeless beauty to your home. However, uncovering and restoring terrazzo isn’t as simple as yanking up the carpet—it requires careful handling to avoid damage.

Here’s what you need to know before you move forward with the restoration process.

Leave Tack Strip Removal to the Pros

One of the most important steps when removing carpet from terrazzo is dealing with the tack strips—the wooden strips with nails that hold the carpet in place. These strips are often nailed or screwed directly into the terrazzo. If they’re pulled out, they can take chunks of terrazzo with them, leaving behind holes and unsightly damage.

A professional will carefully cut the tack strips flush with the terrazzo surface to prevent damage. This method avoids unnecessary repairs and preserves the integrity of the floor.

Let the Experts Handle Adhesive Removal

In some cases, carpet padding may have been glued down, leaving behind sticky or hardened adhesive residue. Removing this residue requires the right tools and products to avoid etching or scratching the terrazzo surface. Your professional stone restoration contractor has specialized products and techniques to safely and effectively remove adhesive without harming the terrazzo.

Avoid Scratches and Chips

Scraping at residue with metal tools, abrasive pads, or harsh chemicals can cause scratches or even discoloration. Professionals know how to approach terrazzo with the care it requires, using gentle yet effective methods to ensure the surface remains intact and ready for restoration.

Prepare the Space for Restoration

Once the carpet is gone, your restoration team will take the necessary steps to repair, clean, and polish the terrazzo. Before they begin, make sure the room is cleared of furniture and valuables. Restoration work can sometimes produce dust, so you may also want to cover nearby areas and check that air vents are protected.

Terrazzo Repairs Require Expertise

If there are chips, cracks, or holes, your restoration contractor will repair them using materials that match the terrazzo’s color and composition. This process requires precision to ensure the repairs blend seamlessly with the surrounding surface. Attempting to patch these areas yourself with general fillers or patching kits can lead to mismatched, obvious repairs.

Trust the Process

Restoring terrazzo is a multi-step process involving deep cleaning, grinding to remove imperfections, and polishing to achieve that signature high-gloss finish. It may take time, but the result will be stunning, with a floor that looks brand new and shines for years to come.

Ask for Maintenance Recommendations

Once your terrazzo has been restored, your contractor will provide tips for keeping it in pristine condition. Most terrazzo floors do best with a pH-neutral cleaner and regular sweeping or dust mopping to prevent grit from dulling the surface.

Restoring terrazzo after carpet removal can transform your home and reveal a beautiful, durable surface. By hiring a professional to handle every step—from cutting tack strips flush to removing adhesive and polishing—you can avoid costly mistakes and ensure your floors look their absolute best.

If you’ve uncovered terrazzo and are ready to breathe new life into it, reach out to your stone PRO to guide you through the process and bring out the full potential of your floors.


By Fred Hueston. This article is one of a series of articles written and published on behalf of Surface Care PRO Partners.
Help, I Have Fleas in my Carpet!

DIY TO ERADICATE CARPET FLEAS

Fleas, those tiny, agile insects notorious for tormenting pets and humans alike, often find their way into our living spaces, particularly carpets and other fabric surfaces such as upholstery, pillows, and curtains.

They don’t just come in on pets. They can hitch rides on just about anything (pant legs, socks, delivered packages, other insects, and rodents) so don’t think you are safe just because you don’t have pets.

The thing is, once they get it in, it is exceedingly difficult to get them out. They are small and hard to see, plus they multiply quickly. Once inside, they quickly infest carpets, where they find an ideal environment for breeding and feeding. Carpets provide a warm and cozy habitat, offering shelter and easy access to potential hosts for blood meals. Fleas lay their eggs in the carpet fibers, and the larvae, pupae, and adult fleas all contribute to the infestation cycle, making it hard to eliminate them without flea specific interventions.

Are there DIY methods to eradicate fleas? Yes, there are.

  • If you have a pet, treat it: Get it bathed and groomed then treat it with a flea killing topical or ingestible. Check with your vet for their recommendations.
  • Wash everything: Wash all fabric surfaces including curtains, pillowcases, blankets, and throws that are in the infested area. Use the hottest water possible that won’t damage your fabrics. If something is dry clean only, take it to the cleaners. Don’t put them back out until after the infestation is gone.
  • Vacuum often and thoroughly: Don’t just vacuum in the same direction, change direction, and use multiple passes. Move furniture to vacuum underneath. If the vacuum cleaner has a bag, trash it after every use. If it has a dirt cup or receptacle, empty it outside in the trash.
  • Over the counter treatments: There are flea specific sprays, powders, and foggers you can use to fight a flea infestation. Follow the directions and know that you may have to treat the situation multiple times.
  • If all else fails, call a professional pest company. Let them deal with the flea problem. It’s their job.
  • Professional carpet cleaners: After the infestation is gone, call a carpet cleaning professional. All those chemicals in the flea treatments are now in your carpets and rugs. They can trap dirt and other contaminants in your carpets causing them to look dirty, smell bad, or become damaged. Getting them professionally cleaned is the best way to prevent these things from happening.

Fleas are annoying little pests that love your carpets and rugs. They  want to make them their home. If you let them do that, they will multiply out of control and make you and your pets miserable. Fighting them off is your best bet for a safe, clean, pest free home.


By Sharon Koehler. This article is one of a series of articles written and published on behalf of Surface Care PRO Partners.

Why Should I Have My Hardwood Professionally Cleaned?

Hardwood Floors Professional Cleaning

Having hardwood floors is a beautiful investment in your home. Having them professionally cleaned periodically helps maximize their beauty and life.

While regular sweeping and mopping can help keep them looking good, there are many good reasons why you should consider having your hardwood floors professionally cleaned. Here are four key reasons why professional cleaning is worth the investment:

1. Deep Cleaning for Long-Term Care

Over time, dirt, dust, and debris accumulate in the cracks and grooves of your hardwood floors. Regular cleaning often only removes surface dirt, but a professional cleaning service can provide a deep, thorough cleaning that reaches areas you might miss. Professionals use specialized equipment and cleaning agents designed for hardwood, which helps break down tough stains and grime without damaging the wood. This deep cleaning helps preserve the wood’s finish and extends its life, ensuring your floors remain in excellent condition for years to come.

2. Protects the Finish

The finish on hardwood floors is essential for protecting the wood from moisture, dirt, and wear. Routine cleaning can cause wear on the finish, especially if harsh chemicals or incorrect cleaning tools are used. Professionals use the right products and techniques to gently remove dirt while preserving the protective layer of your floor. A proper cleaning can even improve the shine and luster of the finish, keeping your floors looking their best.

3. Prevents Allergens and Health Issues

Dust, dirt, pet dander, and other allergens can accumulate in the gaps between your floorboards and are often difficult to remove with standard cleaning. Professional cleaning removes these allergens effectively, improving indoor air quality. For households with pets or allergy sufferers, a deep cleaning can help reduce symptoms related to dust mites, mold, or pollen, creating a healthier living environment. This can be especially important in homes with young children or individuals with respiratory conditions.

4. Saves Time and Effort

Cleaning hardwood floors is more than just a quick sweep and mop. Proper maintenance requires knowing the right techniques, tools, and products to use. By hiring professionals, you can save yourself time and effort while ensuring the job is done correctly. Professionals also have the knowledge to spot any potential issues with your flooring, such as water damage or wear spots, and can address them before they become serious problems.

Regular cleaning is important for the upkeep of hardwood floors. Professional cleaning offers a deeper, more thorough level of care that can protect your investment, improve the health of your home, and save you time in the long run.


By Sharon Koehler. This article is one of a series of articles written and published on behalf of Surface Care PRO Partners.
Caring for Soapstone

SOAPSTONE CARE TIPS

Soapstone countertops are prized for their natural beauty, durability, and unique appearance, but they require specific care to keep their looks and functionality.

Here’s a comprehensive guide on how to care for your soapstone countertops:

Daily Cleaning

For routine cleaning, simply use a soft cloth or sponge with mild dish soap and warm water. Avoid using abrasive cleaners or scouring pads, as they can scratch the surface. Soapstone is non-porous, so it is naturally resistant to stains and bacteria, making everyday cleaning a breeze.

Regular Oiling/Waxing

One of the distinct characteristics of soapstone is its darkening over time. To ensure an even, rich color, apply mineral oil or soapstone wax periodically. Start by cleaning the surface thoroughly. Once dry, apply a small amount of mineral oil or wax using a soft cloth. Spread the oil/wax evenly across the countertop, let it sit for about 30 minutes, then wipe off any excess with a clean cloth. Initially, you may need to repeat this process every few weeks. Over time, as the soapstone patinas, the frequency will reduce to a few times a year.

Handling Stains and Scratches

While soapstone is dense and less prone to staining, oil-based substances can darken the stone temporarily. For deeper cleaning, a gentle soap and water solution will usually suffice. If scratches occur, they can often be sanded out with fine-grit sandpaper (e.g., 120-grit, followed by 220-grit). After sanding, reapply mineral oil or wax to blend the repair with the rest of the surface.

Avoiding Damage

Despite its durability, soapstone is softer than some other countertop materials. To prevent damage, use cutting boards when chopping food and trivets or hot pads under hot pots and pans. While it’s heat-resistant and can handle brief contact with hot items, prolonged exposure can cause cracking.

Long-Term Maintenance

Regular oiling/waxing and prompt attention to any damage are key to maintaining soapstone countertops. Over the years, the patina will develop, giving your countertops a unique and aged look. Embrace this natural evolution as part of the charm of soapstone.

Caring for soapstone countertops involves simple, regular maintenance and gentle handling. With proper care, these countertops can remain beautiful and functional for many years, adding a timeless elegance to your kitchen or bathroom.


By Sharon Koehler. This article is one of a series of articles written and published on behalf of Surface Care PRO Partners.
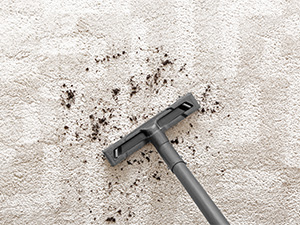
The Benefits of Grout Color Sealing

THE BENEFITS OF GROUT COLOR SEALING

Grout color sealing is a game-changer for maintaining and enhancing the beauty of tiled surfaces.

Whether in kitchens, bathrooms, or other areas, grout plays a crucial role in holding tiles together and adding to the visual appeal. However, grout is also porous, making it susceptible to staining, discoloration, and dirt accumulation over time. This is where grout color sealing offers significant advantages.

  1. Enhanced Appearance
    Grout color sealing revitalizes the look of your tiled surfaces. It allows homeowners to choose a new color or match the existing shade, ensuring a uniform and polished appearance. Discolored or uneven grout lines can make even the most expensive tile look unattractive. With color sealing, grout is transformed, giving the entire surface a fresh, clean appearance.
  2. Protection Against Stains and Dirt
    One of the primary benefits of grout color sealing is its ability to create a protective barrier. The sealant penetrates the grout and repels water, oils, and other contaminants. This prevents stains from seeping into the grout and keeps dirt and debris on the surface, making cleaning much easier.
  3. Long-Lasting Durability
    Color sealing enhances the durability of grout by reducing wear and tear. It strengthens the surface, making it more resistant to cracks, chipping, and other damage. Properly sealed grout can last for years, reducing the need for frequent repairs or replacements.
  4. Mold and Mildew Prevention
    In areas prone to moisture, such as bathrooms and kitchens, mold and mildew can become a problem. Grout color sealing creates a moisture-resistant layer, significantly reducing the likelihood of mold growth. This contributes to a healthier indoor environment.
  5. Easier Maintenance
    Cleaning color sealed grout is significantly easier compared to unsealed grout. With the protective layer in place, spills, dirt, and grime can be wiped away or mopped away. Routine maintenance requires less time and effort, saving homeowners both time and frustration.
  6. Cost-Effective Solution
    Grout color sealing is a cost-effective way to rejuvenate tiled surfaces without replacing the grout or tile. It offers a budget-friendly alternative that enhances the looks and functionality of your tiled surfaces, adding value to your home.

Grout color sealing is an investment that improves the appearance, durability, and cleanliness of tiled surfaces. By protecting grout from stains, moisture, and damage, it ensures long-lasting beauty and easier maintenance, making it an essential solution for homeowners and businesses alike.


By Sharon Koehler. This article is one of a series of articles written and published on behalf of Surface Care PRO Partners.

Should You Use a Stain Protectant on Your Carpet?

If you have carpet in your home, you are certainly aware that at times there are challenges when it comes to keeping it clean.

As you try to clean the spot where the dog dropped a piece of pizza he stole from the trash, or where your child dropped a glass of grape juice, you might be wondering if stain protectant aka stain guard is right for you and your carpet.

Let’s take a look…

Pros of Stain Protectant on Carpet

  1. Durability: Stain protectants create a barrier on the carpet fibers, making them more resistant to spills, dirt, and stains. This can significantly extend the life and looks of your carpet — proven in laboratory research!
  2. Ease of Cleaning: Carpets treated with stain protectants are much easier to clean. Spills can be wiped up quicker before they set into the fibers and create stains.
  3. Looks & Appeal: Regular use of stain protectants can keep carpets looking newer for longer. This is particularly beneficial in high-traffic areas where carpets are more prone to wear and staining.
  4. Allergy Reduction: By preventing dirt and allergens from settling deeply into the carpet fibers, making them easier to vacuum up, stain protectants can help create a healthier indoor environment.

 Cons of Stain Protectant on Carpet

  1. Cost: The initial application of stain protectants can be expensive, particularly for larger areas or if you choose an eco-friendly or non-toxic treatment. This can be a deterrent for some homeowners or businesses with tight budgets.
  2. Temporary Solution: Stain protectants are not permanent and may require reapplication every 6 to 12 months, depending on the amount of foot traffic and the type of carpet. This ongoing maintenance can add to the overall cost.
  3. Chemical Concerns: Some stain protectants have chemicals that can be harmful to the environment or to individuals with allergy or chemical sensitivities. Choosing an eco-friendly or non-toxic choice can ease this issue but might come at a higher price point.
  4. Effectiveness: The effectiveness of stain protectants can vary based on the type of carpet and the nature of the stain. Some protectants might not work as well on natural fibers like wool compared to synthetic fibers like nylon.

Stain protectants on carpets offer serious benefits, particularly in terms of durability, ease of cleaning, and maintaining appeal. However, the costs, need for reapplication, potential chemical concerns, and variable effectiveness are important considerations. Weighing these pros and cons can help in making an informed decision about whether or not to use a stain protectant on your carpet.


By Sharon Koehler. This article is one of a series of articles written and published on behalf of Surface Care PRO Partners.
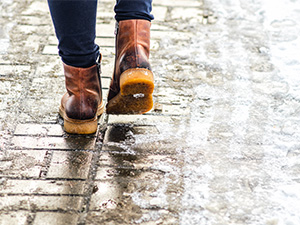
Natural Stone: Changing the Finish for a Whole New Look

Did you know that the finish on your stone can be changed? Whether you’re looking to tone down the high-gloss of a polished floor, elevate a matte finish to a mirror-like sheen, or explore decorative finishes, transforming your natural stone’s finish is an option to give your space a fresh, new look.

Natural stone stands in a league of its own among surface materials, offering an unparalleled blend of durability and adaptability. Unlike other surfaces that may need complete replacement when worn or damaged, natural stone can be restored to its original glory—even if it’s scratched, cracked, or chipped. But restoration is just the beginning. With natural stone, you have the unique opportunity to dramatically transform its appearance—for example, taking it from a high-polish finish to a sophisticated matte or satin sheen, or vice versa. This ability to refinish and reinvent makes natural stone not just a material choice, but a long-term investment in versatility and style.

Before diving into the possibilities, let’s briefly explore the most common stone finishes:

  1. Polished Finish: Achieved by grinding the stone surface with fine abrasives, this finish creates a reflective, high-gloss surface that highlights the stone’s natural colors and veining.
  2. Honed Finish: Offers a smooth, satin-like surface with less shine than polished stone, making it a popular choice for floors and countertops where subtle elegance is desired.
  3. Matte Finish: A non-reflective surface that gives a soft, natural look, ideal for creating a rustic or understated aesthetic.
  4. Decorative Finishes: Includes unique textures like leathered, flamed, brushed, or sandblasted finishes, each adding distinct character to the stone.

Changing Your Stone’s Finish

Thanks to advanced stone restoration techniques, you can transform your stone’s finish to suit your design vision or functional needs.

From Polished to Satin or Matte Finish

If you have a high-gloss polished floor and prefer a softer, understated look, changing to a satin or matte finish is a straightforward process:

  • Honing: Technicians use diamond abrasives to remove the polished layer, revealing a satin-like finish underneath.
  • Benefits: Satin or matte finishes are less reflective, making imperfections like scratches or smudges less visible. They also provide better slip resistance, which is ideal for high-traffic areas or homes with children and pets.

From Matte to High Polish

Perhaps you’ve fallen in love with the luxurious look of polished stone and want to elevate your existing matte finish. This transformation involves:

  • Polishing with Fine Abrasives: A combination of polishing compounds and diamond pads restores the stone to a high-gloss sheen, amplifying its natural colors and details.
  • Benefits: A polished finish is perfect for creating a luxurious ambiance and enhancing the vibrancy of the stone’s veining and patterns.

Is It Right for You?

Changing your stone’s finish can:

  • Refresh Your Space: A new finish can dramatically alter the look of your room, giving it a modern or classic feel.
  • Improve Functionality: Different finishes offer varying levels of slip resistance, maintenance requirements, and durability, allowing you to choose what best fits your lifestyle.
  • Highlight New Trends: As design trends evolve, a new finish can help keep your space looking current.

The Process

While some minor maintenance can be done by homeowners, altering a stone’s finish is a process that requires professional equipment and expertise. Your skilled stone restoration contractor will use specialized tools and techniques to ensure the surface is transformed without compromising the stone’s integrity.

Maintenance After a Finish Change

After altering your stone’s finish, remember, proper care will keep it looking beautiful:

  • Sealing: Depending on the stone type and finish, your technician may recommend sealing the surface to protect it from stains and moisture.
  • Cleaning: Use stone-safe, pH-neutral cleaners to avoid damaging the new finish.
  • Periodic Maintenance: Regular professional maintenance can help preserve the finish and extend the life of your stone.

Final Thoughts

Changing the finish on your natural stone is a powerful way to update your space without the expense of replacing the material. Whether you’re going from polished to satin, matte to high-gloss, or exploring decorative finishes, the possibilities are endless. With the help of your stone restoration PRO, you can achieve a look that aligns with your aesthetic and functional needs while enjoying the enduring beauty of natural stone.


By Deborah Shaw Nelson. This article is one of a series of articles written and published on behalf of Surface Care PRO Partners.

Carpet Rippling aka Buckling

Causes and Solutions for Carpet Rippling aka Buckling

Carpet rippling, also known as buckling or wrinkling, is a common issue that can occur after cleaning a carpet. This phenomenon can be alarming, but understanding the causes and solutions can help address the problem.

Causes of Carpet Rippling

  1. Moisture: During the cleaning process, the backing of the carpet can absorb moisture, leading to expansion and rippling.
  2. Improper Installation: One of the primary reasons carpets ripple after cleaning is incorrect installation. If the carpet was not installed correctly, rippling can occur. This includes issues such as insufficient stretching during installation or using the wrong type of padding. A carpet that is not tightly secured to the tack strips is more prone to shifting and wrinkling.
  3. Temperature and Humidity: Environmental factors like changes in temperature and humidity can cause the carpet fibers and backing to expand and contract. This is particularly true in regions with high humidity or if there are drastic changes in weather conditions.
  4. Heavy Furniture: Moving heavy furniture across the carpet can cause it to stretch and ripple. This is often worsened after cleaning when the carpet is still slightly damp and more pliable.

How Carpet Rippling Goes Away

  1. Material Properties: Carpets are designed to be flexible. The backing and fibers can expand when exposed to moisture and contract as they dry. This natural elasticity allows the carpet to return to its original shape once the moisture evaporates.
  2. Tension and Weight: The weight of the carpet itself and the tension applied during installation can help the carpet settle back into place. Over time, as the carpet dries and the room returns to a stable temperature and humidity, the ripples can diminish.
  3. Professional Intervention: Professional carpet cleaning and maintenance services are skilled at addressing rippling. Techniques such as hot water extraction are often followed by drying processes that minimize the risk of ripples.

Solutions to Carpet Rippling

  1. Proper Drying: Ensuring the carpet is thoroughly dried after cleaning can help prevent or reduce rippling. More often than not, once the carpet is dry after cleaning, the ripples will go away.
  2. Professional Stretching: The most effective solution for a continuously rippled carpet is to have it professionally re-stretched. Carpet stretching involves pulling the carpet tight and re-securing it to the tack strips along the edges. This process smooths out the ripples and restores the carpet to its original flat state.
  3. Quality Installation: Prevention is always better than cure. Ensuring the carpet is installed correctly in the first place, with adequate stretching and proper padding, can prevent future rippling. Professional installation often includes a guarantee against issues like buckling.
  4. Regular Maintenance: Regular vacuuming and avoiding excessive moisture can help keep the carpet’s integrity. When cleaning, it’s important to use the appropriate amount of water and ensure proper drying.

Carpet rippling after cleaning is a common but manageable issue. It is primarily caused by improper installation, moisture, and environmental factors. The rippling can go away naturally as the carpet dries and contracts back to its original shape. Professional re-stretching and ensuring proper installation and maintenance can help prevent and/or resolve this problem. Understanding the causes and solutions ensures carpets stay smooth, looking good, and long-lasting.


By Sharon Koehler. This article is one of a series of articles written and published on behalf of Surface Care PRO Partners.
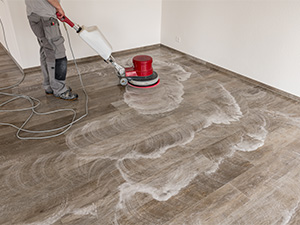
From Dull to Dazzling: What Stone Restoration Can Do

Natural stone surfaces, such as marble, granite, terrazzo, and limestone, are beautiful, durable, and timeless. However, even the toughest stones are subject to wear and tear over time. Foot traffic, spills, scratches, and exposure to the elements can leave stone surfaces looking dull, scratched, or stained. That’s where professional stone restoration comes in.

If your once-lustrous floors or countertops have lost their shine, stone restoration can bring them back to life. Let’s explore how this transformative process works and the stunning results it can achieve.

  1. What is Stone Restoration?

Stone restoration is a specialized process that involves cleaning, polishing, and repairing natural stone surfaces to restore them to their original appearance. Whether it’s countertops, floors, or walls, stone restoration can eliminate imperfections like scratches, stains, and etching, all while enhancing the stone’s natural beauty. Stone restoration can also include changing the finish from a high-polish to a satin finish, for example, and vice-versa.

It goes beyond regular cleaning or sealing – it’s about restoring the stone’s shine, texture, and structural integrity, often making it look better than new. This process is ideal for both residential and commercial spaces that rely on the timeless elegance of stone.

  1. Common Issues with Stone Surfaces

Over time, natural stone can suffer from a range of common problems that diminish its appearance and durability:

    • Dullness: Stone surfaces, especially high-traffic areas like floors, can lose their original shine. Foot traffic, dust, and everyday wear leave a dull finish.
    • Stains and Etching: Acidic substances like coffee, wine, or lemon juice can cause etching on stone surfaces, leaving visible marks or dull spots.
    • Scratches: Moving furniture, dropping heavy objects, or abrasive cleaning tools can leave scratches and gouges on the stone.
    • Chips and Cracks: Even strong stones like granite and marble can develop chips or cracks over time, compromising their appearance and function.

These issues not only detract from the aesthetics of the stone but can also lead to long-term damage if left untreated. Stone restoration addresses these problems at their root.

  1. The Stone Restoration Process: From Dull to Dazzling

Here’s a breakdown of the key steps in a typical stone restoration process:

    • Inspection and Assessment: A professional will evaluate the stone’s condition, looking for areas that need repair, polishing, or sealing. Understanding the type of stone and its specific issues is essential for selecting the right restoration method.
    • Deep Cleaning: Specialized cleaning solutions are used to remove embedded dirt, stains, and grime from the stone. This step prepares the surface for the polishing or repair work ahead.
    • Grinding and Honing: If the stone surface has deep scratches, etches, or unevenness, a professional will use diamond abrasives to grind and hone the stone. This removes the damaged outer layer and restores a smooth, uniform surface.
    • Polishing: After honing, the stone is polished to restore its natural shine. This process uses progressively finer abrasives to bring out the stone’s glossy, reflective surface.
    • Crack and Chip Repair: For damaged areas, fillers are used to repair cracks and chips, blending them with the surrounding stone to create a seamless finish.
    • Sealing and Protection: To protect the newly restored surface, a professional will apply a high-quality sealer. This protects against future staining and helps maintain the stone’s glossy finish for years to come.
  1. Benefits of Professional Stone Restoration

Stone restoration offers more than just a visual upgrade – it provides several key benefits:

    • Enhanced Aesthetics: Restoration revitalizes the natural beauty of stone, bringing out its vibrant colors and intricate veining. A polished stone surface can dramatically enhance the overall look of a room.
    • Cost-Effective: Restoring stone is often far more affordable than replacing it. Professional restoration can make old, worn stone surfaces look brand new at a fraction of the cost of new installation.
    • Longevity: Stone restoration repairs minor damage and adds a protective layer, increasing the lifespan of your stone surfaces. This preventative care ensures that your stone remains strong and beautiful for years to come.
    • Increased Property Value: Restored stone surfaces can significantly improve the appeal of a home or business. Polished stone floors, countertops, and entryways create a luxurious impression that adds value to any space.
  1. Why You Should Hire a Professional Stone Restoration Company

While some cleaning and polishing tasks can be done at home, professional stone restoration requires specialized tools, knowledge, and experience. Hiring a professional stone restoration company ensures:

    • Expertise: Professionals understand the unique properties of each type of stone and can tailor the restoration process accordingly. They know how to achieve the best results without damaging the stone.
    • Advanced Tools: Stone restoration requires professional-grade equipment, including diamond abrasives and high-quality polishers that produce a flawless finish.
    • Time and Efficiency: A professional can complete the restoration process quickly and efficiently, minimizing disruption to your daily routine.
  1. When Should You Consider Stone Restoration?

If your stone surfaces look dull, stained, scratched, or chipped, it’s time to consider professional stone restoration. Regular maintenance such as sealing and cleaning can extend the time between restorations, but eventually, every stone surface benefits from a professional touch.

Conclusion

Stone restoration is a game-changer for anyone who wants to revive the beauty and longevity of their natural stone surfaces. From dull to dazzling, the transformation is remarkable, giving your floors, countertops, and other stone features a fresh, elegant look. If you want to enhance the appearance of your space while protecting your investment, professional stone restoration is the answer.


By Fred Hueston. This article is one of a series of articles written and published on behalf of Surface Care PRO Partners.