White Residue on Stone

If you have white residue on your stone, here are a few tips and tricks for identifying the cause and possibly removing it.

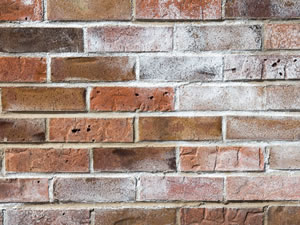
First, take a close look. If the substance can be scraped into shavings, it may be an accumulation of cosmetics, soaps, cleaning products, or hard water build up. If it is powdery, then it is likely efflorescence.

Accumulation of Cosmetics, Soaps, or Cleaning Products

Here’s a quick and easy test that can tell you whether the white residue on your stone is an accumulation of cosmetics, soaps, or cleaning products. Use a nylon pan scraper or a razor blade to carefully scrape the residue. If it can be easily removed, then you are dealing with dried products on the stone. The shavings will either be soapy when water is introduced or smeary or oily if it is conditioner, lotions, or hair treatments.

Hard Water Build Up

Like the test above, hard water deposits can be scraped away, but only with significantly more difficulty.

Efflorescence

The good news about efflorescence is that most of the time, it is a minor inconvenience that can be remedied without having to replace the stone. When moisture evaporates from the stone, it leaves behind salts and minerals. The stone will need to be periodically professionally cleaned, but eventually all the moisture will dissipate and the efflorescence problem will disappear.

The bad news is that every now and then, efflorescence is just the visible symptom of a much bigger problem underneath the stone — moisture in the substrate. An experienced stone restoration contractor can determine whether the stone can be restored or if it will have to be replaced.

Getting Rid of the Residue

If you want to attempt to remove product residue or hard water build up yourself, spray the stone with a pH-neutral, stone-safe cleaner and allow ample dwell time to soften the residue. Then using gentle pressure and a white Scotch Brite pad or a Dobie pad, clean the stone. If you see a difference, then you should be able to rinse and repeat this cleaning process until all the residue is removed.

For stubborn residue, you may be tempted to use a stronger cleaning agent or a heartier scrubbing pad, but doing so may do more harm than good. Calcium-based stones can etch if you use the wrong chemicals and the finish on soft stones can be scratched if the abrasive is too hard. It may be best to call a stone care professional rather than cleaning the stone yourself.

Removing a Stain Left By a Potted Plant

Question: I have a water ring where a plant was sitting on my hearthstone, which I believe is limestone. Is there any way to remove it? I appreciate your help.

Great question.

Simply put, the water ring you see is either a stain or an etch… or a combination thereof.

You must first determine if the “stain” is a true stain or an etch mark. A general rule of thumb when dealing with stains on natural stone is that a stain will always be darker than the stone. This means the stone has absorbed contaminants such as oil, grease, dirt, etc. An etch, on the other hand, will always be lighter than the stone. Etching occurs when an acidic substance comes in contact with a calcite based stone such as marble, travertine or limestone.

With potted plants that sit directly on natural stone, there are a couple of possibilities. If the ring you see is darker than the stone, then soiling has penetrated into the pores of the stone and left a stain. Moisture that accumulated under the pot may have contained acidic properties that could have reacted with the stone surface causing the stone to etch.

We first suggest cleaning the stone surface thoroughly with a heavy duty stone cleaner to clean deep down into the stone to remove any ground in dirt and soil. (Ask us for recommendations.) Rinse thoroughly, then let dry. If the ring is still there, then it’s time to address the stain or the etch or a combination of both.

Removing a stain (remember, a stain is always darker than the stone) will require the use of a poultice. A poultice is an easy and effective way to draw stains out of your stone. A poultice is essentially a cleaning/chemical agent to break down the stain and an absorbent material to draw it out. There are many ready-made poultices on the market today, but you can easily make one yourself. (https://stoneandtilepros.com/stain-removal-application).

If the stone happens to have any etching (damage that is lighter than the stone), it could be possible to restore this yourself. Minor etching that is smooth to the touch can possibly be removed with a marble polishing powder or compound IF (and this is important) the stone is light colored and polished. If the stone is honed, or if the etch mark is rough to the touch you will need to contact us to restore the surface of the stone.

TIP: Avoid placing potted plants directly on the stone surface. Condensation or moisture from spillage could result in a stain or etch.

Treating Oil Stains On Driveways and in Garages

If you have a driveway or garage, the odds are good you have at least once in your life encountered oil stains and discovered that they don’t hose off very well. So, how do you get the stain out?

One option we recommend is to use Stain Reaper by MB Stone Care (www.mbstonecare.com). It’s a favorite of many stone and concrete restoration professionals, because it works. Stain Reaper is a ready-to-use, low-odor paste poultice. It pulls deep-seated oil, dirt, harmful salts and other embedded stains out of sensitive masonry, even polished limestone and marble. No mixing is needed, and it is easy to use. It is safe for all natural stone.

d-Limonene

Another common treatment is to use d-Limonene, which is commonly used as maintenance cleaner for concrete pads, parking complexes, and airport runways. The oils and greases that drip from cars can be lifted off the concrete with the application of either straight d-Limonene or a water-diluted product. With straight d-Limonene, it is applied directly to the oil spots. The d-Limonene lifts the oil from the surface, so it can then be absorbed with a solid media such as kitty litter or oil absorbent pads. When using a water-diluted product, use the traditional mop-and-bucket method. Some d-Limonene/water products have also been used in small floor scrubbers for removing oil and forklift tire marks, and in larger units for taking up tire marks in garages.

Whichever option you choose, make sure you don’t ignore the safety requirements – you are, after all, working with chemicals. Follow the directions on the package carefully and don’t be discouraged if it takes more than one treatment. If the stain goes deep or has been sitting a while, it could take multiple applications.

Enzymes to Clean Up Oil Spills and Stains

The most recent advancement in the removal of oil stains from concrete involves using special single-celled microorganisms that thrive on crude oil and its derivatives, eating them up like candy. Enzymes and oxygen digest the oil and turn it into carbon dioxide and more microorganisms. When the food source (oil) is gone, the microorganisms die, leaving the concrete clean and oil-free. This is the same technology used to clean beaches and waterways after large oil spills. There are several of these types of products on the market today. Do a search on the web for ‘enzymes to clean up oil.’ You’ll find several options.

Consult A Professional

If you have neither time nor inclination to DIY, or you’d like some advice before you start, never hesitate to consult your restoration professional. We are always happy to answer your questions.

Cleaning New Carpets: Dispelling a Common Misconception

Cleaning Your New Carpet

You may have heard that it’s best to wait as long as possible before having new carpet professionally cleaned. People who offer this advice believe that the manufacturer’s carpet protection treatment will be washed away with a professional cleaning and that carpets, once cleaned, will start attracting more dirt.

How valid are these concerns? Should you wait as long as possible to have your new carpets cleaned? The definitive answer is no, and here’s why.

The Carpet Protective Sealants Concern

If you’ve ever owned a set of nonstick cookware, you know that dish soap and a sponge won’t ruin the coating. Similarly, protective sealants on your carpet are specially designed to easily withstand carpet cleaning processes.

The real concern about breakdown of the protection is abrasives. If you took steel wool and scouring powder to your nonstick cookware, it would be ruined. The same concept applies to your carpet. Built-up dirt, grime, and grit have an abrasive effect, not only on protective treatments, but worse, on the delicate carpet fibers. Allowing contaminants to settle in and remain is a sure way to ruin protective treatments and invite premature wear.

Does A Shampooed Carpet Attract More Dirt?

There could actually be an element of truth to this, but it’s not what you think. This is where professional, quality carpet cleaning vs. improper, cheap carpet cleaning makes a big difference. Less than reputable carpet cleaning services will often cut costs by using lower quality detergents that leave a sticky residue, or they may not take the time to thoroughly rinse cleaning solutions from the carpet. Contaminants adhere to what’s been left behind, and the carpet can quickly become even dirtier than it was prior to having it cleaned.

Quality vs. Cheap Really Makes a Difference

A truly professional carpet cleaning company uses high quality cleaning solutions, equipment, and techniques and rinses completely. The results are pristine carpets that are no more prone to soiling than if they were just installed.

Don’t Forget About the Manufacturer’s Warranty

Remember, if you have invested in new carpet, your manufacturer’s warranty has required care and cleaning obligations you must follow in order to maintain coverage. For example, Stainmaster’s carpet warranty states that professional carpet cleaning services should be “performed by a trained, qualified carpet care professional, at least as frequently as every 18 months since the date of purchase of your carpet. Failing to do so will void your warranty coverage.”

So, the definitive answer is…

Don’t delay professional carpet cleaning. Take care of your investment. As long as you choose your carpet cleaning service provider wisely, and have regularly scheduled cleaning done according to recommended guidelines, your brand new carpet will be clean and inviting for years to come.

To see recommended cleaning schedules and for more care tips, download our Carpet and Interior Textiles Care Guide.

Preventative Care Tips

Tips From the Pros for Protecting Natural Stone Floors and Countertops During Holiday Parties

Ah, ’tis the season…! Inviting friends and family to celebrate the holidays can be a joyous occasion filled with love, laughter — and that inevitable spill or stain on your natural stone floors, countertops, bar tops and other surfaces. Here are some precautionary tips from the PROS to prevent damage to your beautiful stone:

  • Spills from soda, coffee, fruit juice, and red wine can stain stone surfaces — even some granite, if they are not sealed properly. Wipe up spills immediately to inhibit staining. If a stain does develop, make a poultice. If etching occurs from acidic spills, give your stone technician a call.
  • Use trivets, doilies, tablecloth and runners to protect stone tables and countertops from hot plates and food spills.
  • Have coasters readily available on stone bar tops, tables and countertops, and encourage guests to use them.
  • Wax from brightly colored holiday candles can easily drip down and stain stone surfaces. Place a plate or placemat underneath candelabras, advent wreathes and menorahs to collect dripping wax.
  • When preparing food on stone countertops, use cutting boards to prevent chips and scratches.
  • Use floor mats, especially at the front door, and encourage guests be comfortable by taking off their shoes and high heels to avoid scuff marks on stone floors.
  • Furniture should face each other to allow guests to be social without having to drag chairs along your stone floor. At the very least, put felt pads on bottom of all chair legs to minimize scratches.

For more tips, download our Stone and Tile Care Guide. You will find useful information about common stone problems, how to keep your stone looking its best, using the right cleaning products, sealing and protecting stone, DIY tips and more.

And, remember — if you have any issues that you can’t fix on your own, contact us immediately. It’s important to always keep your investment looking its best.

HAPPY HOLIDAYS!

The Sensitive Side of Granite

The Sensitive Side of Granite

When it comes to stories about acidic juices, foods and cleansers leaving behind etch marks on natural stone, the stone in question is usually marble. However, most homeowners are unaware that their granite may also be susceptible to citrus, wine, soda and other substances that contain acids.

Sure, granite is one of the most durable natural stones you can buy, and unlike marble, granite is not a calcite-based stone, so it is reasonable to assume that granite should not be vulnerable to acids. The problem is, some stones, even though they are marketed as granite, may in fact have calcium in their composition. Since it’s hard to determine the composition at the time of purchase, be diligent in cleaning up any spills on your granite immediately.

With that said, there is one acid, Hydrofluoric acid (HF), that will severely etch, pit and dull a polished granite surface regardless if the stone contains calcium carbonate. This acid can be found in many rust removers. That’s why it’s important to always check labels before applying any substance to your granite.

Acid etching of any kind on granite usually means the granite needs to be repaired by a stone restoration professional.

Repairing Limestone Etching and Scratching

Repairing Limestone Etching and Scratching

Limestone is one of the most prevalent natural stones in the United States and is gaining popularity in design since it requires little maintenance, offers excellent wear-ability and is quite versatile.  It is a popular and excellent choice for floors, shower walls, mantels, outdoor tabletops and kitchen countertops. It is quarried in nine states, with Wisconsin and Indiana producing the most.

While hardy, beautiful and elegant limestone is a calcite based stone, making it vulnerable to etching, just like marble. (Remember, marble is a limestone; however limestone is not a marble). Limestone is also a soft stone making it susceptible to scratches.

Etching

Etching is the most common natural stone problem, especially with limestone. Any acidic substance—tomatoes, wine, soda, vinegar—that touches your limestone will most likely leave a white-ish, dull mark that resembles a water-glass ring on a table. If the etch is really bad, you can actually feel it with your fingers.

The Solution:  For light etching on polished limestone you can remove the etching yourself with a mild etch remover paste. For more severe etching or etching on honed (non-reflective) surfaces, it is recommended that you call a stone restoration professional.

Scratches

Scratches will occur in limestone because it is such a soft stone. Knives —anything sharp for that matter—and abrasive cleaners can easily scratch your precious limestone.

The Solution: For light scratches in darker limestone, blot mineral oil into the scratch. If your stone is lightly colored, honed or polished, use super fine sandpaper, working your way up to finer and finer grits until the scratch disappears. Deeper and larger scratches should be buffed out by a professional.


This is one of a series of articles written and published  on behalf of Stone and Tile PRO Partners.

I’m sorry, I think you mythunderstood me

It’s kind of funny what people who should know better will say about common stone failures or issues. Over the past several years, we have heard many stories about the reasons stone will fail, turn color, fade, and so on. Many are comical and most are just plain false. Here’s a sampling you may enjoy…

A Warped Sense of Humor

Many seasoned installers who have tried to install green marble tiles with ordinary thin set or other water-based setting materials have experienced warping problems. Here are two ways we’ve heard them explained.

1. Myth: “Green Marble will warp because it contains living plant material. As water is added to the marble, the plants start to grow and this makes the marble warp.” We nearly fell over laughing, but he wasn’t kidding. He really thought this was the reason.

2. Myth: “Green Marble will curl on the edges because the installer did not put enough setting mortar on the edges. The green marble will have a tendency to lift off the floor where there is no mortar and hence will curl.” While not quite as outrageous as the first explanation, it is still just as wrong.
Truth: The real reason green marble warps is a condition known as hysterisis. Green marble is very sensitive to moisture. When water enters the stone, it causes the marble to release any internal stress, thus causing it to warp.

Home Sweet What?

3. Myth: “Your stone floor needs to be homed!”
Truth: No, this is not a spelling mistake – the word used was “homed.” We have run into several sales people who have called the honing process “homing.” Maybe they also worked with pigeons, but we’ve never heard of homing a floor. The proper term, of course, is “HONE,” which means to abrade a stone.

“Plop, Plop, Fizz, Fizz…”

4. Myth: “Your stone floor has an effervescence problem.”
Truth: The key word here is “effervescence.” Let’s clear this up right now. Efflorescence is the deposit of soluble salts on the surface of the stone that is caused by water that carries the salts from the setting bed of the stone to the surface; it is often deposited as a white powder-like residue on the surface of the stone. Effervescence is what happens when something fizzes. A good example is when you drop a tablet of Alka-Seltzer into a glass of water. The fizzing is referred to as “effervescence.” We’ve never seen a stone effervesce unless someone was pouring acid on it!

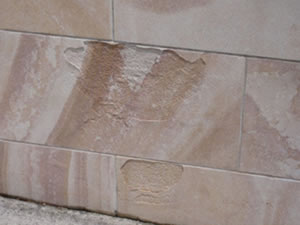
5. Myth: “Sealing your stone will help with your efflorescence problem.” Truth: We’ve heard so-called experts instruct people with an efflorescence problem to seal the stone as a remedy. This is wrong. Sealing will only block or reduce the pore size of the stone, which will not only cause more efflorescence, but it could also cause spalling, which is when the stone flakes at the surface.

Are You Cracked?

6. Myth: “That’s not a crack, it’s a fissure!”
Truth: Many fabricators will try to blame cracks that occur in stone installations on natural fissures that occur in the stone. Sometimes they are right and sometimes they are wrong. If you look up the word “fissure” in the dictionary, guess what? A fissure is a crack. The distinction they are trying to make is between fissures, which are naturally occurring as part of the formation of the stone and cracks (more appropriately called “breaks”) caused by external forces on the stone. Of course, the most likely place for a break to occur is on a natural fissure. Consequently, definitions need to be clarified and the stone needs to be examined carefully to determine if natural fissures are at risk of becoming breaks during normal usage.

Would You Like Some Salad With That?

7. Myth: “To remove oil from stone, saturating it with water will force the oil out.” Truth: Since it is true that oil floats on water, you would think this makes sense. But trust us, it doesn’t work. The oil is trapped in the pores of the stone and no amount of water is going to force it out. The best way to remove oil from stone is with a poultice and a degreasing chemical. For specifics and poulticing instructions, see https://surfacecarepros.com/stain-management-app/ .

8. Myth: “Just use some vinegar and water to clean your marble or limestone.” Truth: Generally folks in the stone business know better, however this is often recommended by tile installers. Don’t do it! Vinegar is an acid and will etch calcium-based stone. Marble and limestone are generally the most susceptible, but some types of granite will also be damaged by vinegar.

Stones Can Be So Vein!

9. Myth: “If it’s got veins, it’s marble.” Truth: This is a fib we hear all the time. Many people in the industry believe that if a stone has veins, it must be marble. This is totally false. Veins can also be found in granite and limestone.

You Make Me Sick!

10. Myth: “Granite countertops harbor bacteria and emit harmful radon gas.” Truth: This is absolutely FALSE! NIOSH and the CDC have no reports of granite or any other stone used as a countertop being unsafe. If stone were unsafe or unsanitary, why would it be used in food laboratories or sold as cutting boards? There has been no known proof of any illness caused by using stone as a countertop. And as for the rumors that granite contains harmful radon gas — there is so little radon in granite that you would have to live to be 10,000 years old for it to have an ill effect on you. There is likely more radon coming from the ground and the concrete that your house is built on.

What You Need to Know About Caring for Soapstone

Do you have or are you considering soapstone? Here are some tips for caring for soapstone and keeping it beautiful.

For New Installations

If your soapstone has just been installed, perform weekly oiling with a food grade mineral oil or enhancer made for soapstone for the first month, and then twice a month for the next three months. After the fourth month, you should only need to oil once a month or less. As the oil evaporates, the stone will lighten, telling you that it is time for another oiling.

To Enhance or Not…. This is the Question

Versatility of finish is one of the great pluses of soapstone. Some homeowners love the natural, untreated soft-gray look, while others prefer to color enhance it to bring out the deeper colors. The choice is yours.

Virtually Stain Proof

Alkalis and acids found in many foods and drinks are not likely to stain the dense and inert surface of soapstone (which is why it is so popular in labs and science classrooms). Any staining that occurs can be quickly and easily remedied with scrubbing or sanding.

Scratches

Soapstone is a very soft stone and scratches will occur. Light scratches will disappear with a direct dab of FDA approved food-grade mineral oil or soapstone enhancer. To permanently remove a deeper scratch, apply medium pressure to the scratched area with an 80 grit sanding sponge.

Apply a light coat of FDA approved food-grade mineral oil or soapstone enhancer to the sanded area. The mineral oil application should be repeated 2-3 times over a 2-3 day period until the sanded area matches the coloration of the rest of the stone. The enhancer should be applied twice with the second application about 24 hours after the first.

Returned to Its Former Beauty…

Even after 100 years of hard use, soapstone can be re-finished to a new state as though it had just been installed. Give us a call if you need any help. As a stone care professional we can expertly perform the services needed to repair or restore your soapstone.

See the full article, Stone Showcase: Soapstone in the Spring 2014 issue of Stone Advisory Magazine.

This is one of a series of articles written and published  on behalf of Stone and Tile PRO Partners.

Testing Stone For Kitchen Countertop Usability -The Lemon Juice and Oil Test

It is time to select your granite for your kitchen countertops. What should you look for? Two things: Absorbency and acid sensitivity. You do NOT want a stone that is too absorbent, and you do NOT want a stone that is mixed with calcite (the main component of marble and limestone).

The Lemon Juice and Oil Test will help you determine the suitability of any stone you are considering.

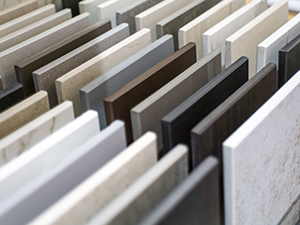
Collect a sample of any stone you are considering. Line them up on a table or countertop, dust them thoroughly, then spill a few drops of lemon juice and cooking oil on each one of them. If you notice that where the juice and the oil hit the stone, its surface turns dark im-mediately, eliminate them as an appropriate candidate.

If you notice that the juice and the oil take a little time to get absorbed (a half a minute or better), then you have a stone whose absorbency can be effectively controlled with a good-quality impregnator.

If you finally notice that some samples will not absorb anything within, say, half an hour or so, then you may have a winner. That stone will not even need to be sealed.

Now, how to eliminate the word ‘may’ from the equation? The answer in another question: Why use lemon juice instead of, say plain water? as you’re not just look-ing to determine the absorbency of the considering, also want to determine that your samples are 100% silicate rocks to some stones—which may be traded as granite of calcite. If there’s even a little calcite in the stone, it will (citric acid) and, when you wipe your spills dry, you will notice a dull spot of the same shape of the lemon drops. In such case, once again, these stones would not be appropriate for a kitchen countertop. If instead it’s still nice and shiny under where the drops were, then you eliminated the ‘may’ factor!