About Porcelain and Ceramic Tiles

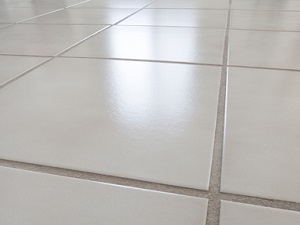
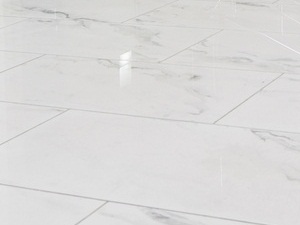
Porcelain and ceramic are similar, in that they are both made from clay and kiln fired, making them very different from other categories of tiles, such as glass or natural stone. Although the words porcelain and ceramic are often used interchangeably, differences between the two types of tile can make a difference in the cost, appearance, and longevity of your installation.

What’s the difference between porcelain and ceramic?

Ultimately, a ceramic tile is categorized as porcelain if its moisture absorption rate is .5% or lower. Ceramic tile is cheaper, easier to install, and offers more color selections than porcelain. The ingredients of porcelain tiles are more refined, and it is fired at a greater pressure and higher temperature than ceramic, making it much harder and denser, and consequently, more expensive and more difficult to install than ceramic. But cost is only one consideration among many.

About Glazed and Through-Body Porcelain

A glazed porcelain tile has a coating that fills in any microscopic holes on the surface of the clay, making it easier to keep clean than unglazed tiles. However, unglazed tiles are better for slip resistance and less likely to show signs of wear, since the color on the surface is the same color that runs through the entire tile.

Tile Care and Maintenance

Tile floors should be swept and damp mopped regularly and professionally cleaned as needed. Porous grout lines can be sealed to inhibit staining and to make regular cleaning more productive. When grout color sealer is applied to grout lines, they become impervious to stains. With all the benefits of clear sealer, grout color sealer offers numerous additional benefits, including constant-acting mildewcides and fungicides. Unglazed porcelain tile, although less porous than natural stone, can be subject to discolorations and staining with traffic and use. These surfaces should be professionally sealed once per year or more. Glazed ceramic or porcelain tiles do not require sealing, but may need slip resistance treatments, depending on the way the space is used.

Consider all the factors, and not just price, when you make your purchase decision for new floors and surfaces. For existing floors, proper care and maintenance can make a world of difference. Don’t replace your tile without consulting with an experienced tile restoration contractor, who may be able to achieve dramatic results that postpone or eliminate the need for replacement.

Selecting Stone For Exterior Countertops

Natural stone is an excellent choice for an outdoor kitchen or other exterior living spaces. Here’s what you need to know before you select your natural stone countertop material.

Marble or Limestone

Soft, porous stones like marble or limestone are more prone to chipping and scratching and may not be the ideal choice for countertops exposed to the elements.

Soapstone

Soapstone is not porous and scratches can be easily repaired by the homeowner, making it an excellent selection for outdoor kitchen countertops. Unfortunately, soapstone has a limited color pallet, so if you are into flashy, exotic-looking slabs, this might not be the right stone for you. Soapstone must be waxed or oiled, often at first, but with increasingly less frequency as time goes on.

Granite

For stone that holds up excellently to wind and rain, and if sealed properly, will not stain, look no further than granite. With virtually unlimited color and texture options, granite is sure to please even those with the most particular design tastes. Plus, with a long-term sealer and stain barrier, it is very low-maintenance. Be sure to select a lighter to mid-range color to avoid heat absorption and accidental burns.

Often, granite has resins injected into it to make it stronger. These resins are UV sensitive and can result in faded or discolored areas on the portion of the granite that is exposed to direct sunlight. If your granite is in direct sunlight, keep it covered when you are not using it.

Feel free to contact us with any questions you may have about selecting stone for your outdoor countertops.

How To Remove A Terrazzo Stain

How To Remove a Stain on Terrazzo

Stains on terrazzo can be unsightly and may lead you to decide you have no choice but to have tile or carpet installed over it, but often stains on terrazzo can be effectively removed. You can attempt to remove the stain yourself or contact a professional stone restoration contractor. Here is what will need to be done.

Are your terrazzo floors waxed or coated?

It is not uncommon for a terrazzo floors to be coated or waxed with a topical finish. The only way to know whether the stain is in the topical finish or in the terrazzo itself is to remove any old finish. If you are certain that your terrazzo has a natural, honed or polished finish then you can skip the stripping process described below and move on to the poultice application.

Also note that most modern terrazzo is made with a resin matrix that will soften if stripped. If you are sure that your terrazzo has an older cementitious matrix, you can safely proceed with stripping. If you have any doubts or know that you have a newer, resin matrix terrazzo floor, do not apply a stripper to your terrazzo. Please contact your stone restoration contractor for guidance.

Stripping Waxes and Coatings

It is very important to note that floor stripper is very caustic and can cause injury or damage. You must wear heavy latex gloves and eye protection and use masking tape and plastic to protect the floor surrounding your work area.

Mix one part water-based floor stripper (the same kind used for vinyl tile or polymer finishes) with six parts water and apply to the stained area. Allow five minutes dwell time. Agitate the solution with a green scrubbing pad. Use an absorbent white cloth or paper towels to soak up the solution. Then, repeat this entire process.

At this point, if the coating was stained and not the terrazzo itself, it is possible that the stain may be gone. If so, use a pH-neutral, stone-safe cleaner to remove any remaining stripper and clean the area. If the stain is still there, that means it is in the terrazzo, and you can try to remove it using a poultice application.

The Poulticing Method of Stain Removal

A poultice is a combination of a dry, absorbent medium and a liquid chemical or cleaning agent. The ingredients for your poultice will depend on what type of stain you are trying to remove. Please visit our Stain Removal Application for the specific ingredients and directions for mixing and applying a poultice.

Restoring Your Terrazzo Finish

Please note: If your terrazzo has a natural, honed or polished finish, there is no need to strip or reapply coatings.

If you stripped the stained area, you removed the topical finish. That means you now have a small area that looks dull compared to the surrounding floor. To resolve this problem, use a paint brush to reapply a water-based finish. It may take up to eight coats to give the work area a nice, even sheen that blends with the surrounding area.

Professional Terrazzo Stain Removal and Refinishing

An experienced natural stone restoration contractor can use a floor machine with an aggressive pad to strip your entire floor, if needed. Depending on the severity of the stain, the technician can either apply a poultice or grind the affected area, removing a very thin upper layer and virtually erasing the stain. Then, the floor can be deep scrubbed and recoated to rejuvenate the existing finish or honed and polished for a beautiful, natural finish that eliminates the need for any future stripping or recoating.

Practical Suggestions For Stone Care and Maintenance

Stone restoration contractors often get calls to remediate accidental damage done by homeowners, cleaning services, janitorial services, and building service contractors who mishandle the care and maintenance of natural stone surfaces.

As an example, one of the most frequent mistake we see residential customers make is to use vinegar to clean a calcium-based stone like marble or travertine. Vinegar is an acidic substance that chemically reacts with the calcium in natural stone, transforming once-beautiful and elegant stone finishes into dull, rough-looking surfaces.

Commercial customers have their fair share of missteps with stone care, too. For example, a commercial client sought professional services shortly after a maintenance employee (who did not have the knowledge, experience, or credentials to provide care or maintenance on engineered stone) applied a clear coating to three thousand square feet of flooring. The high traffic concentration at this facility caused dullness, damage, and wear patterns in walkways while the edges near the walls were still shiny. Every time the housekeeping department wet-mopped the floors, pieces of the brittle finish came loose.

The calls we get usually start the same way, with the customer hoping that what was done to their stone didn’t ruin the finish and that they might be able to avoid having the stone replaced. Although we are always ready and willing to provide restoration services, we would like to offer some practical suggestions for avoiding natural stone damage during care and maintenance procedures.

Practical Suggestions for Care and Maintenance

  • Dust mop floors daily to remove any excess grit that could scratch the surface.
  • Use a neutral stone cleaner for mopping. For commercial clients who do auto scrubbing, use a very soft pad and keep the squeegee clean and free of soil.
  • Do not allow the floor to be sealed with any film-forming finish, such as conventional floor finishes or over-the-counter products that “add shine.”
  • Do not use any penetrating petroleum distillate products that seem to darken and shine by clogging the pours of the stone with an oily finish. Not only is this difficult to remedy, but it can also increase the risk of slip and fall accidents.
  • Do not allow acidic products to be used near marble or other calcium based natural stone. Although stone care professionals may use acidic polishing compounds, these chemicals can cause serious damage in the hands of those without the proper training and experience. Especially make note of toilet bowl cleaners. If they are used near natural stone, they should not be acidic.
  • On showers and counter tops, do not allow any abrasive cleaners, even abrasive products considered “soft.” Many marbles can scratch and dull very easily when abrasives are used on them.
  • Don’t use products for hard water removal unless they clearly state they are safe for natural stone as most of them contain some sort of acid.

Sealers Are Important

A stone impregnating sealer will repel spills, giving you enough time to clean up before they are absorbed by the porous stone and become stains. A professional stone restoration contractor can select the appropriate sealer for your stone and ensure it is properly applied. However, keep in mind that although impregnating sealers inhibit stains, they don’t protect the surface of the stone from etching. Although most granites are not susceptible to etch marks, something acidic like lemon juice, vinegar, or some cleaning chemicals can still create etch marks on marble or other calcium based stones, even if they are properly sealed.

Following these suggestions will help you to avoid accidental damage. If you use a cleaning service, janitorial service, or employ building service contractors, be sure they are aware of these basic care and maintenance instructions for natural stone surfaces.

What To Do About Cement Stains on Sandstone

We recently were asked how to remove 3 year-old cement stains from sandstone walls without changing the color of the sandstone. Although this is not a question we get frequently, we thought it was a good one.

Projects involving cement (DIY or otherwise) can be messy. If spillage or splatters are not addressed immediately, they can be difficult to remove, particularly once they have dried. In areas where sandstone is commonly used as a building material, removal of cement stains can become even more challenging.

First things first. Is the cement chunky?

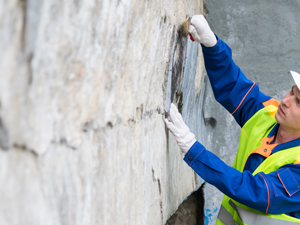
If the cement was splattered (rather than smeared, for example) and looks as though it is sitting on top of the stone, you will want to carefully chip off as much of the chunky bits as possible first. Remember to use safety equipment, such as safety glasses, during this process. No one wants cement in their eyes.

Cleaning with muriatic acid

Muriatic acid (also called hydrochloride acid), diluted with water could be used to remove the cement, but since sandstone is often held together with calcite or dolomitic cement, which are broken down by acids, muriatic acid may do more harm than good. Before using any kind of acidic cleaner, it is important to test how your sandstone will react.

IMPORTANT DISCLAIMER: Muriatic acid is just that – an acid! It can be harmful to pets, children and adults (plants don’t like it much either) so be sure to follow ALL safety instructions and precautions on the container and keep the children and pets away.

To test how your stone will react

Dilute one part muriatic acid with six parts water and place a drop in an inconspicuous location. If the drop of diluted acid fizzes, that means the acid is breaking down calcium carbonate within the stone. Do not use an acidic cleaner.

If the drop of diluted acid does not fizz, don’t assume you are in the clear yet. Dilute one part muriatic acid with four parts water and test the stone again. If the less diluted acid still does not fizz when in contact with the stone, things are looking good. You will still want to be vigilant as you clean.

Be sure to clean the stone using a pH neutral cleaner once the cement is removed.

Working with a professional

Cleaning with acid can be daunting, and we highly recommend you leave this tricky cleanup job to an experienced, trained stone restoration professional rather than doing it yourself or hiring a handyman who doesn’t understand the properties and characteristics of natural stone. We are always happy to answer your questions or provide an estimate.

Environmentally-Friendly Natural Stone

Is Natural Stone An Environmentally-Friendly Choice?

Granite, marble, travertine, and other natural stone materials can create a warmer and more inviting atmosphere in a home or office space and serve as an excellent choice of décor, especially for nature lovers. However, environmentally conscious people may wonder whether it leaves a significant carbon footprint. We asked Fred Hueston, Chief Technical Director for surpHaces and Founder of Stone Forensics to weigh in on whether natural stone is an environmentally friendly choice. Here’s what he had to say.

Stone Is Not a Limited Natural Resource

Stone can be found in almost every country in great abundance. For example, marble has been quarried in Carrera, Italy for centuries, and there is still an abundant supply. In the United States, there are quarries within 500 miles of nearly every major metropolitan area. Quarry techniques have also improved worldwide, and most of the time, explosives are no longer required. “It’s a pretty clean industry with zero waste,” said Hueston.

Natural Stone is Minimally Processed

There is very little environmental impact in stone fabrication, because fabricators use specially designed wet blades to greatly reduce the amount of silica, or stone dust, that is released into the air. Unlike stone, composite materials like wood, brick, ceramic, glass, and concrete require natural resources and energy to create.

Many recycled composite materials contain polyester binders, which are basically plastic, and can emit VOCs (volatile organic compounds), because they are solvent based. The lifespan of composite materials is also limited, unlike natural stone, which virtually lasts forever. Polyester resins in engineering materials will break down over time and are sensitive to heat and sunlight, which is why natural stone is the preferred choice for outdoor décor.

What About Cleaners and Sealers?

Environmentally friendly, pH neutral cleaners are recommended over harsh cleaners for natural stone. And according to Hueston, nearly all sealers used on natural stone are water-based and FDA approved.

High Durability Means Little or No Waste

Have you ever visited to an old church or historical building where the original granite or marble floors, walls, and other surfaces were still in use and looking untouched by time? Natural stone not only can withstand centuries of traffic and use, but with proper care and regularly scheduled maintenance, it can continually look brand new.

When natural stone is damaged, in most cases, it can be completely restored, and if for some reason it is damaged beyond repair, it does not have to end up in a landfill. It can be used for other building materials, like gravel, for example.

According to Hueston, calcium-based residual material from marble quarries is used for vitamins, medicines, and antacids. There is even a North Carolina quarry that uses their waste for local chicken feed.

The great thing about stone is that it came from the earth, and whatever is not recycled can be simply returned back to the earth.

White Residue on Stone

If you have white residue on your stone, here are a few tips and tricks for identifying the cause and possibly removing it.

First, take a close look. If the substance can be scraped into shavings, it may be an accumulation of cosmetics, soaps, cleaning products, or hard water build up. If it is powdery, then it is likely efflorescence.

Accumulation of Cosmetics, Soaps, or Cleaning Products

Here’s a quick and easy test that can tell you whether the white residue on your stone is an accumulation of cosmetics, soaps, or cleaning products. Use a nylon pan scraper or a razor blade to carefully scrape the residue. If it can be easily removed, then you are dealing with dried products on the stone. The shavings will either be soapy when water is introduced or smeary or oily if it is conditioner, lotions, or hair treatments.

Hard Water Build Up

Like the test above, hard water deposits can be scraped away, but only with significantly more difficulty.

Efflorescence

The good news about efflorescence is that most of the time, it is a minor inconvenience that can be remedied without having to replace the stone. When moisture evaporates from the stone, it leaves behind salts and minerals. The stone will need to be periodically professionally cleaned, but eventually all the moisture will dissipate and the efflorescence problem will disappear.

The bad news is that every now and then, efflorescence is just the visible symptom of a much bigger problem underneath the stone — moisture in the substrate. An experienced stone restoration contractor can determine whether the stone can be restored or if it will have to be replaced.

Getting Rid of the Residue

If you want to attempt to remove product residue or hard water build up yourself, spray the stone with a pH-neutral, stone-safe cleaner and allow ample dwell time to soften the residue. Then using gentle pressure and a white Scotch Brite pad or a Dobie pad, clean the stone. If you see a difference, then you should be able to rinse and repeat this cleaning process until all the residue is removed.

For stubborn residue, you may be tempted to use a stronger cleaning agent or a heartier scrubbing pad, but doing so may do more harm than good. Calcium-based stones can etch if you use the wrong chemicals and the finish on soft stones can be scratched if the abrasive is too hard. It may be best to call a stone care professional rather than cleaning the stone yourself.

Removing a Stain Left By a Potted Plant

Question: I have a water ring where a plant was sitting on my hearthstone, which I believe is limestone. Is there any way to remove it? I appreciate your help.

Great question.

Simply put, the water ring you see is either a stain or an etch… or a combination thereof.

You must first determine if the “stain” is a true stain or an etch mark. A general rule of thumb when dealing with stains on natural stone is that a stain will always be darker than the stone. This means the stone has absorbed contaminants such as oil, grease, dirt, etc. An etch, on the other hand, will always be lighter than the stone. Etching occurs when an acidic substance comes in contact with a calcite based stone such as marble, travertine or limestone.

With potted plants that sit directly on natural stone, there are a couple of possibilities. If the ring you see is darker than the stone, then soiling has penetrated into the pores of the stone and left a stain. Moisture that accumulated under the pot may have contained acidic properties that could have reacted with the stone surface causing the stone to etch.

We first suggest cleaning the stone surface thoroughly with a heavy duty stone cleaner to clean deep down into the stone to remove any ground in dirt and soil. (Ask us for recommendations.) Rinse thoroughly, then let dry. If the ring is still there, then it’s time to address the stain or the etch or a combination of both.

Removing a stain (remember, a stain is always darker than the stone) will require the use of a poultice. A poultice is an easy and effective way to draw stains out of your stone. A poultice is essentially a cleaning/chemical agent to break down the stain and an absorbent material to draw it out. There are many ready-made poultices on the market today, but you can easily make one yourself. (https://stoneandtilepros.com/stain-removal-application).

If the stone happens to have any etching (damage that is lighter than the stone), it could be possible to restore this yourself. Minor etching that is smooth to the touch can possibly be removed with a marble polishing powder or compound IF (and this is important) the stone is light colored and polished. If the stone is honed, or if the etch mark is rough to the touch you will need to contact us to restore the surface of the stone.

TIP: Avoid placing potted plants directly on the stone surface. Condensation or moisture from spillage could result in a stain or etch.

Treating Oil Stains On Driveways and in Garages

If you have a driveway or garage, the odds are good you have at least once in your life encountered oil stains and discovered that they don’t hose off very well. So, how do you get the stain out?

One option we recommend is to use Stain Reaper by MB Stone Care (www.mbstonecare.com). It’s a favorite of many stone and concrete restoration professionals, because it works. Stain Reaper is a ready-to-use, low-odor paste poultice. It pulls deep-seated oil, dirt, harmful salts and other embedded stains out of sensitive masonry, even polished limestone and marble. No mixing is needed, and it is easy to use. It is safe for all natural stone.

d-Limonene

Another common treatment is to use d-Limonene, which is commonly used as maintenance cleaner for concrete pads, parking complexes, and airport runways. The oils and greases that drip from cars can be lifted off the concrete with the application of either straight d-Limonene or a water-diluted product. With straight d-Limonene, it is applied directly to the oil spots. The d-Limonene lifts the oil from the surface, so it can then be absorbed with a solid media such as kitty litter or oil absorbent pads. When using a water-diluted product, use the traditional mop-and-bucket method. Some d-Limonene/water products have also been used in small floor scrubbers for removing oil and forklift tire marks, and in larger units for taking up tire marks in garages.

Whichever option you choose, make sure you don’t ignore the safety requirements – you are, after all, working with chemicals. Follow the directions on the package carefully and don’t be discouraged if it takes more than one treatment. If the stain goes deep or has been sitting a while, it could take multiple applications.

Enzymes to Clean Up Oil Spills and Stains

The most recent advancement in the removal of oil stains from concrete involves using special single-celled microorganisms that thrive on crude oil and its derivatives, eating them up like candy. Enzymes and oxygen digest the oil and turn it into carbon dioxide and more microorganisms. When the food source (oil) is gone, the microorganisms die, leaving the concrete clean and oil-free. This is the same technology used to clean beaches and waterways after large oil spills. There are several of these types of products on the market today. Do a search on the web for ‘enzymes to clean up oil.’ You’ll find several options.

Consult A Professional

If you have neither time nor inclination to DIY, or you’d like some advice before you start, never hesitate to consult your restoration professional. We are always happy to answer your questions.

Cleaning New Carpets: Dispelling a Common Misconception

Cleaning Your New Carpet

You may have heard that it’s best to wait as long as possible before having new carpet professionally cleaned. People who offer this advice believe that the manufacturer’s carpet protection treatment will be washed away with a professional cleaning and that carpets, once cleaned, will start attracting more dirt.

How valid are these concerns? Should you wait as long as possible to have your new carpets cleaned? The definitive answer is no, and here’s why.

The Carpet Protective Sealants Concern

If you’ve ever owned a set of nonstick cookware, you know that dish soap and a sponge won’t ruin the coating. Similarly, protective sealants on your carpet are specially designed to easily withstand carpet cleaning processes.

The real concern about breakdown of the protection is abrasives. If you took steel wool and scouring powder to your nonstick cookware, it would be ruined. The same concept applies to your carpet. Built-up dirt, grime, and grit have an abrasive effect, not only on protective treatments, but worse, on the delicate carpet fibers. Allowing contaminants to settle in and remain is a sure way to ruin protective treatments and invite premature wear.

Does A Shampooed Carpet Attract More Dirt?

There could actually be an element of truth to this, but it’s not what you think. This is where professional, quality carpet cleaning vs. improper, cheap carpet cleaning makes a big difference. Less than reputable carpet cleaning services will often cut costs by using lower quality detergents that leave a sticky residue, or they may not take the time to thoroughly rinse cleaning solutions from the carpet. Contaminants adhere to what’s been left behind, and the carpet can quickly become even dirtier than it was prior to having it cleaned.

Quality vs. Cheap Really Makes a Difference

A truly professional carpet cleaning company uses high quality cleaning solutions, equipment, and techniques and rinses completely. The results are pristine carpets that are no more prone to soiling than if they were just installed.

Don’t Forget About the Manufacturer’s Warranty

Remember, if you have invested in new carpet, your manufacturer’s warranty has required care and cleaning obligations you must follow in order to maintain coverage. For example, Stainmaster’s carpet warranty states that professional carpet cleaning services should be “performed by a trained, qualified carpet care professional, at least as frequently as every 18 months since the date of purchase of your carpet. Failing to do so will void your warranty coverage.”

So, the definitive answer is…

Don’t delay professional carpet cleaning. Take care of your investment. As long as you choose your carpet cleaning service provider wisely, and have regularly scheduled cleaning done according to recommended guidelines, your brand new carpet will be clean and inviting for years to come.

To see recommended cleaning schedules and for more care tips, download our Carpet and Interior Textiles Care Guide.