If you are considering natural stone as a material for your kitchen or bath plans, whether new home construction or a renovation project, you will need to know the difference between a stone fabricator and a stone restoration contractor, and you will need to enlist the services of both. Here are the details.
Why the Confusion?
In the stone industry, from quarry to countertop, different types of companies practice different specialties. Some companies are concerned only with supply, others with design and installation, and others with repair and maintenance. Some companies may focus solely on commercial properties while others specialize in residential properties, and some may service both. Although stone fabricators usually do not do repair and restoration work and restoration contractors usually do not do new installation, there are occasionally some companies that do cross over work from one specialty to the other.
Stone Fabrication
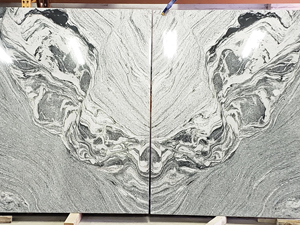
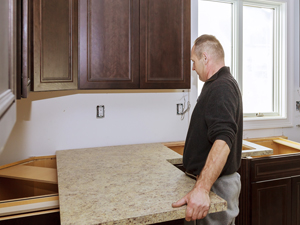
Most people know that when it comes to natural stone countertops, fabricators offer a wide variety of options for countertop edges, backsplashes, decorative trim, and more. What many people don’t know is that fabricators rarely do anything with the face of the stone. Occasionally fabricators repair minor flaws in a slab face or provide a custom finish if they are properly equipped to do so, but for the most part, fabricators specialize in cutting and shaping natural stone.
Highly skilled technicians make a rectangle slab of stone conform to your creative vision, matching the specifications of each element in your kitchen design, from cabinets, sinks, and cooktops to faucets and other features. Fabricators finish edges so that they have a clean, elegant appearance that matches with the surface finish. Once stone is installed, a fabricator may wipe down countertops to remove dust or construction debris or apply a sealer, but any other work involving the face of already-installed stone, for example, changing the finish from honed to polished or vice versa, will require the services of a professional stone restoration contractor. Basically, homeowners can expect the appearance of the face of the slab to remain unchanged from the slab selection phase to when they see it as the newly installed top.
Stone Restoration
Natural stone restoration contractors help maintain the like-new appearance of already-installed natural stone, such as countertops and vanity tops, as well as walls, tub surrounds, fireplace surrounds, hardscape, and other stone surfaces. Their services may involve repair, restoration, or maintenance.
Over the course of time, countertops will eventually show signs of wear. Acidic substances in food and drinks may cause etching, heavy use may result in fine scratches and dullness, or a dropped heavy object may cause a chip or crack. Most of the time, an experienced stone restoration contractor can resolve stone problems, repairing damage and honing and polishing to restore the finish. Stone restoration contractors may also provide maintenance services, such as regularly scheduled visits to clean, buff, and seal stone.
With proper care, a stone restoration contractor can help your natural stone last a long time. When stone replacement services are required, whether it is because of a remodeling decision or out of necessity due to irreparable damage or failure, then it will be time to consult with a stone fabricator again.
This article is one of a series of articles written and published on behalf of Surface Care PROS Partners.